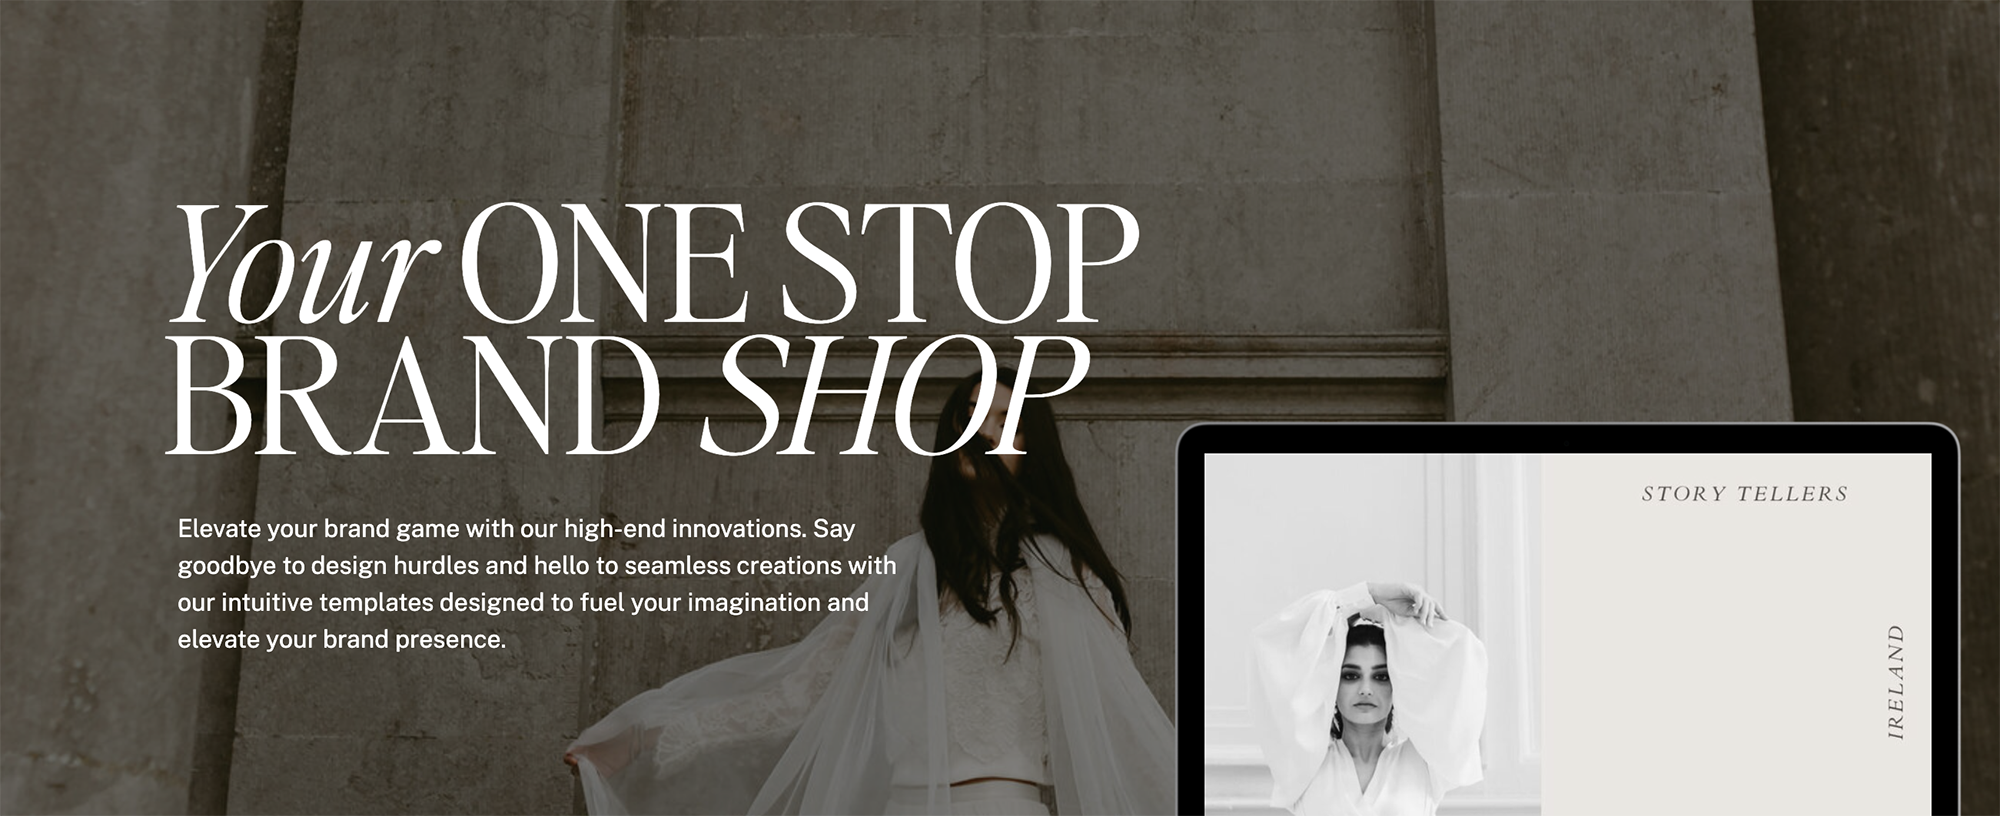
Design a Stunning Pricing Guide Using Our Canva Templates
A professional and well-structured pricing guide is essential for any business that wants to clearly showcase its services, set client expectations, and maintain a polished brand image. With our Canva templates, creating a sleek and stylish pricing guide has never been easier. Whether you’re a photographer, designer, coach, or small business owner, this step-by-step guide will help you customise and optimise your pricing guide for your brand.
Although this blog post is focused on our pricing guide templates, the key principles apply to any of our eBooks, client guides, and business resources. Whether you’re customising a pricing brochure, a welcome guide, or an informational eBook, the steps outlined here will help you create a polished, professional design that aligns with your brand.
Why You Need a Pricing Guide
A pricing guide does more than just list prices—it helps you communicate your value, build trust with potential clients, and make the booking process smooth and professional. With a well-designed pricing guide, you can:
✅ Clearly outline your services – Avoid back-and-forth pricing discussions.
✅ Build brand consistency – Keep your branding uniform across all platforms.
✅ Show professionalism – A polished price guide increases client confidence.
✅ Save time – Provide clients with instant information instead of answering repetitive questions.
✅ Encourage higher bookings – A structured guide makes it easy for clients to choose a package that fits their needs.
Using our Canva templates, you can create a beautiful and effective pricing guide in just a few simple steps—without needing design experience!
How to Customise Your Pricing Guide Using Our Canva Templates
Step 1: Access Your Canva Template
Once you’ve purchased our pricing guide template, you’ll receive a Canva link to access the file.
📌 How to Open Your Template:
1️⃣ Click the template link provided in your download.
2️⃣ Select “Use Template” to create your own editable copy.
3️⃣ The template will open in Canva, ready for you to customise!
💡 Tip: If you’re new to Canva, sign up for a free account at www.canva.com.
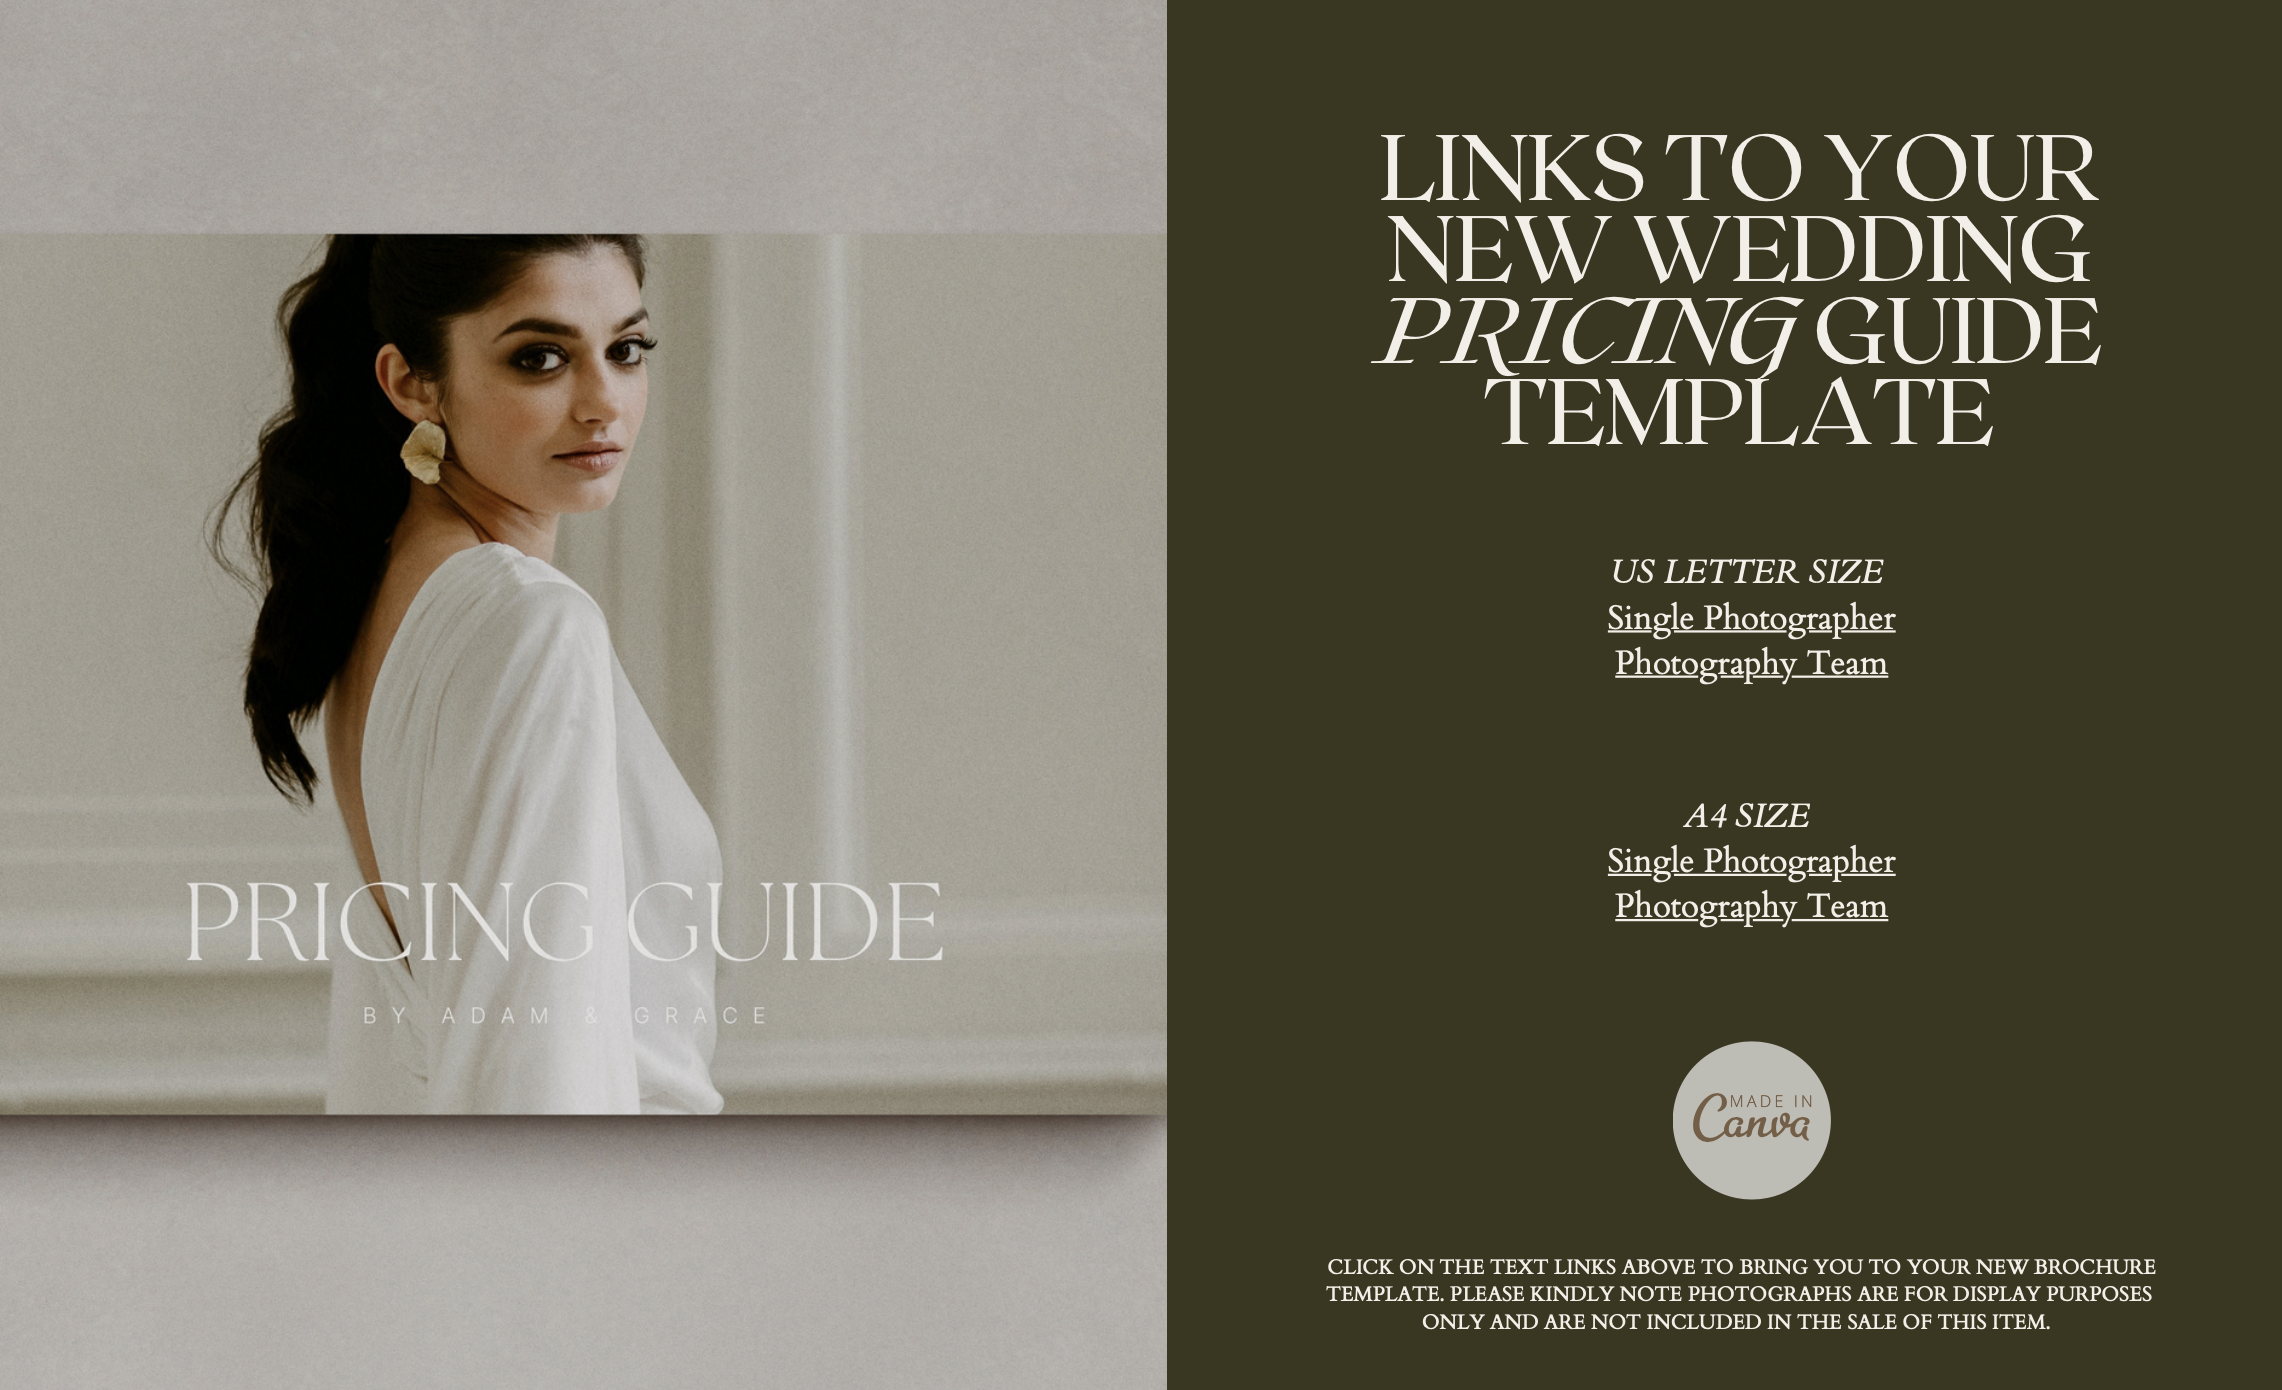
Please note: We have included versions in both UK and US English, as well as options for both solo photographers (using ‘I’) and team-based photographers (using ‘we’). Be sure to select the template that best fits your business and brand voice (for reference please see download link sample in the image below).
🔹 Important Tip: Make a Duplicate Copy Before Editing
Before making any changes, we recommend duplicating your template to keep an original version as a backup. This way, if you ever need to revert to the original design, you’ll have a clean copy ready to go.
📌 How to Duplicate Your Design in Canva:
1️⃣ Open your pricing guide template in Canva.
2️⃣ Click “File” in the top left menu.
3️⃣ Select “Make a Copy” – this creates a duplicate version you can edit freely while preserving the original.
Step 2: Add Your Pricing & Service Information + General Tools/ Tips
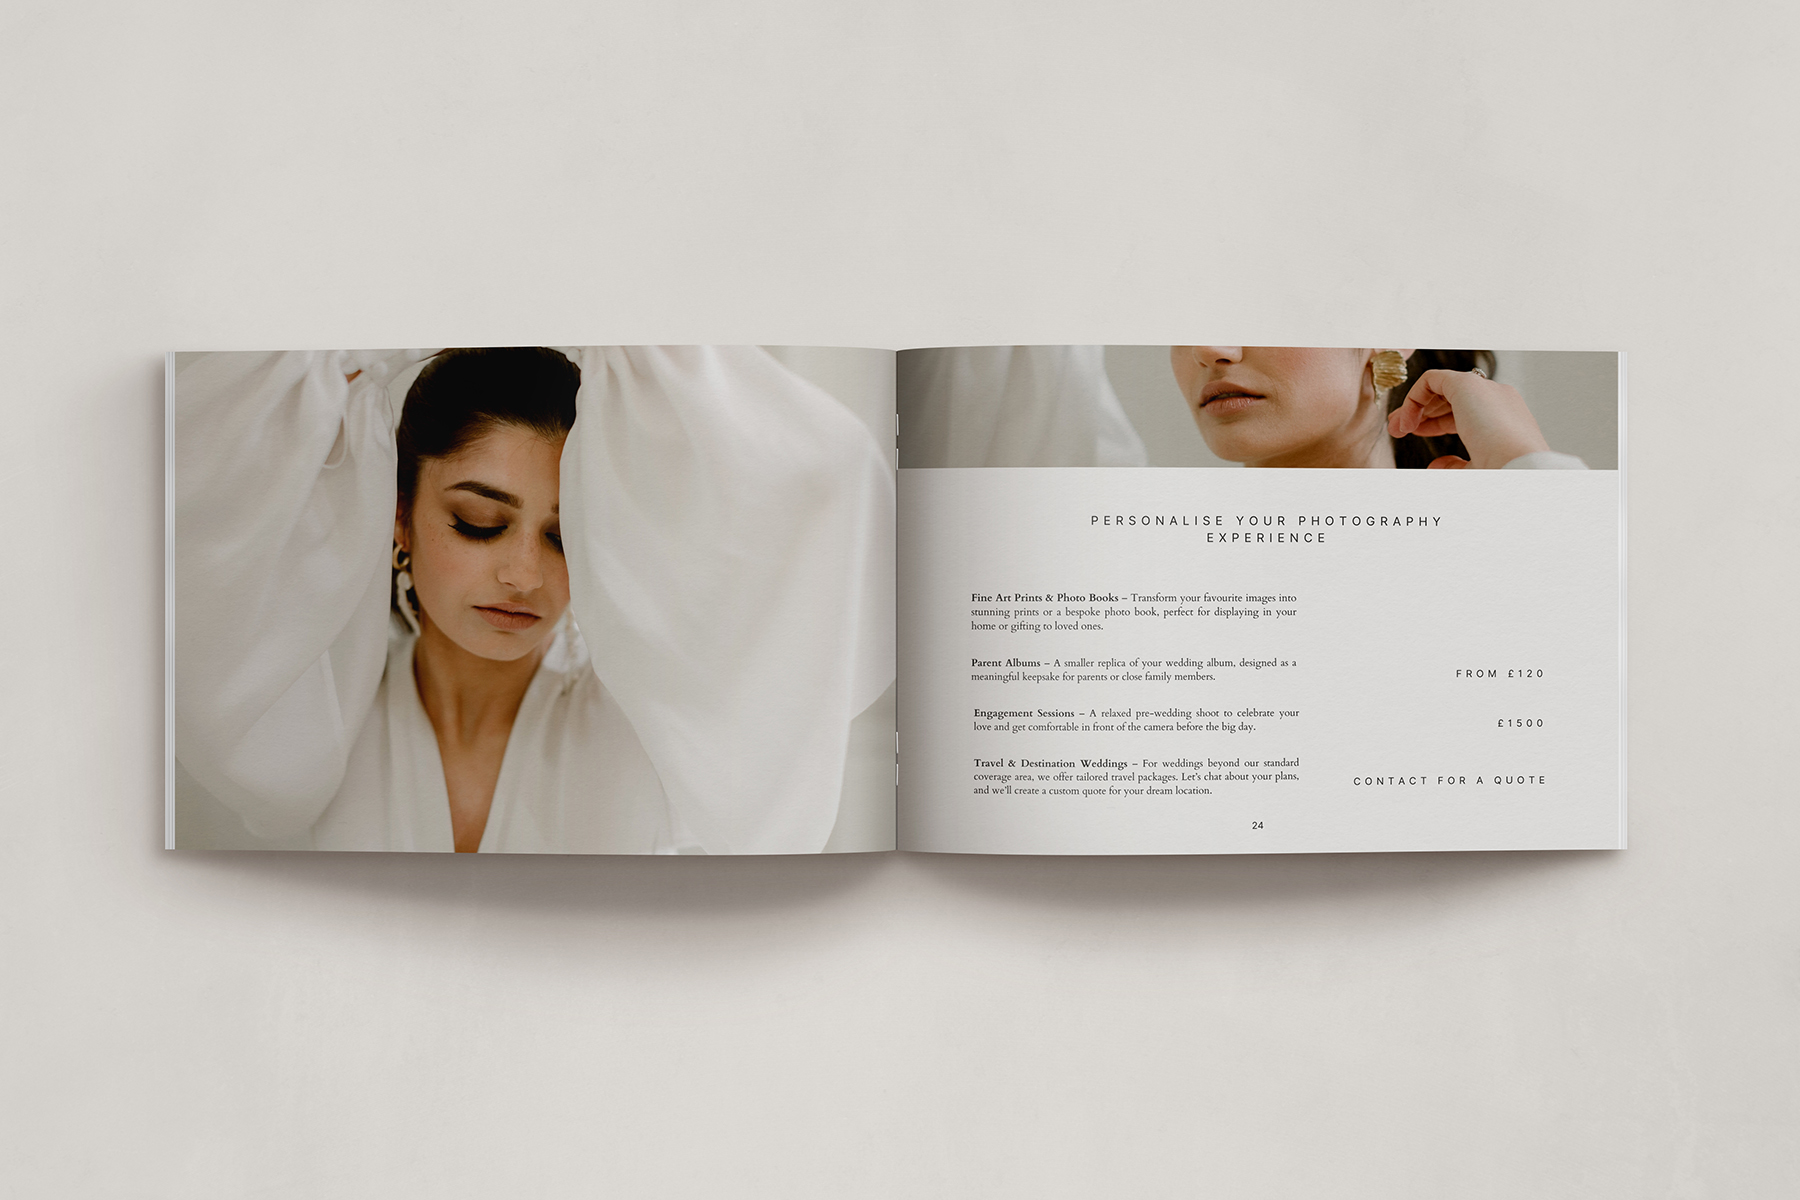
Once your template is open, replace the placeholder text with your own pricing details. We’ve included pre-written text that you’re welcome to use as is, or you can customise it to match your brand’s voice and style. Please review all sections carefully and update them as needed, including your business name, services, and contact information. Don’t forget to amend any details in the footer section to ensure consistency with your brand.
✅ Service Names & Packages – Clearly outline the options available.
✅ Pricing Details – Be transparent and use a structured layout.
✅ Custom Add-ons – Highlight any optional services or upgrades.
✅ Payment Terms – Include deposit requirements or payment plans if applicable.
✅ FAQ Section (Optional) – Address common client questions about your services.
💡 Tip: Use short, easy-to-read descriptions and avoid overloading the guide with too much text.
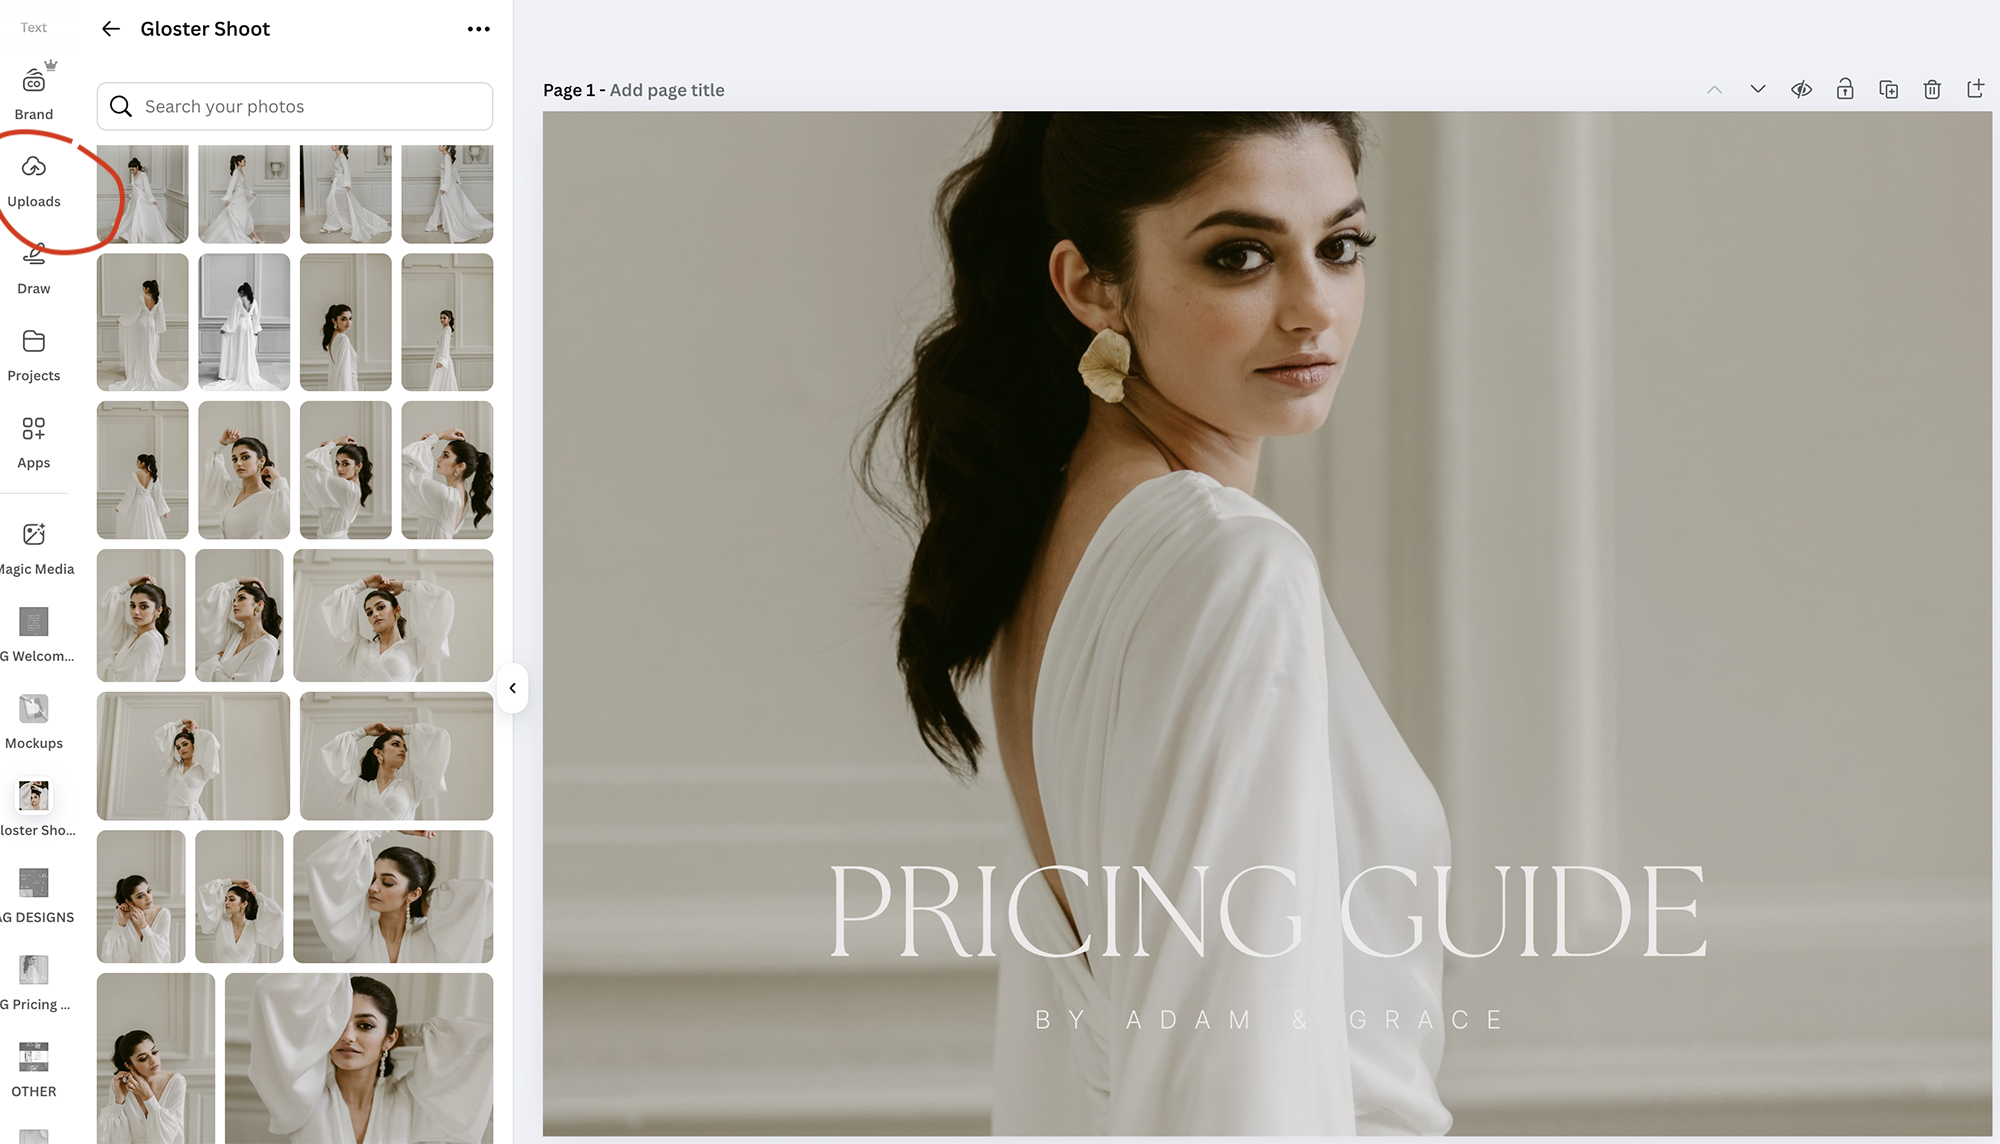
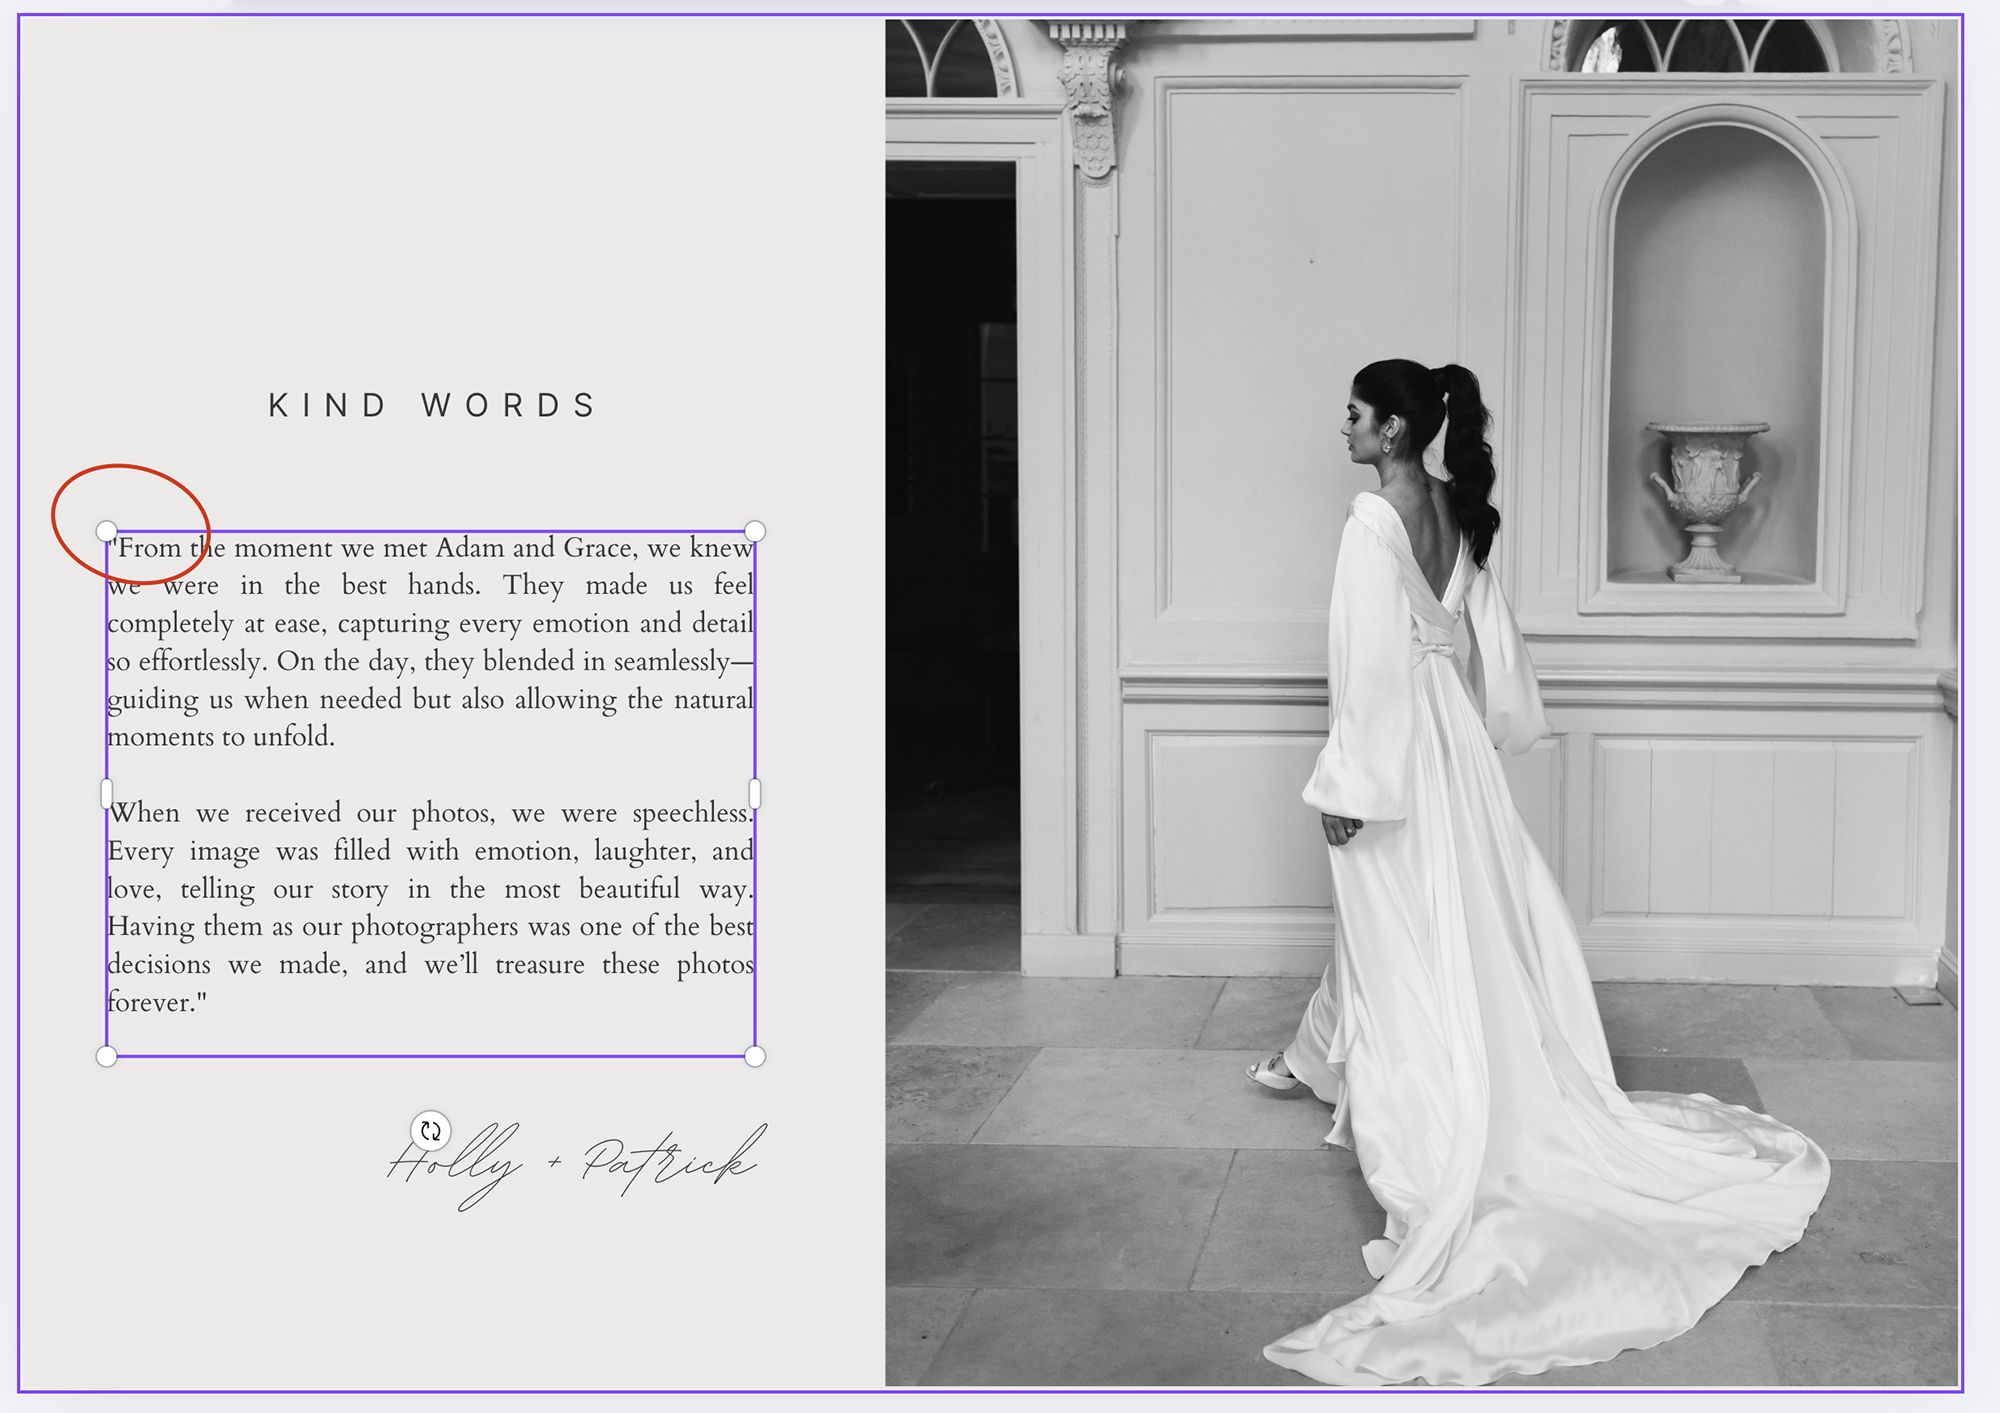
For a quicker and more efficient workflow, select your favourite photos and upload them all to your Canva gallery before editing. To do this, click the ‘Uploads’ button on the left-hand side of the Canva interface while in your design. This allows you to easily access and insert your images as needed. For guidance, refer to the red circle in the image above.
To change the photos simply select your chosen image from the uploaded photos in the sidebar and drag it across onto the placeholder.
📌 How to Change Colours in Canva:
1️⃣ Click on any element you’d like to change.
2️⃣ Use the colour picker in the top menu to select your brand colours.
3️⃣ If using a premium Canva account, you can upload a brand kit for quick changes.
💡 Tip: Keep branding consistent across all pages to maintain a professional look.
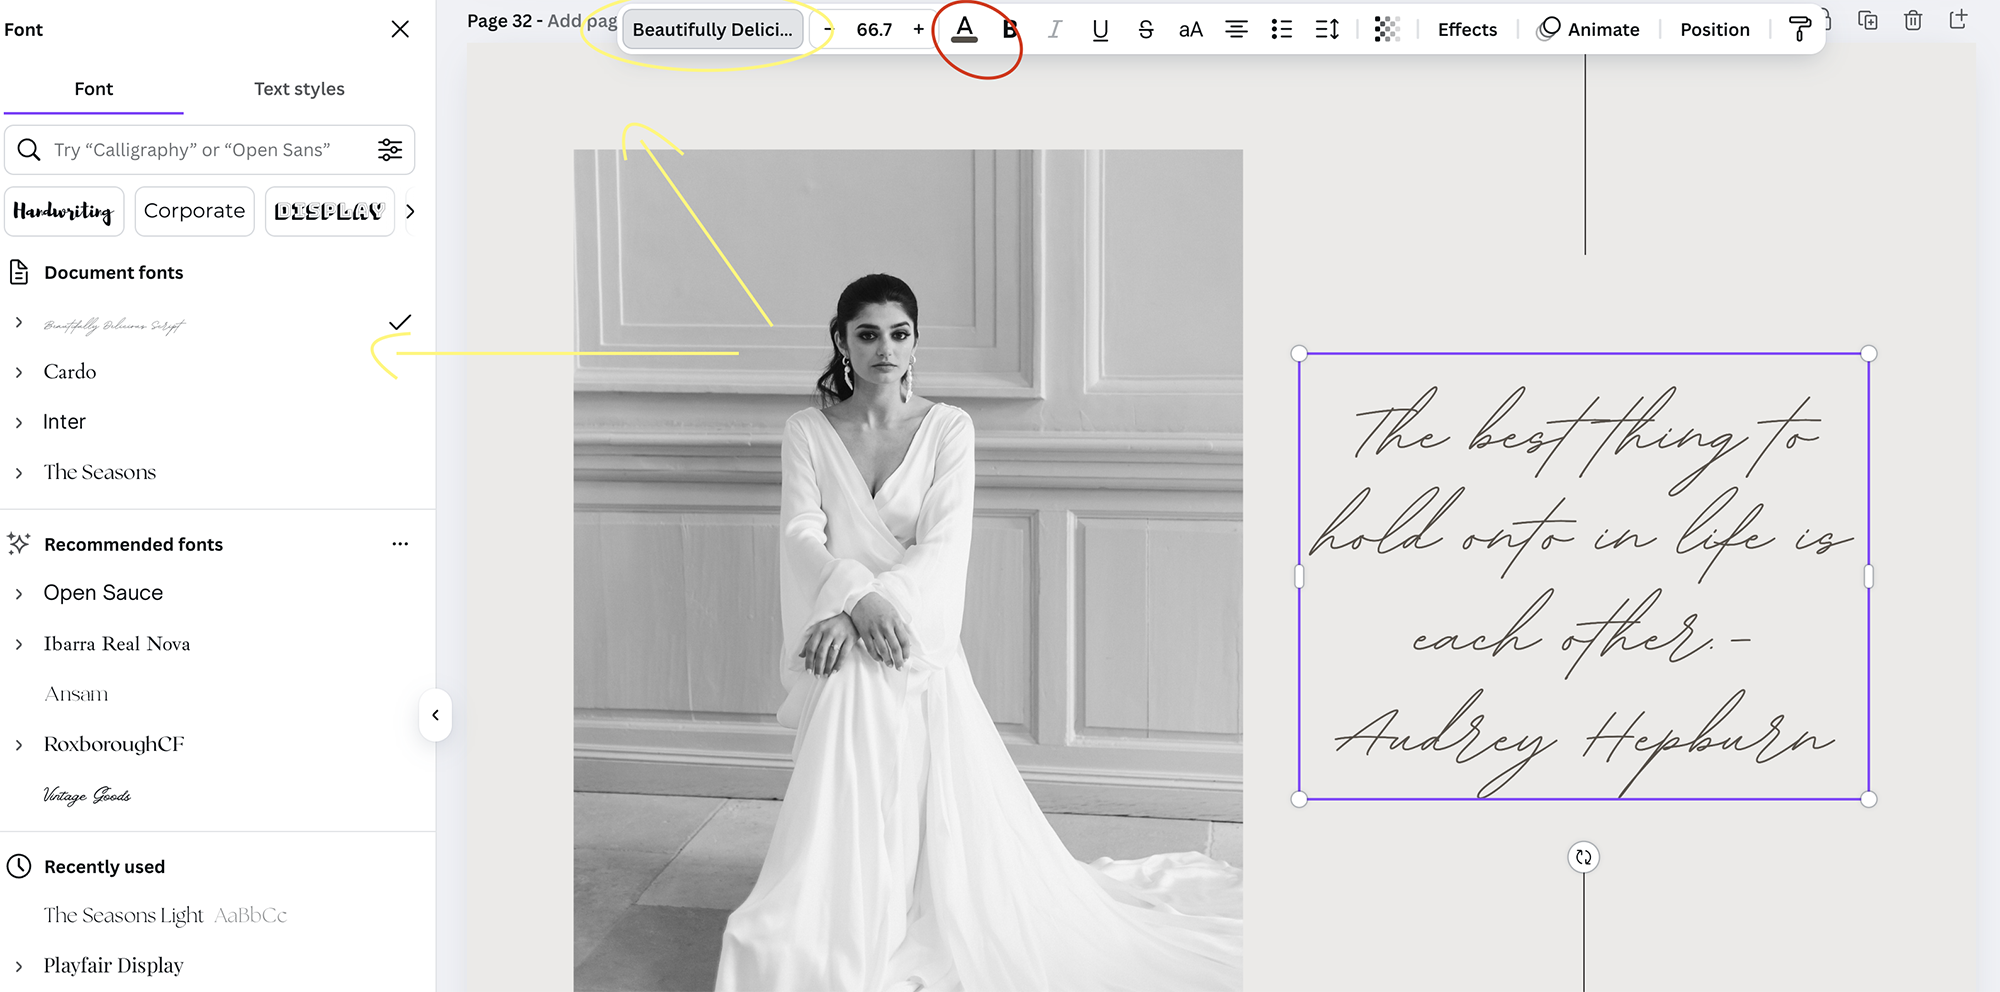
📌 How to Change Fonts in Canva:
1️⃣ Click on the text you want to edit.
2️⃣ In the top toolbar (see red circle in image below), select the font dropdown to browse available fonts.
3️⃣ Choose a font that suits your brand (see yellow circles in image below) or upload a custom font if using Canva Pro.
4️⃣ Adjust size, spacing, and alignment using the toolbar to refine the design.
📌 How to place your logo on Canva (Typically on the back page):
1️⃣ Click the ‘Uploads’ tab on the left-hand side of the Canva interface.
2️⃣ Click ‘Upload Files’ and select your logo image from your device.
3️⃣ Once uploaded, drag and drop your logo into place.
4️⃣ Resize and position it neatly—typically on the back page, footer, or a dedicated branding section.
5️⃣ Adjust opacity if you’d like a subtle watermark effect.
💡 Pro Tip: Ensure your logo is in PNG format with a transparent background for a clean, professional look.
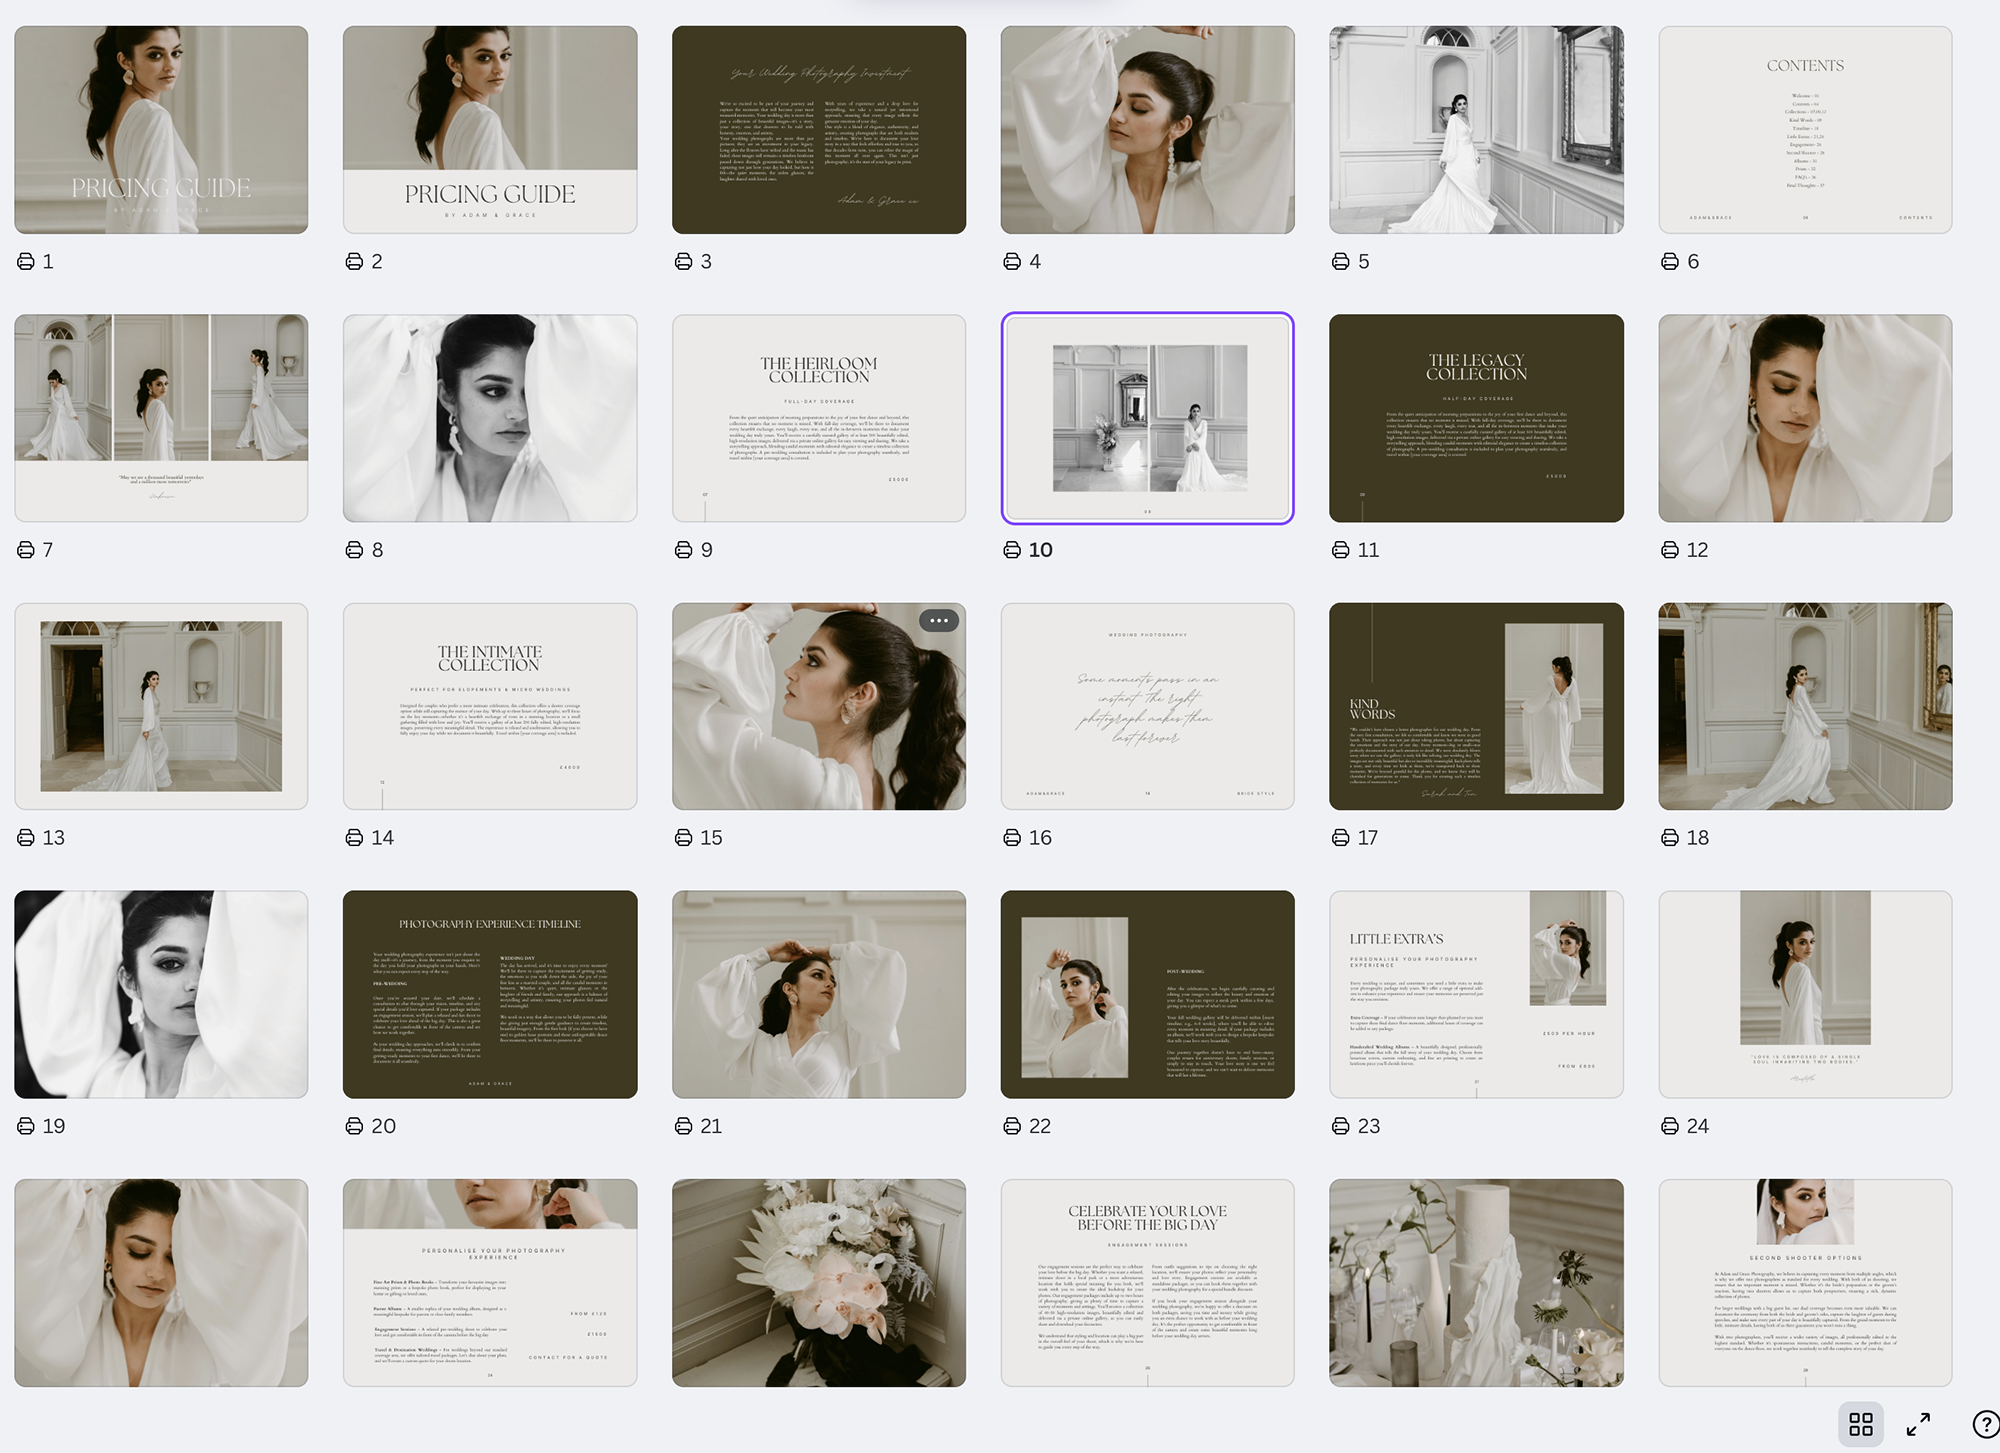
To view all pages side by side and get a better idea of how your pricing guide flows as a double-page spreads, click the Multi-Page View (Grid View) option in Canva. You’ll find this at the bottom right corner of your screen. For reference, see the circled area in the image above.
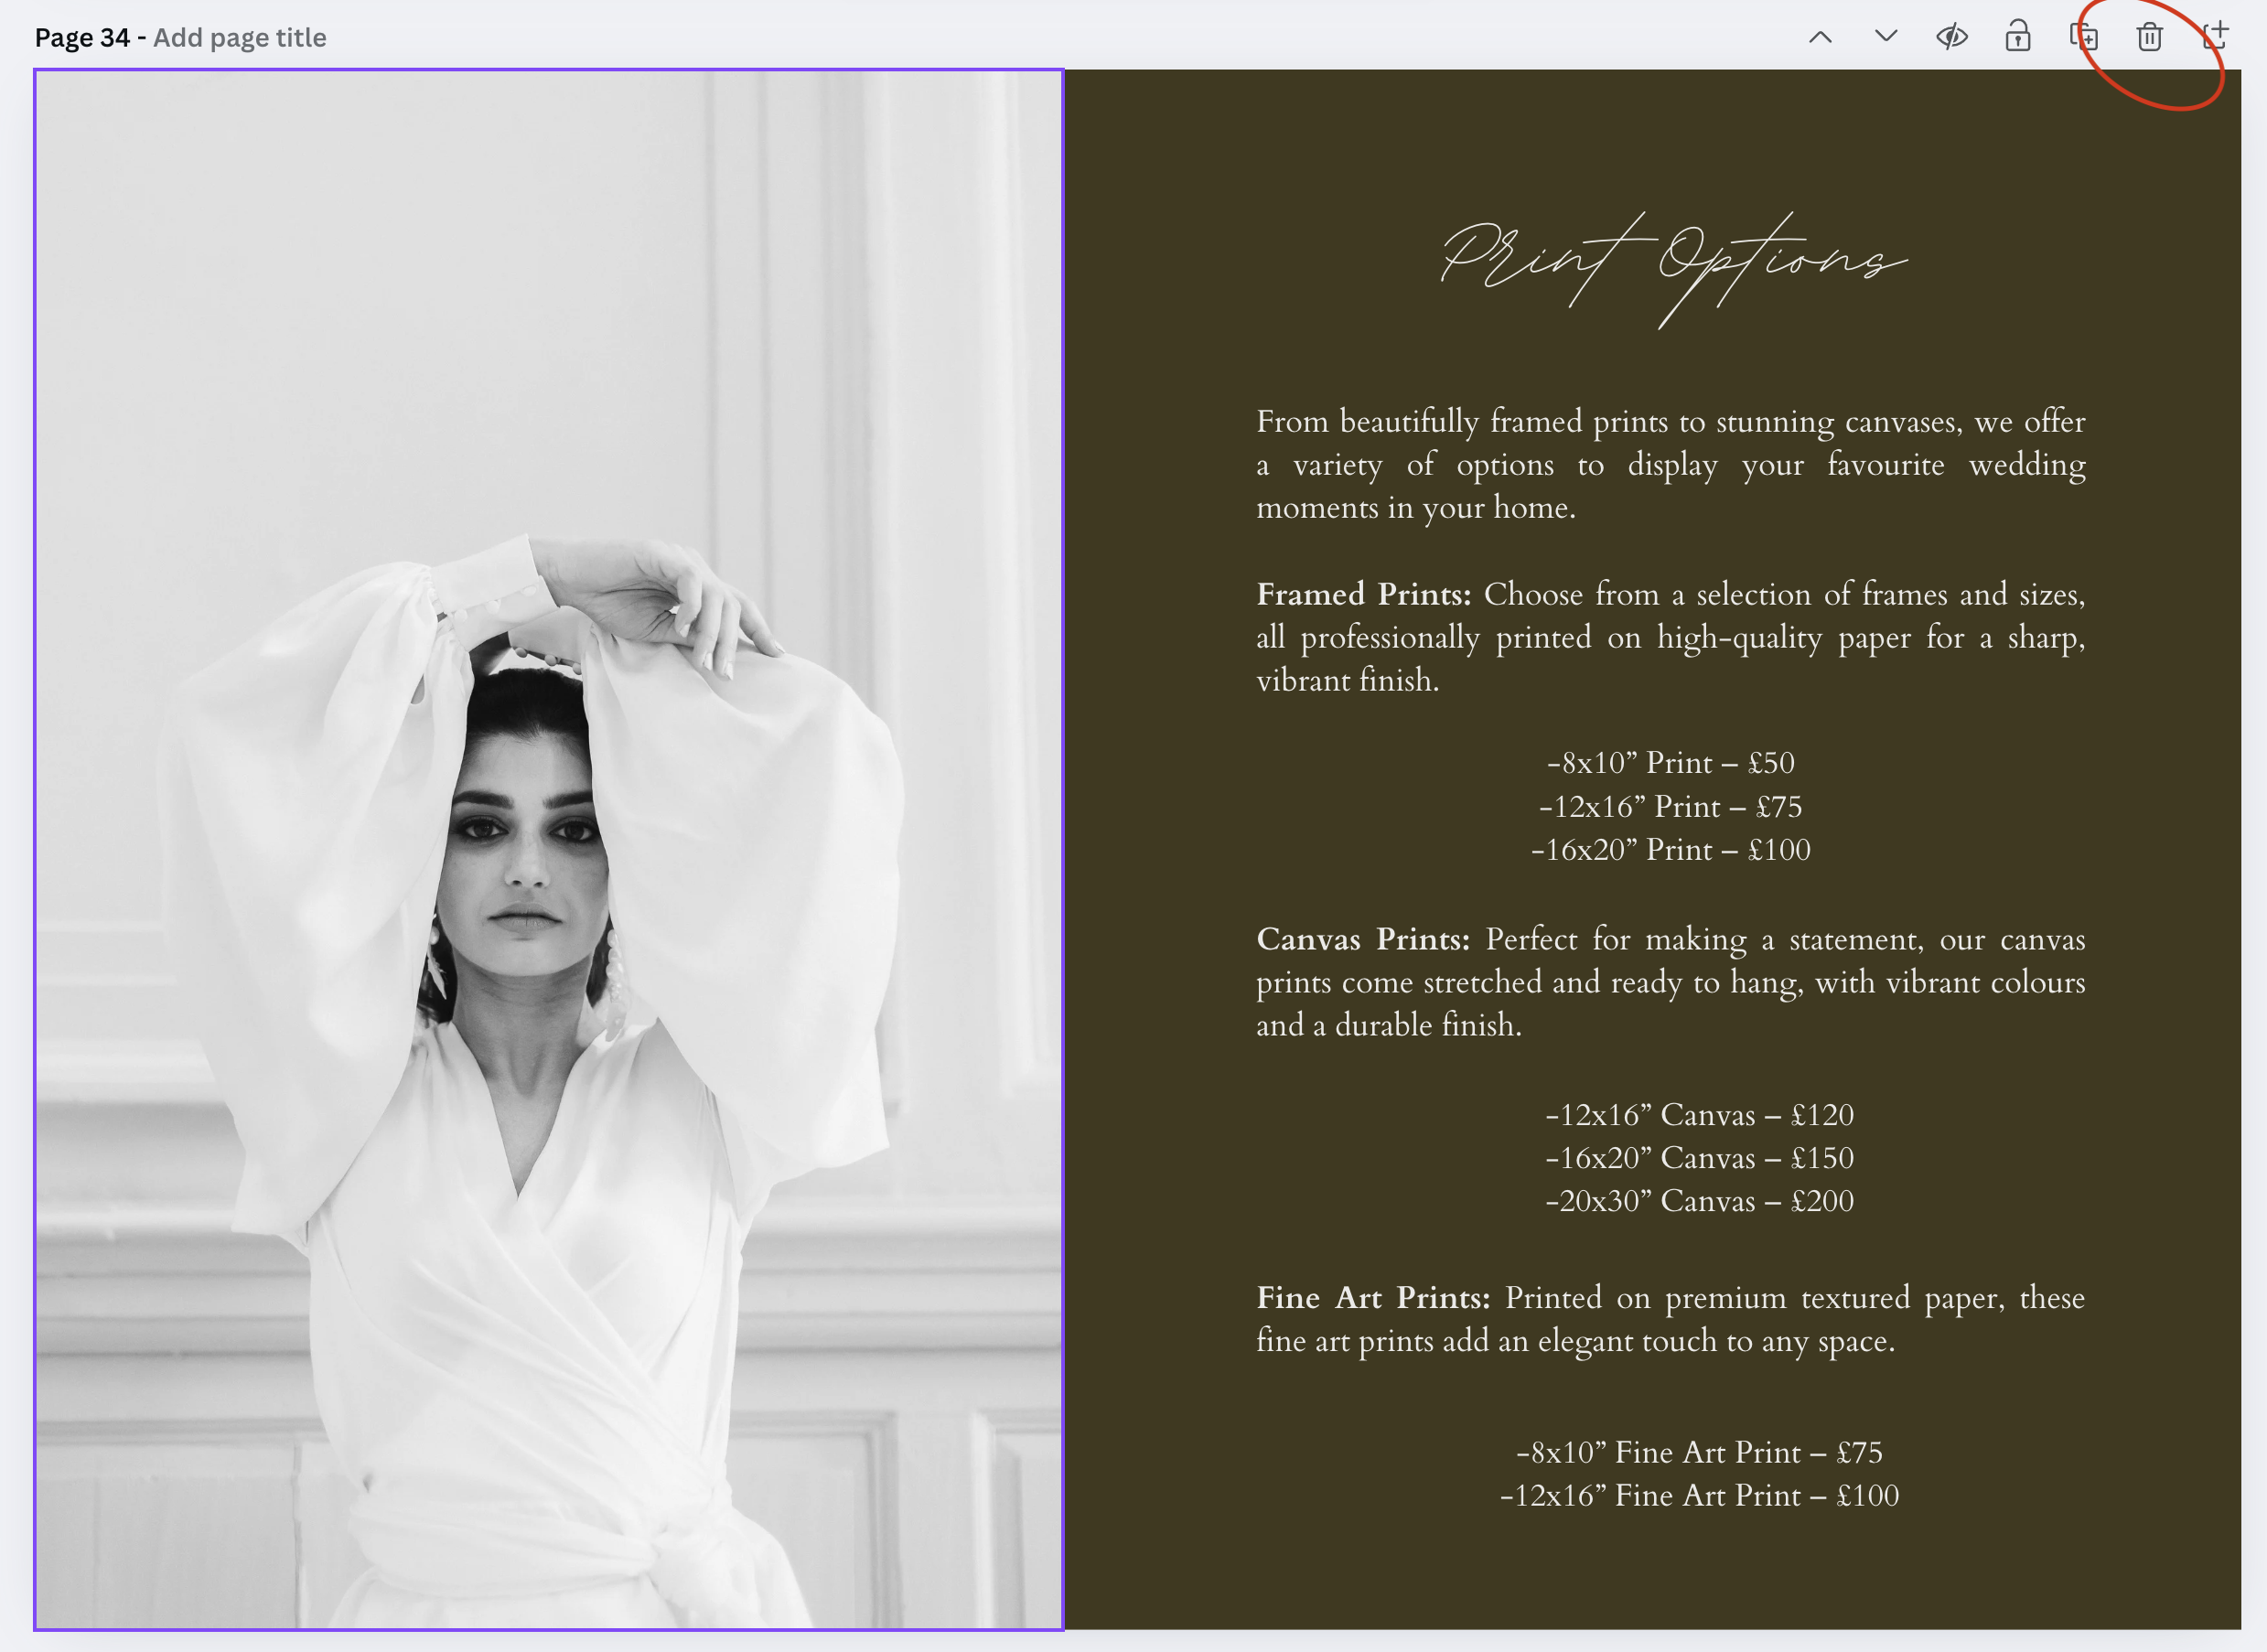
While we personally don’t price add-ons such as prints and canvases, we understand that many photographers do. That’s why we’ve included a double-page spread with dedicated space for these options in your brochure, in case you need them.
If you prefer not to use these pages, you can easily remove them. To do this, simply click on the ‘bin’ (delete) button at the top right corner of the page you want to delete (see image below for reference).
💡 Tip: If you accidentally delete a page, you can always use the Undo button to restore it. A little reminder here to always make a duplicate copy before you begin your designs so you always have a an original copy to fall back on if you need it.
Step 4: Format for Readability & Consistency
To ensure a clean, professional design:
✅ Align text & spacing – Canva’s alignment tools keep things neat.
✅ Use a clear hierarchy – Headings, subheadings, and body text should be easy to differentiate.
✅ Leave enough white space – Avoid clutter for a balanced, polished design.
📌 How to Align Text in Canva:
1️⃣ Click on the text box you want to adjust.
2️⃣ Use the alignment buttons (see red circle in image below) in the toolbar (left, centre, right, justified).
3️⃣ Drag text boxes to ensure even spacing between elements.
💡 Tip: Stick to 2-3 fonts max to keep the guide looking professional.
Step 5: Export & Share Your Pricing Guide
You can send your pricing guide digitally or share a view-only version so clients can access it online without needing to download or print it. To share simply select the ‘Share’ button at the top right hand side of the screen.
📂 Best File Formats for Exporting:
📌 PDF (Print or Standard) – Best for emailing or printing.
📌 JPEG/PNG – Great for sharing on social media or embedding in emails.
📌 Editable Canva Link – If you want to offer a customisable version for your team or clients.
📌 Public View Canva Link – Perfect for sending an interactive digital version that clients can view online without downloading.
💡 Tip: Always preview your guide before sending to ensure there are no errors. If you decide to print your guide it can be a really great way to impress your potential clients, please consider a good quality printing company.

How to Use Your Pricing Guide Effectively
Once your pricing guide is ready, use it to enhance your client experience:
📧 Email it to potential clients – Attach the PDF when responding to inquiries.
📍 Embed it on your website – Let potential clients download it instantly.
📱 Share it on social media – Post snippets of your pricing to attract new customers.
🖨 Print physical copies – Have a printed version ready for meetings and consultations.
💡 Tip: Add a Call-to-Action (CTA) at the end, like “Ready to book? Contact us today!”

Final Thoughts
Creating a stunning pricing guide doesn’t have to be complicated! With our Canva templates, you can design a professional, on-brand pricing guide in minutes—helping your business look polished, professional, and ready to convert inquiries into bookings.
🎨 Haven’t grabbed your template yet? Browse our shop and get started today!
🔗 Shop Pricing Guide Templates Now
Need more help with Canva? Check out all of our Canva tutorials and recourses here.
Need a New Logo or Brand Refresh?
If you’d like a new logo or an updated design to match your branding, we have a logo set designed to complement this pricing guide perfectly.
🛒 Shop the Matching Logo Set Here → https://adamandgrace.com/shop
This ensures your pricing guide and branding remain cohesive, giving your business a polished and professional look across all materials.