Creating engaging social media posts doesn’t have to be time-consuming or complicated. With Canva templates, you can design branded, professional-looking content in just minutes—no design experience needed!
In this guide, we’ll walk you through how to customise your Canva templates step by step, covering colours, fonts, images, animations, carousels, and scheduling. Whether you’re designing Instagram posts, Pinterest Pins, or Facebook graphics, these tips will help you optimise your social media templates like a pro.
Why Use Canva Templates for Social Media?
Using Canva templates saves you time, ensures your branding is consistent, and makes content creation easy. Here’s why they’re a game-changer:
✅ Quick & Easy to Customise – Edit and post in just a few clicks.
✅ Brand Consistency – Keep your colours, fonts, and visuals uniform.
✅ Optimised for Every Platform – No need to resize—templates are already formatted.
✅ Professional & Engaging – No design skills needed!
Now, let’s dive into how to edit your Canva templates for social media success!
Step 1: Open & Duplicate Your Canva Template
Before you start editing, create a duplicate copy of your template. This ensures you always have the original version as a backup if needed.
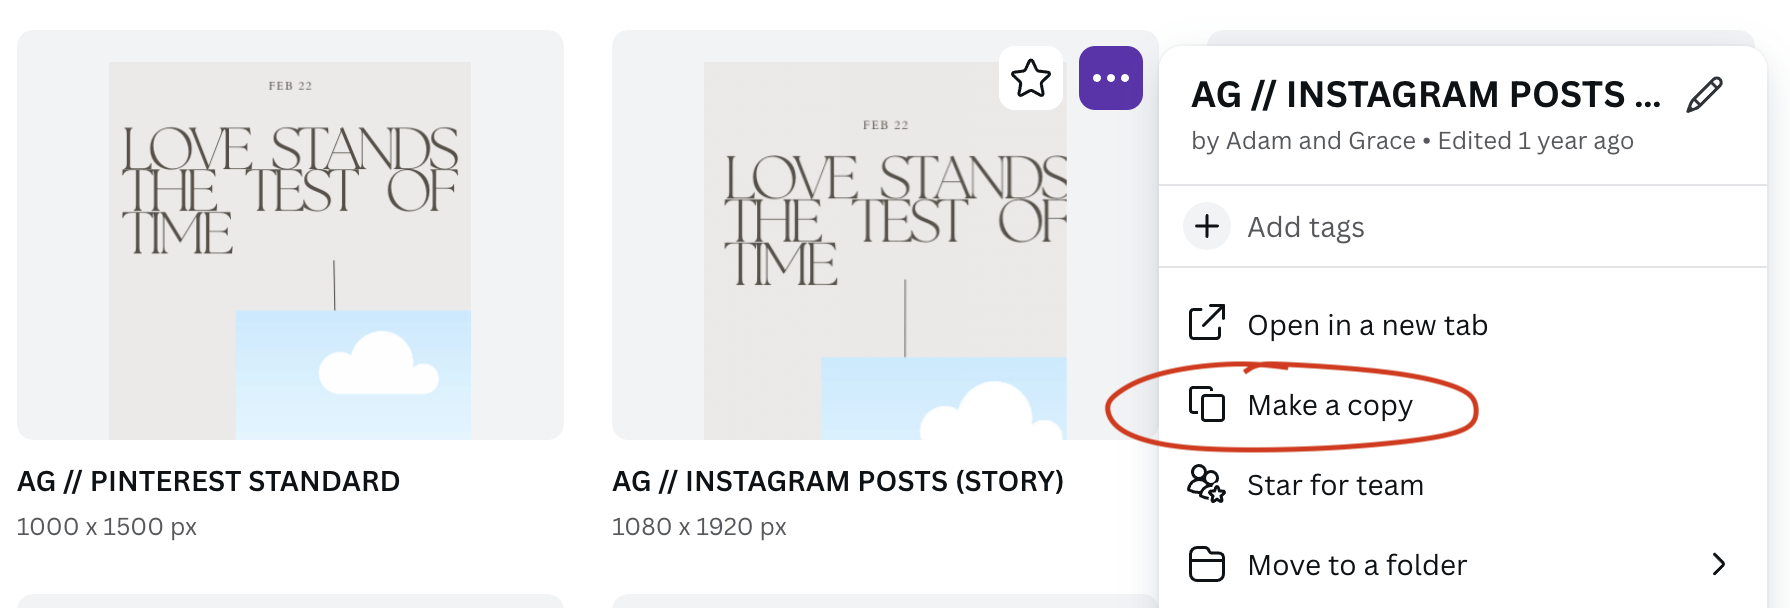
📌 How to Duplicate Your Canva Template:
1️⃣ Click the Canva template link and select “Use Template” to open it.
2️⃣ Go to File > Make a Copy to create a duplicate version before making changes.
Or alternatively you can make a copy once you are on the main interface. To do this simply hover over your design on the main page and select the three buttons on the top right hand side of the design, select ‘Make a Copy’ from the options shown (please see image for reference).
💡 Pro Tip: Keeping an unedited version helps if you ever need to start fresh or make future updates.
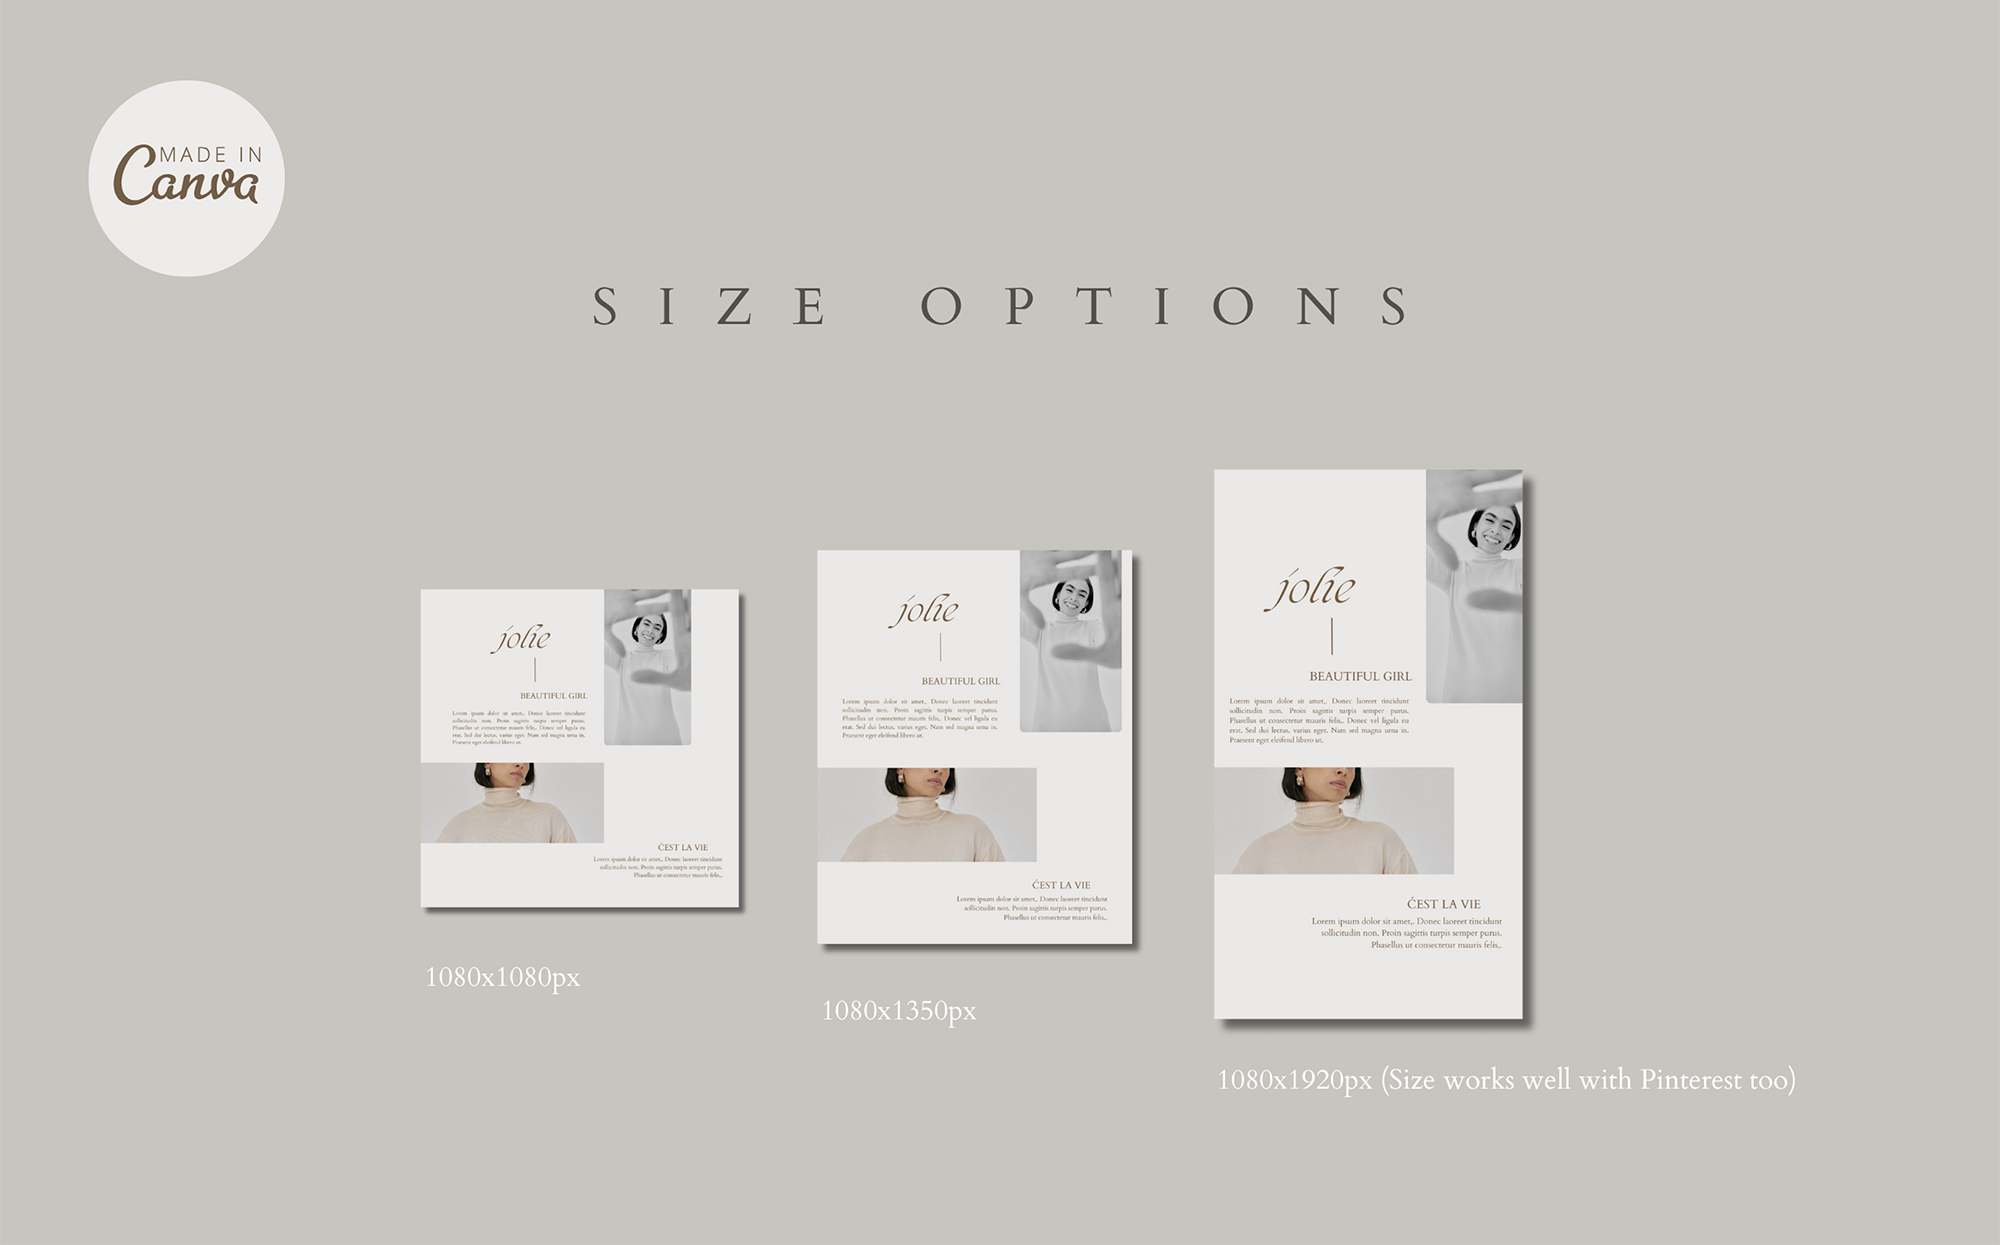
Before you start editing your templates, make sure to select the correct design size. You’ll choose your preferred image size when downloading your files—simply refer to the download PDF you received at the time of purchase and select the appropriate size.
For easy reference, here’s a size guide image below to help you choose the right dimensions before getting started.
Step 2: Customise Colours, Fonts & Branding
To maintain a strong brand identity, update the colours and fonts in your template to match your branding.
📌 How to Change Colours in Canva:
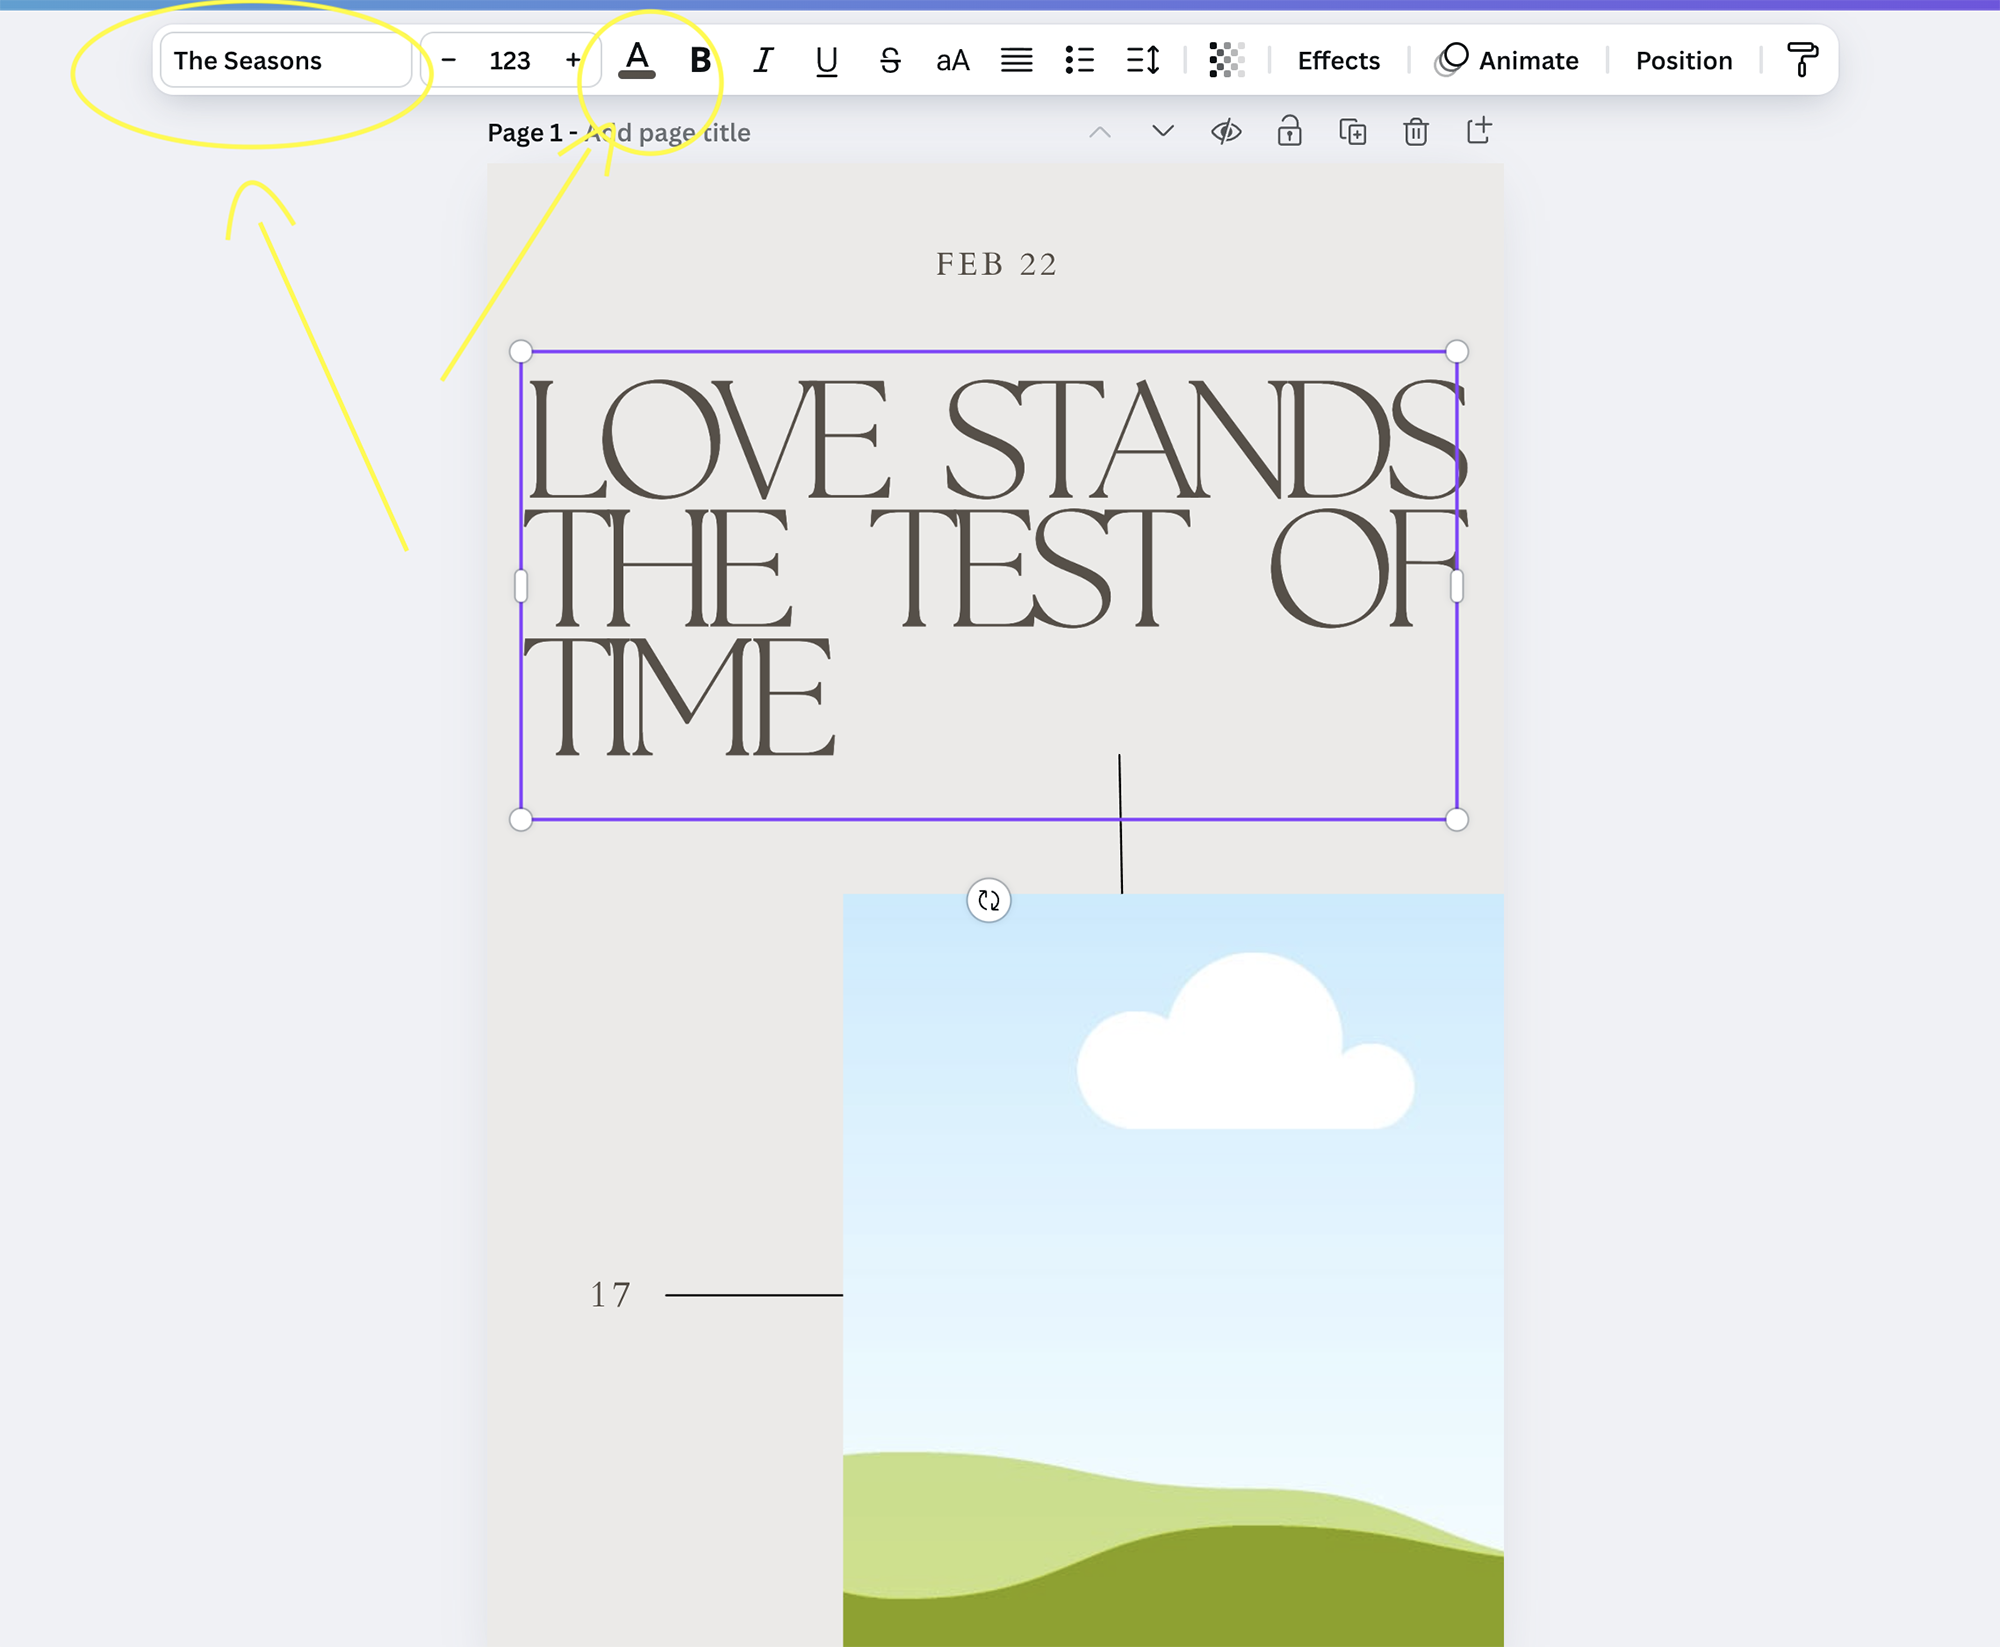
🎨 Click on any design element you want to update.
🎨 Use the colour picker in the top toolbar to select your brand colours (please see image for reference below.)
🎨 If using Canva Pro, apply your Brand Kit to update all colours at once.
📌 How to Change Fonts in Canva:
🔤 Click on the text you want to edit.
🔤 Open the font dropdown menu at the top (please see image for reference below).
🔤 Select a font that aligns with your brand (or upload a custom font if using Canva Pro).
💡 Pro Tip: Stick to 1-2 fonts for consistency and readability across all platforms.
Keep the designs as they are or change fonts and/or colours to suit your brand. ⬇️
Step 3: Swap Out Images & Graphics
High-quality visuals make your social media content stand out and engage your audience.
📌 How to Upload & Replace Images in Canva:
🖼 Click the “Uploads” tab on the left (see red circle in reference image below).
🖼 Drag and drop your own images or browse Canva’s stock library.
🖼 To replace an existing image, drag your new image over the placeholder until it snaps into place.
💡 Pro Tip: Use high-resolution, on-brand images that align with your messaging.

Step 4: Create Carousels & Animated Posts
Adding carousels and animations increases engagement by encouraging interaction.
📌 How to Create a Carousel Post in Canva for Photo-Based Posts
Carousel posts are a great way to showcase multiple images from a wedding day in a visually engaging way. Instead of posting one photo at a time, a seamless carousel allows you to tell a story across multiple slides while keeping the design cohesive.
📌 How We Use Our Design Templates in Carousel Posts on Instagram:
1️⃣ Choose a Selection of Photos – For example as wedding photographers we would select 5-10 of the best images from a wedding day to highlight key moments.
2️⃣ Add a Testimonial or Booking Slide – At the beginning or end of the carousel, include a testimonial from the couple or a call-to-action (CTA) slide with your contact details, directing people to book their wedding with you.
3️⃣ Download and Post – Export all slides as PNG or JPG, then upload them in order as a carousel post on Instagram, Facebook, or LinkedIn.
💡 Pro Tip: Carousel posts increase engagement because users swipe through multiple slides, keeping them interacting with your content for longer.
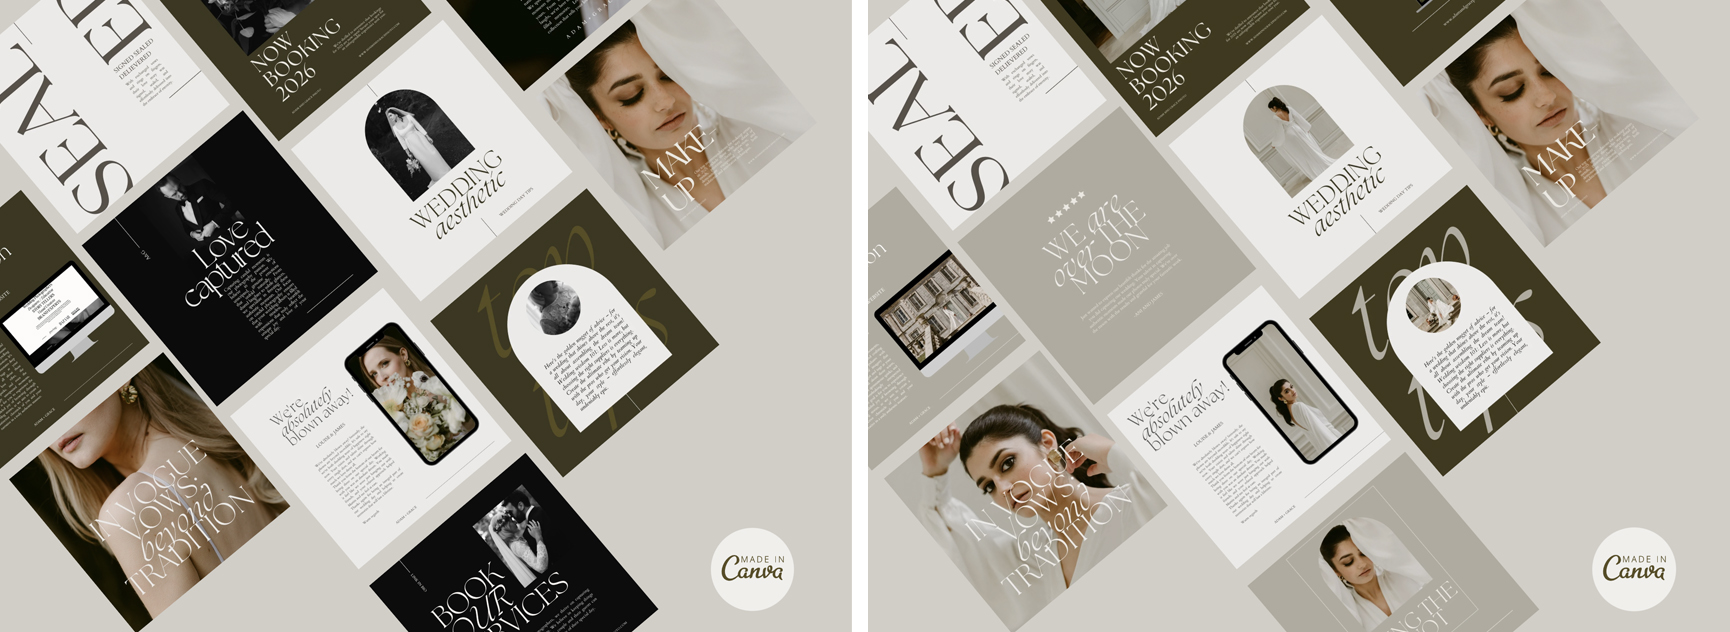
Here’s an example of how we use our templates at the end of a carousel of photos on Instagram. You can either use single photos or a seamless carousel template to create a visually connected design—both options work beautifully!
At the end of our carousels, we often include a testimonial template like this or a slide featuring our website details and service information. We also sometimes use templates at the beginning to introduce the post and set the tone.
🖼 Want to Make Carousel Posts Even Easier?
As mentioned we also offer seamless carousel templates (as featured in the video above) designed specifically for photo-based posts! These Canva templates allow you to quickly and effortlessly create beautiful, flowing carousels that showcase your work professionally.You can use these alongside the text templates to begin or end your designs with a professional touch, making them visually cohesive and engaging.
🛒 Explore Our Seamless Carousel Templates Here → https://adamandgrace.com/instagram-photo-carousels
📌 How to Create an Animated Post in Canva:
Some people like to use animation in their templates to engage their audience. Here are some basic steps on how to do this;
🎬 Select an element (text, image, or shape).
🎬 Click “Animate” in the top toolbar.
🎬 Choose an animation effect like “Fade,” “Rise,” or “Bounce.”
🎬 Download as MP4 or GIF for Instagram, Facebook, or Pinterest.
💡 Pro Tip: Animated posts work best for stories, reels, and ads to grab attention quickly.

Step 5: Save & Share Your Social Media Posts
Once your design is finalised, download and schedule your posts to stay consistent.
📌 Best File Formats for Social Media:
📥 PNG – High-quality images for Instagram and Facebook.
📥 MP4 – For animated posts and video content.
📥 JPEG – Smaller file size, good for quick sharing (we usually use Jpeg and its a free option on Canva free account).
📌 How to Download Your Canva Design:
✅ Click “Share” in the top-right corner.
✅ Select “Download”, choose your file format, and save it to your device.
💡 Pro Tip: Batch-create multiple posts at once to save time and streamline your workflow.
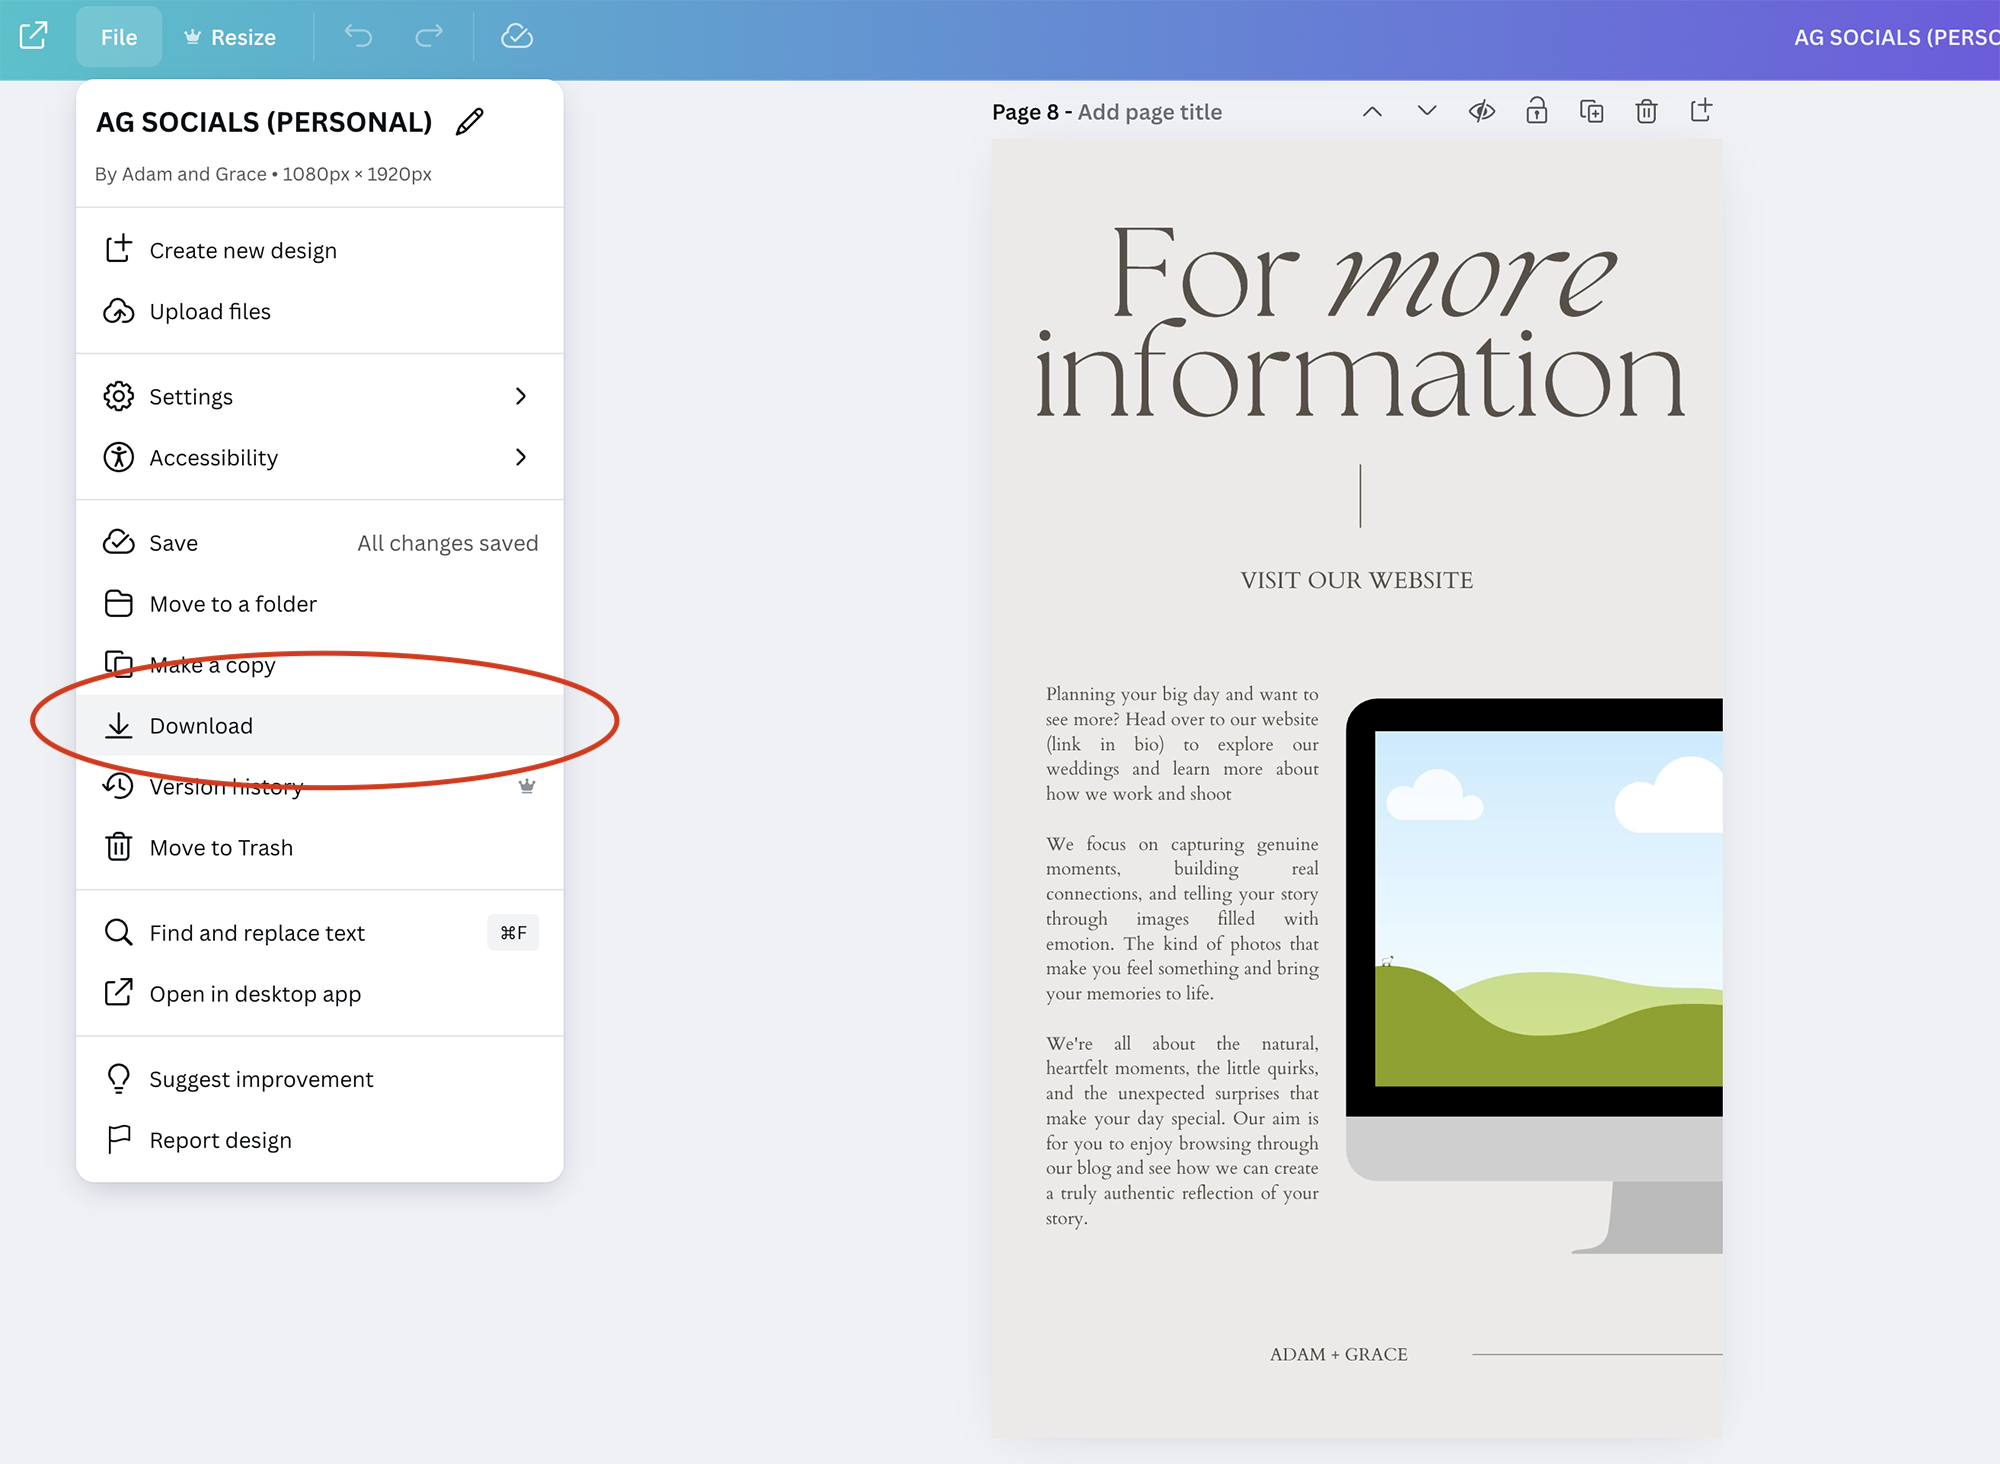
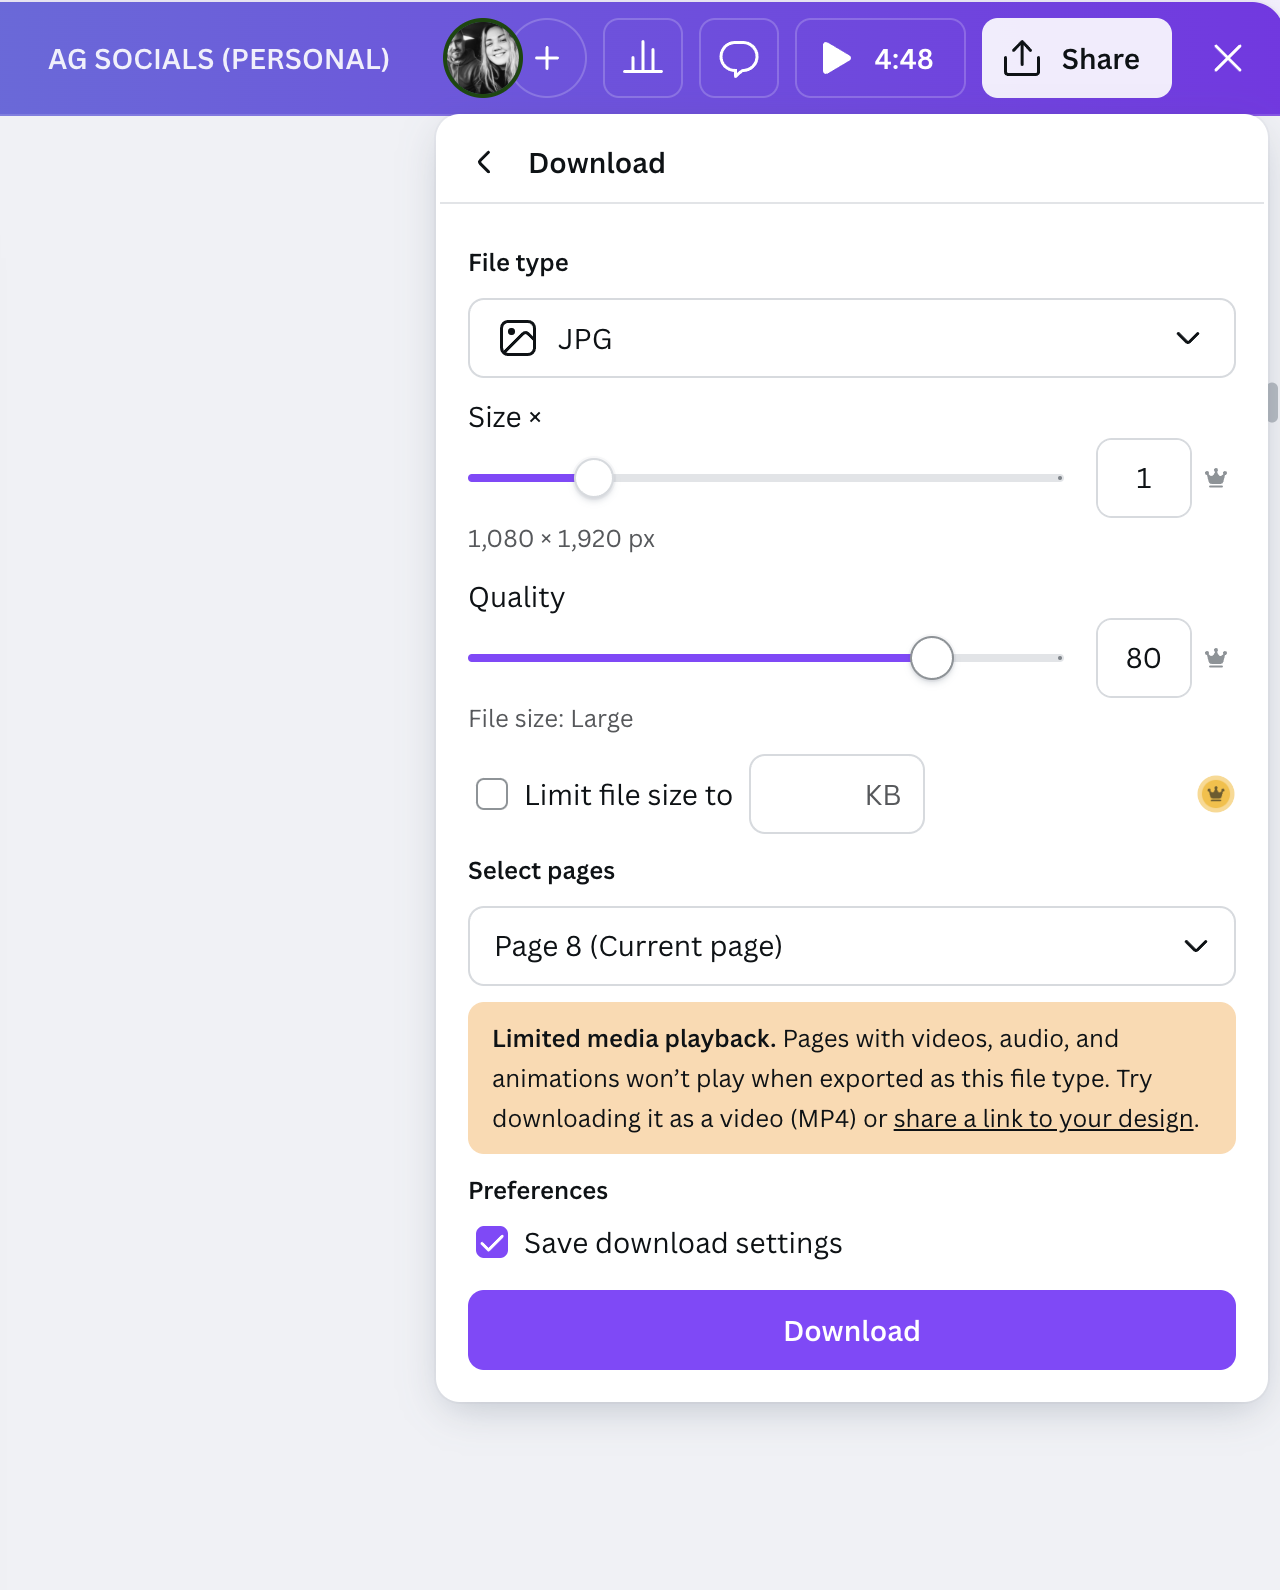
To download simply click ‘File then Download’. Once you do that a pop up screen will show to the right hand side of your screen. You then simply select your download preferences. We typically use jpeg for most social media sharing.
Step 6: Schedule Your Social Media Content
Consistency is key for social media success. Use a scheduling tool to plan your posts in advance.
📌 Best Free & Paid Scheduling Tools:
📅 Meta Business Suite – Schedule Facebook & Instagram posts.
📌 Pinterest Scheduler – Automate Pin publishing.
🕒 Later, Planoly, Buffer – Manage Instagram, TikTok, and LinkedIn content.
📊 Canva Scheduler (Pro Feature) – Post directly from Canva!
📝 Notion – Organise content planning, schedule posts, and track social media strategy in one place.
💡 Pro Tip: Use Notion alongside your scheduling tools to map out content ideas, captions, and posting dates for a streamlined workflow or you can use it solely to do these things too. Its an amazing note taking tool and they offer so much in the free version, even free social media planning templates.
Final Thoughts
Editing Canva templates doesn’t have to be difficult! By customising colours, fonts, images, and animations, you can create engaging, professional social media posts in minutes—without hiring a designer.
🎨 Want to save even more time? Check out our Canva social media templates and start creating today!
🔗 Shop Social Media Templates Now —> https://adamandgrace.com/shop
For more Canva tips and resources check out our blog here —-> https://adamandgracephoto.com/category/resources/