Whether you’re launching a product, designing a brand, or simply elevating your presentation game, using a Photoshop mockup is a quick and beautiful way to showcase your work professionally. If this is your first time using one—don’t worry. We’ve created this to feel intuitive and easy. Here’s exactly how to use your PSD file, step-by-step.
What You’ll Need:
- Adobe Photoshop (any recent version will do)
- Your purchased PSD mockup file (from us 💌)
- Your design file (a .jpg, .png, or .psd works)

Step 1: Open the Mockup File in Photoshop
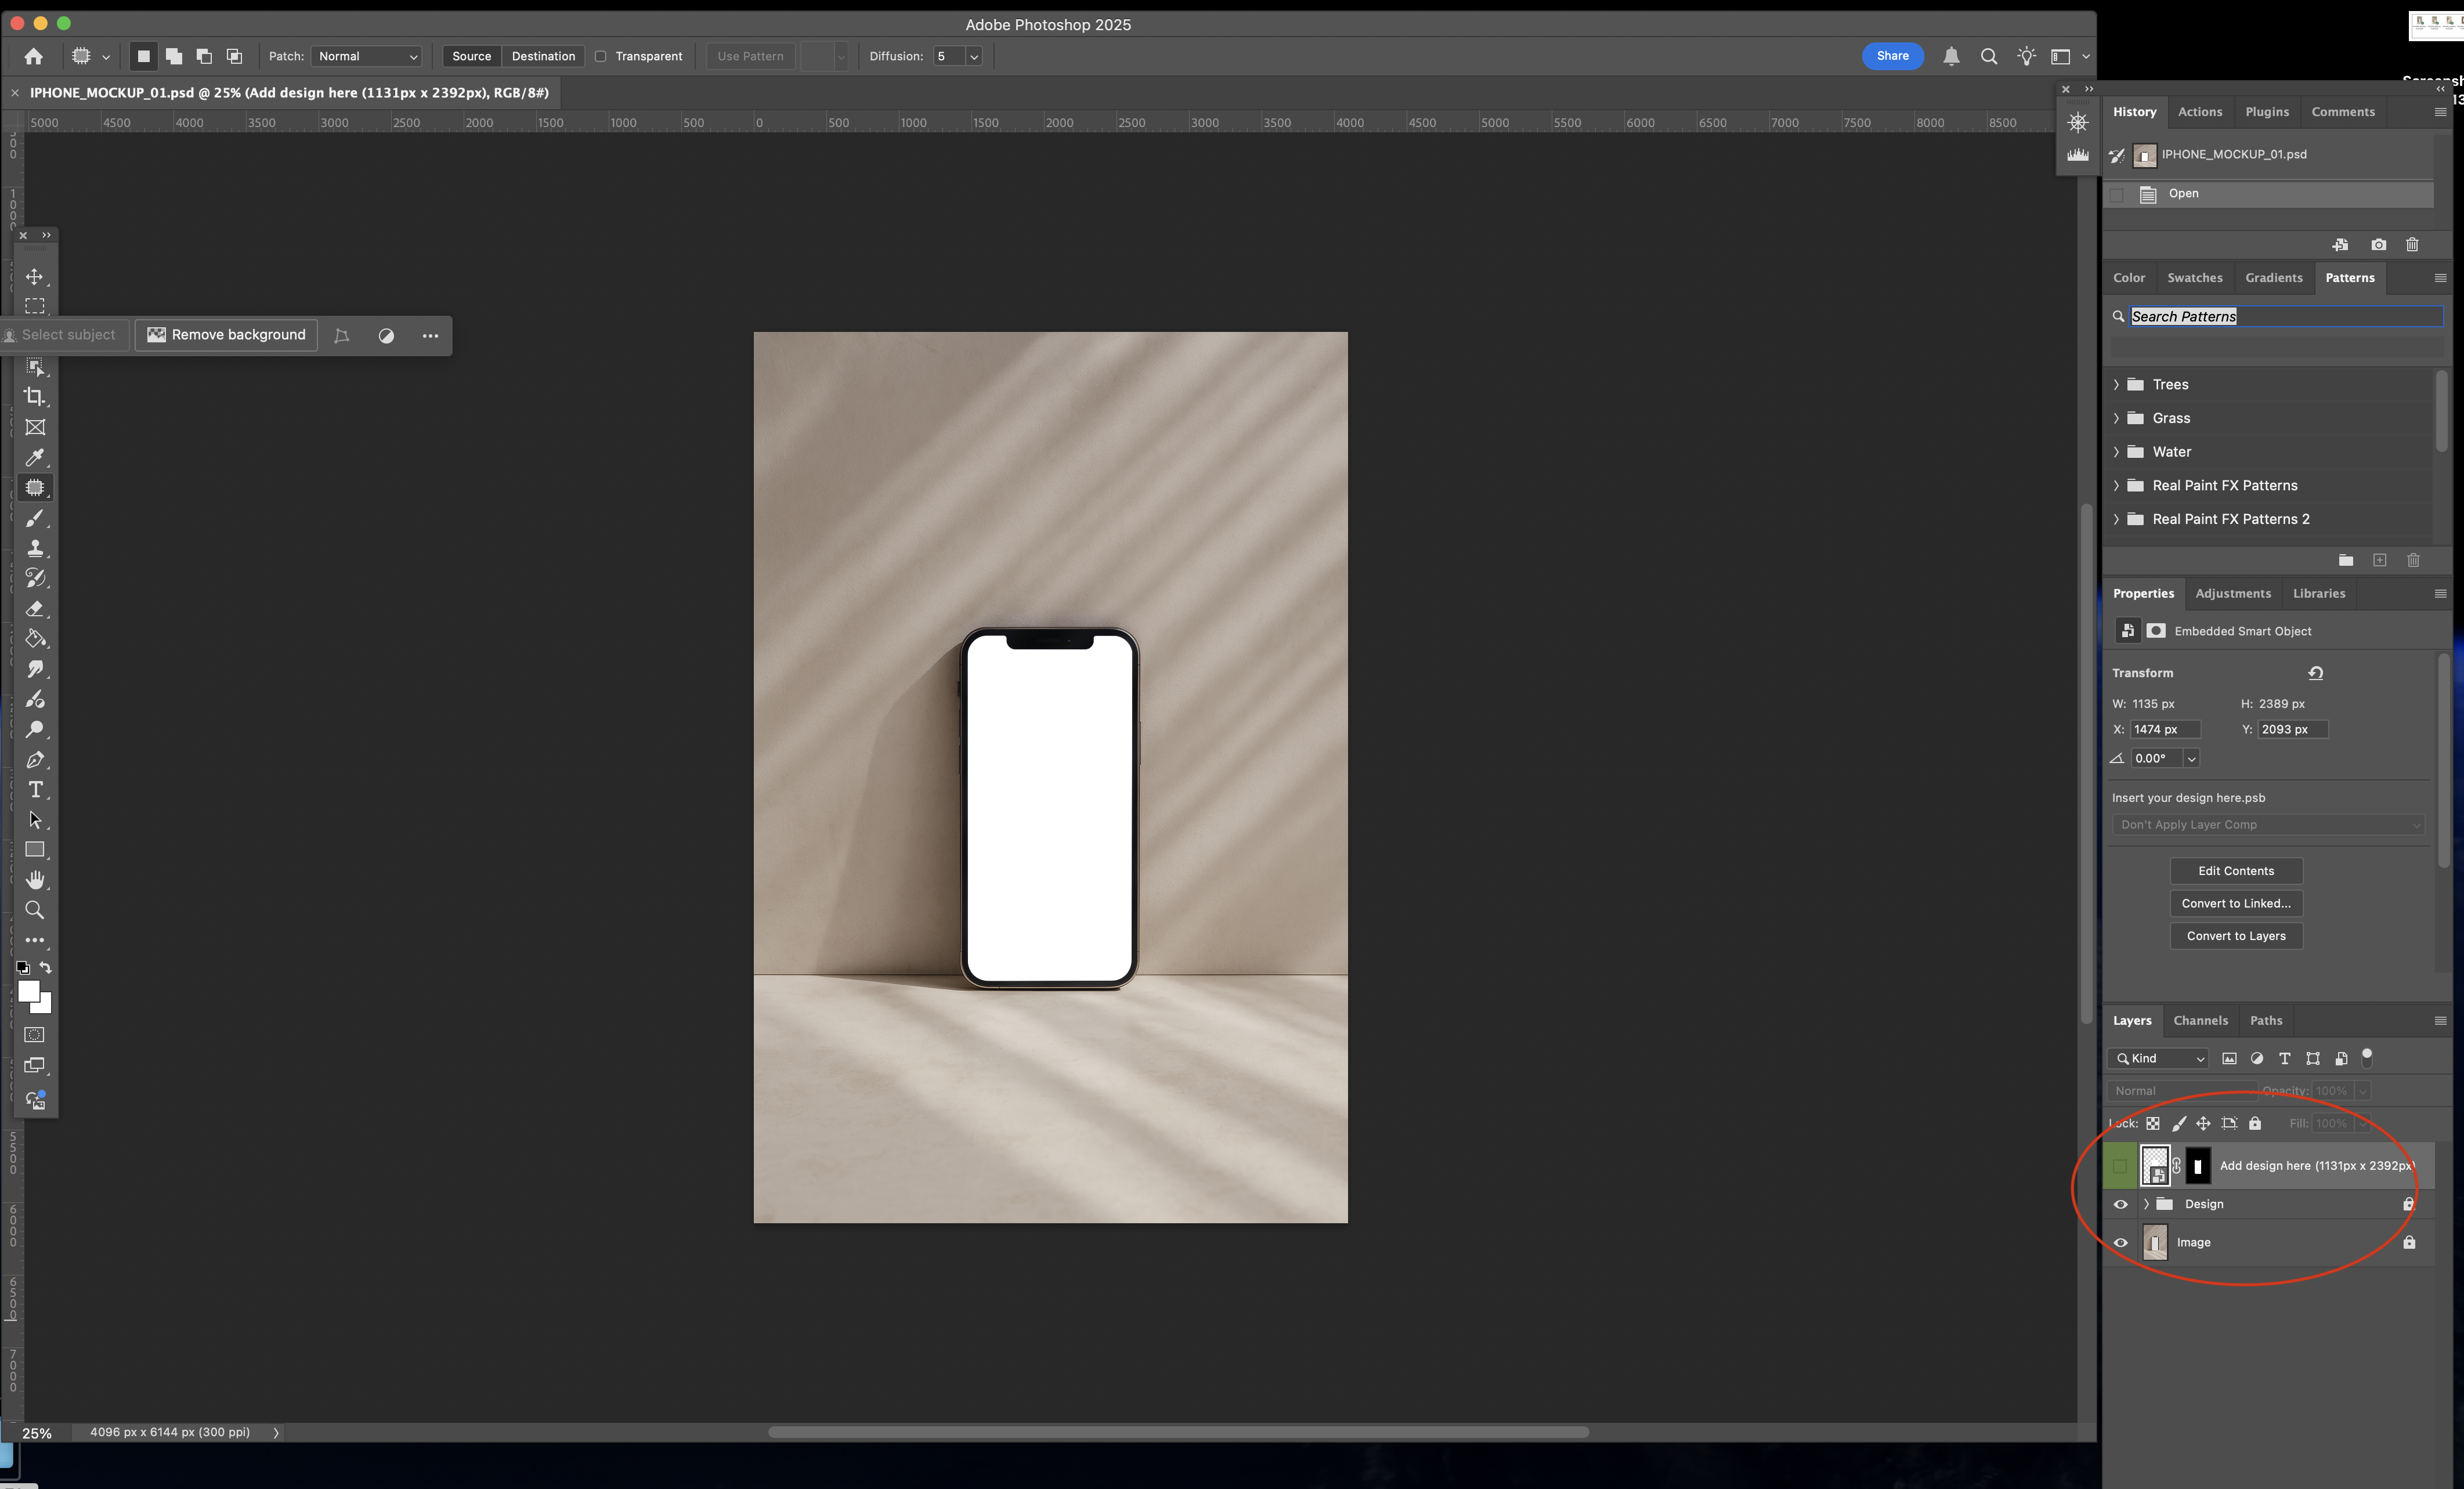
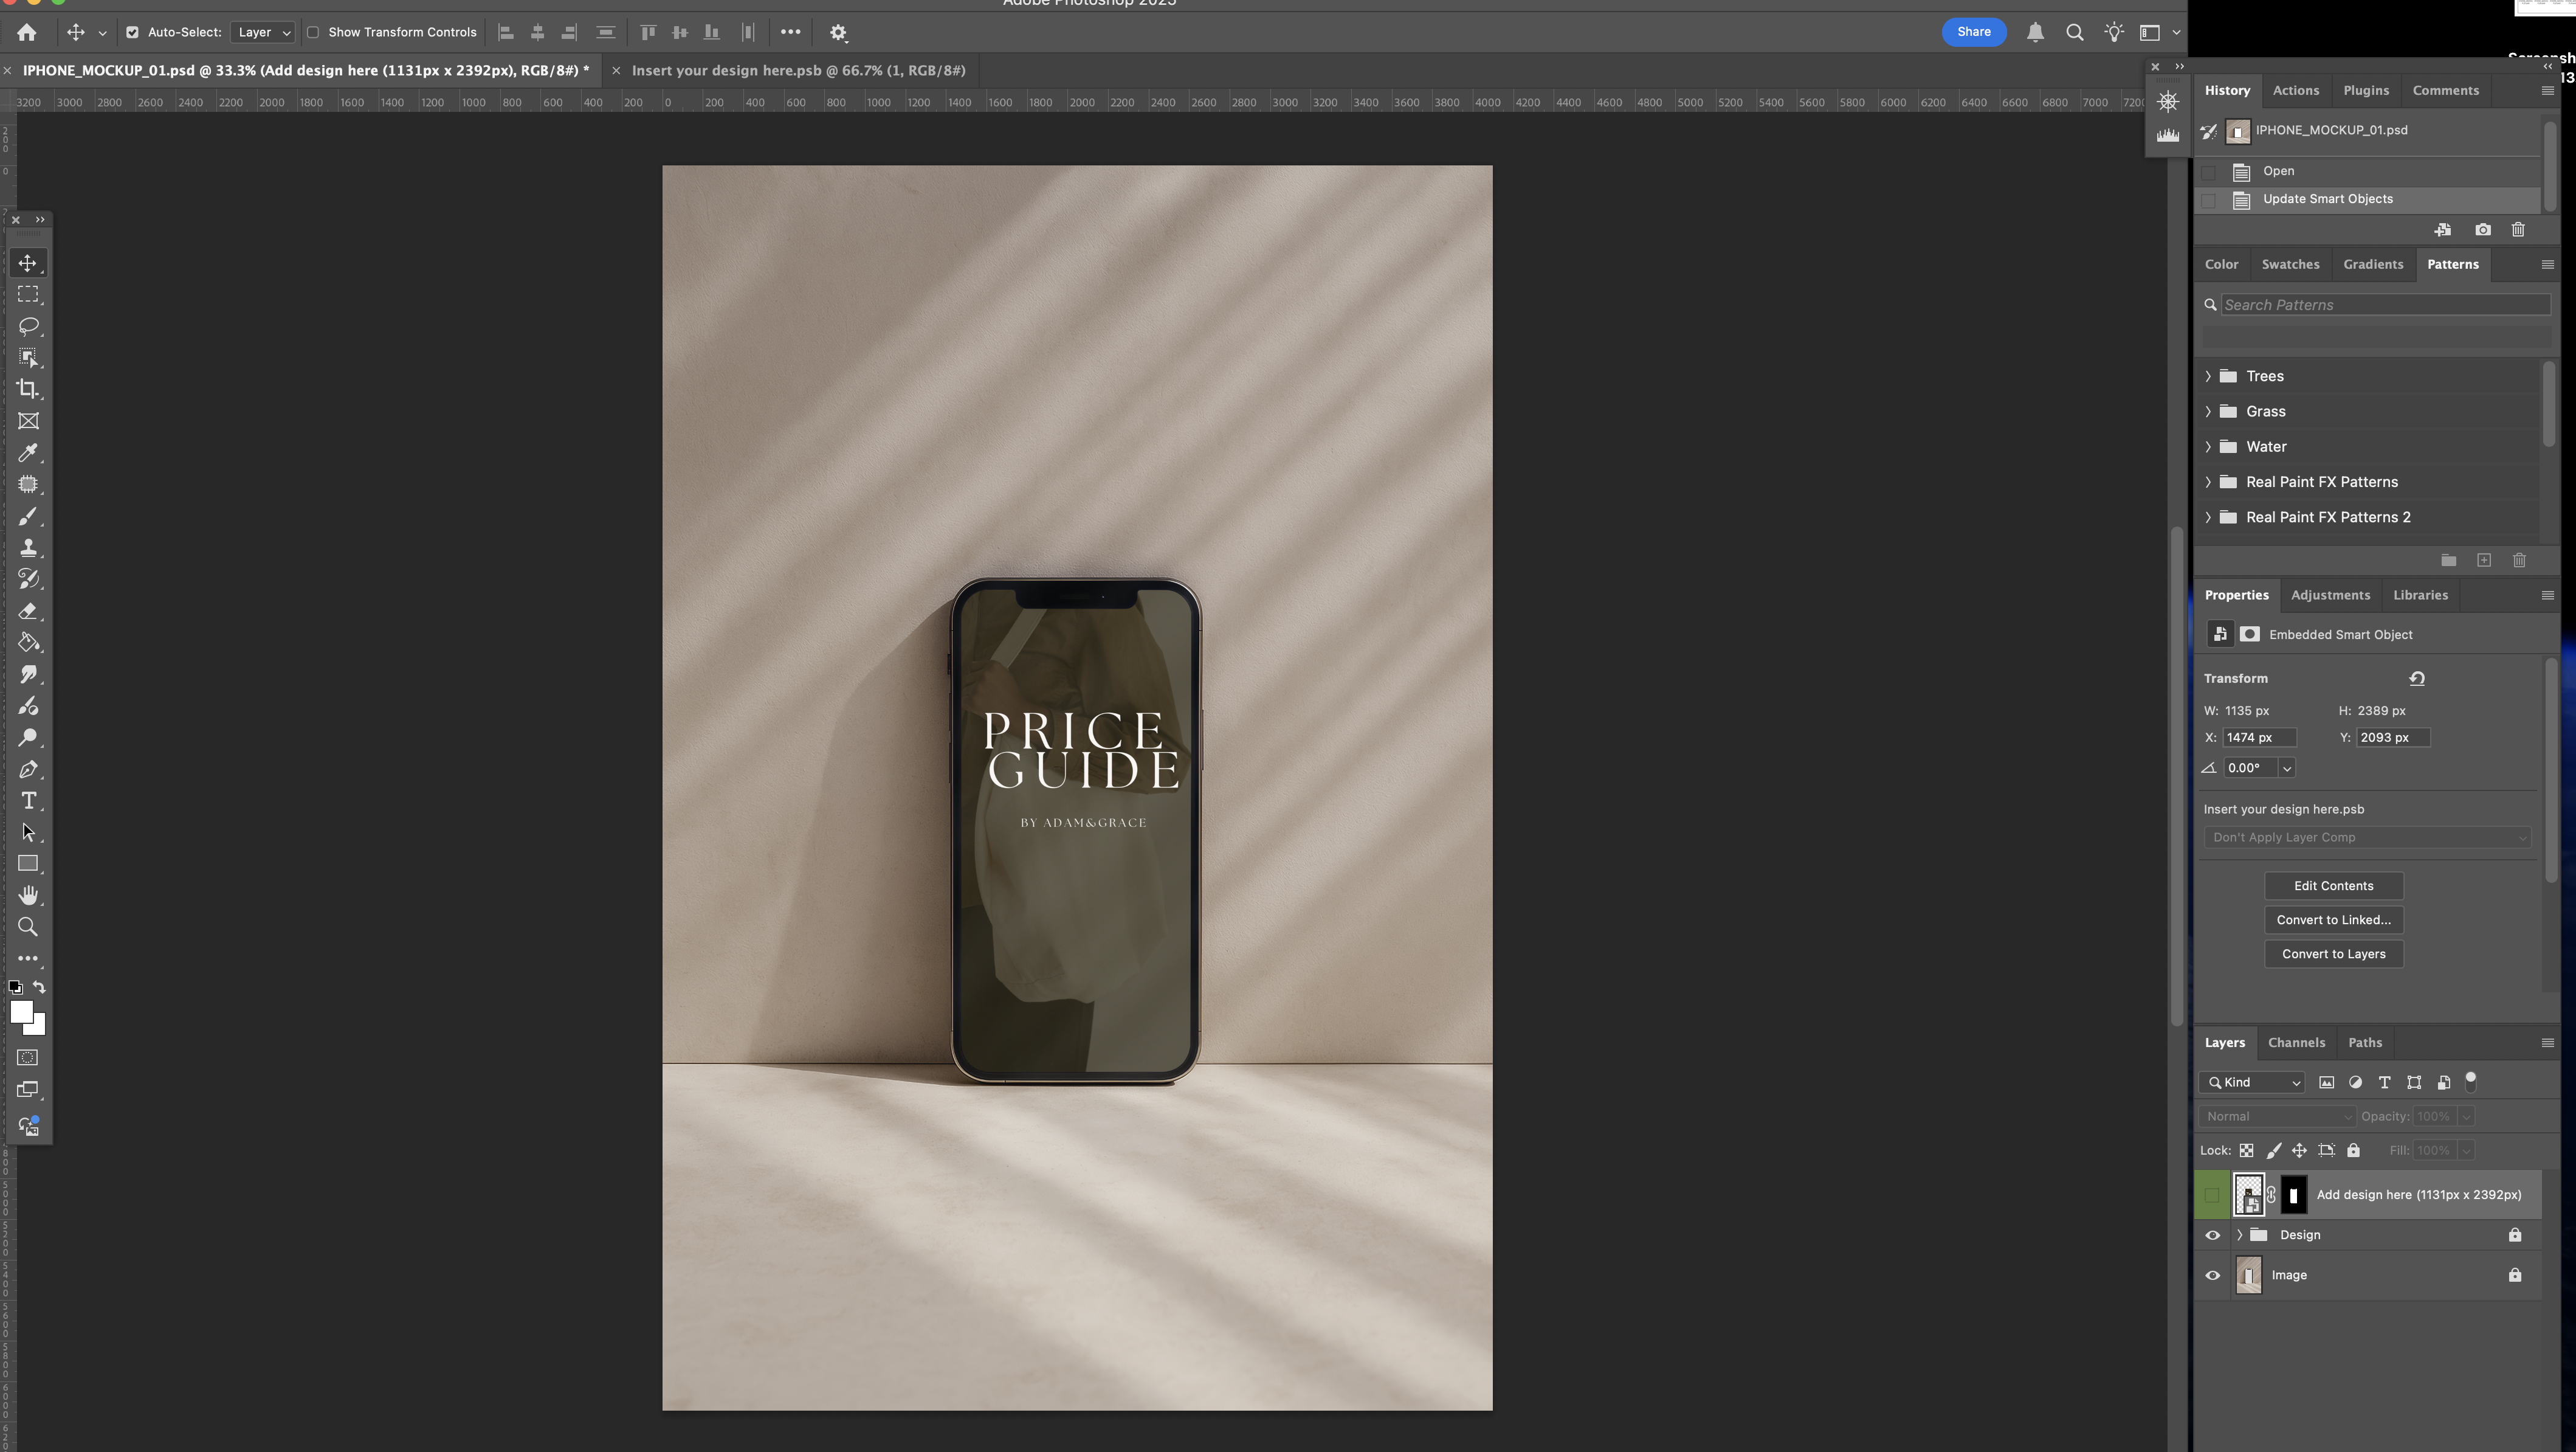
Double-click to open the .psd file you downloaded. Once it’s open, you’ll see a layered panel on the right (this is where the magic happens ✨).
You’ll notice a folder or layer named “Add design here” (or similar). This is the Smart Object. Think of it like a window that lets you drop your design in, and it’ll automatically update the screen in the mockup.
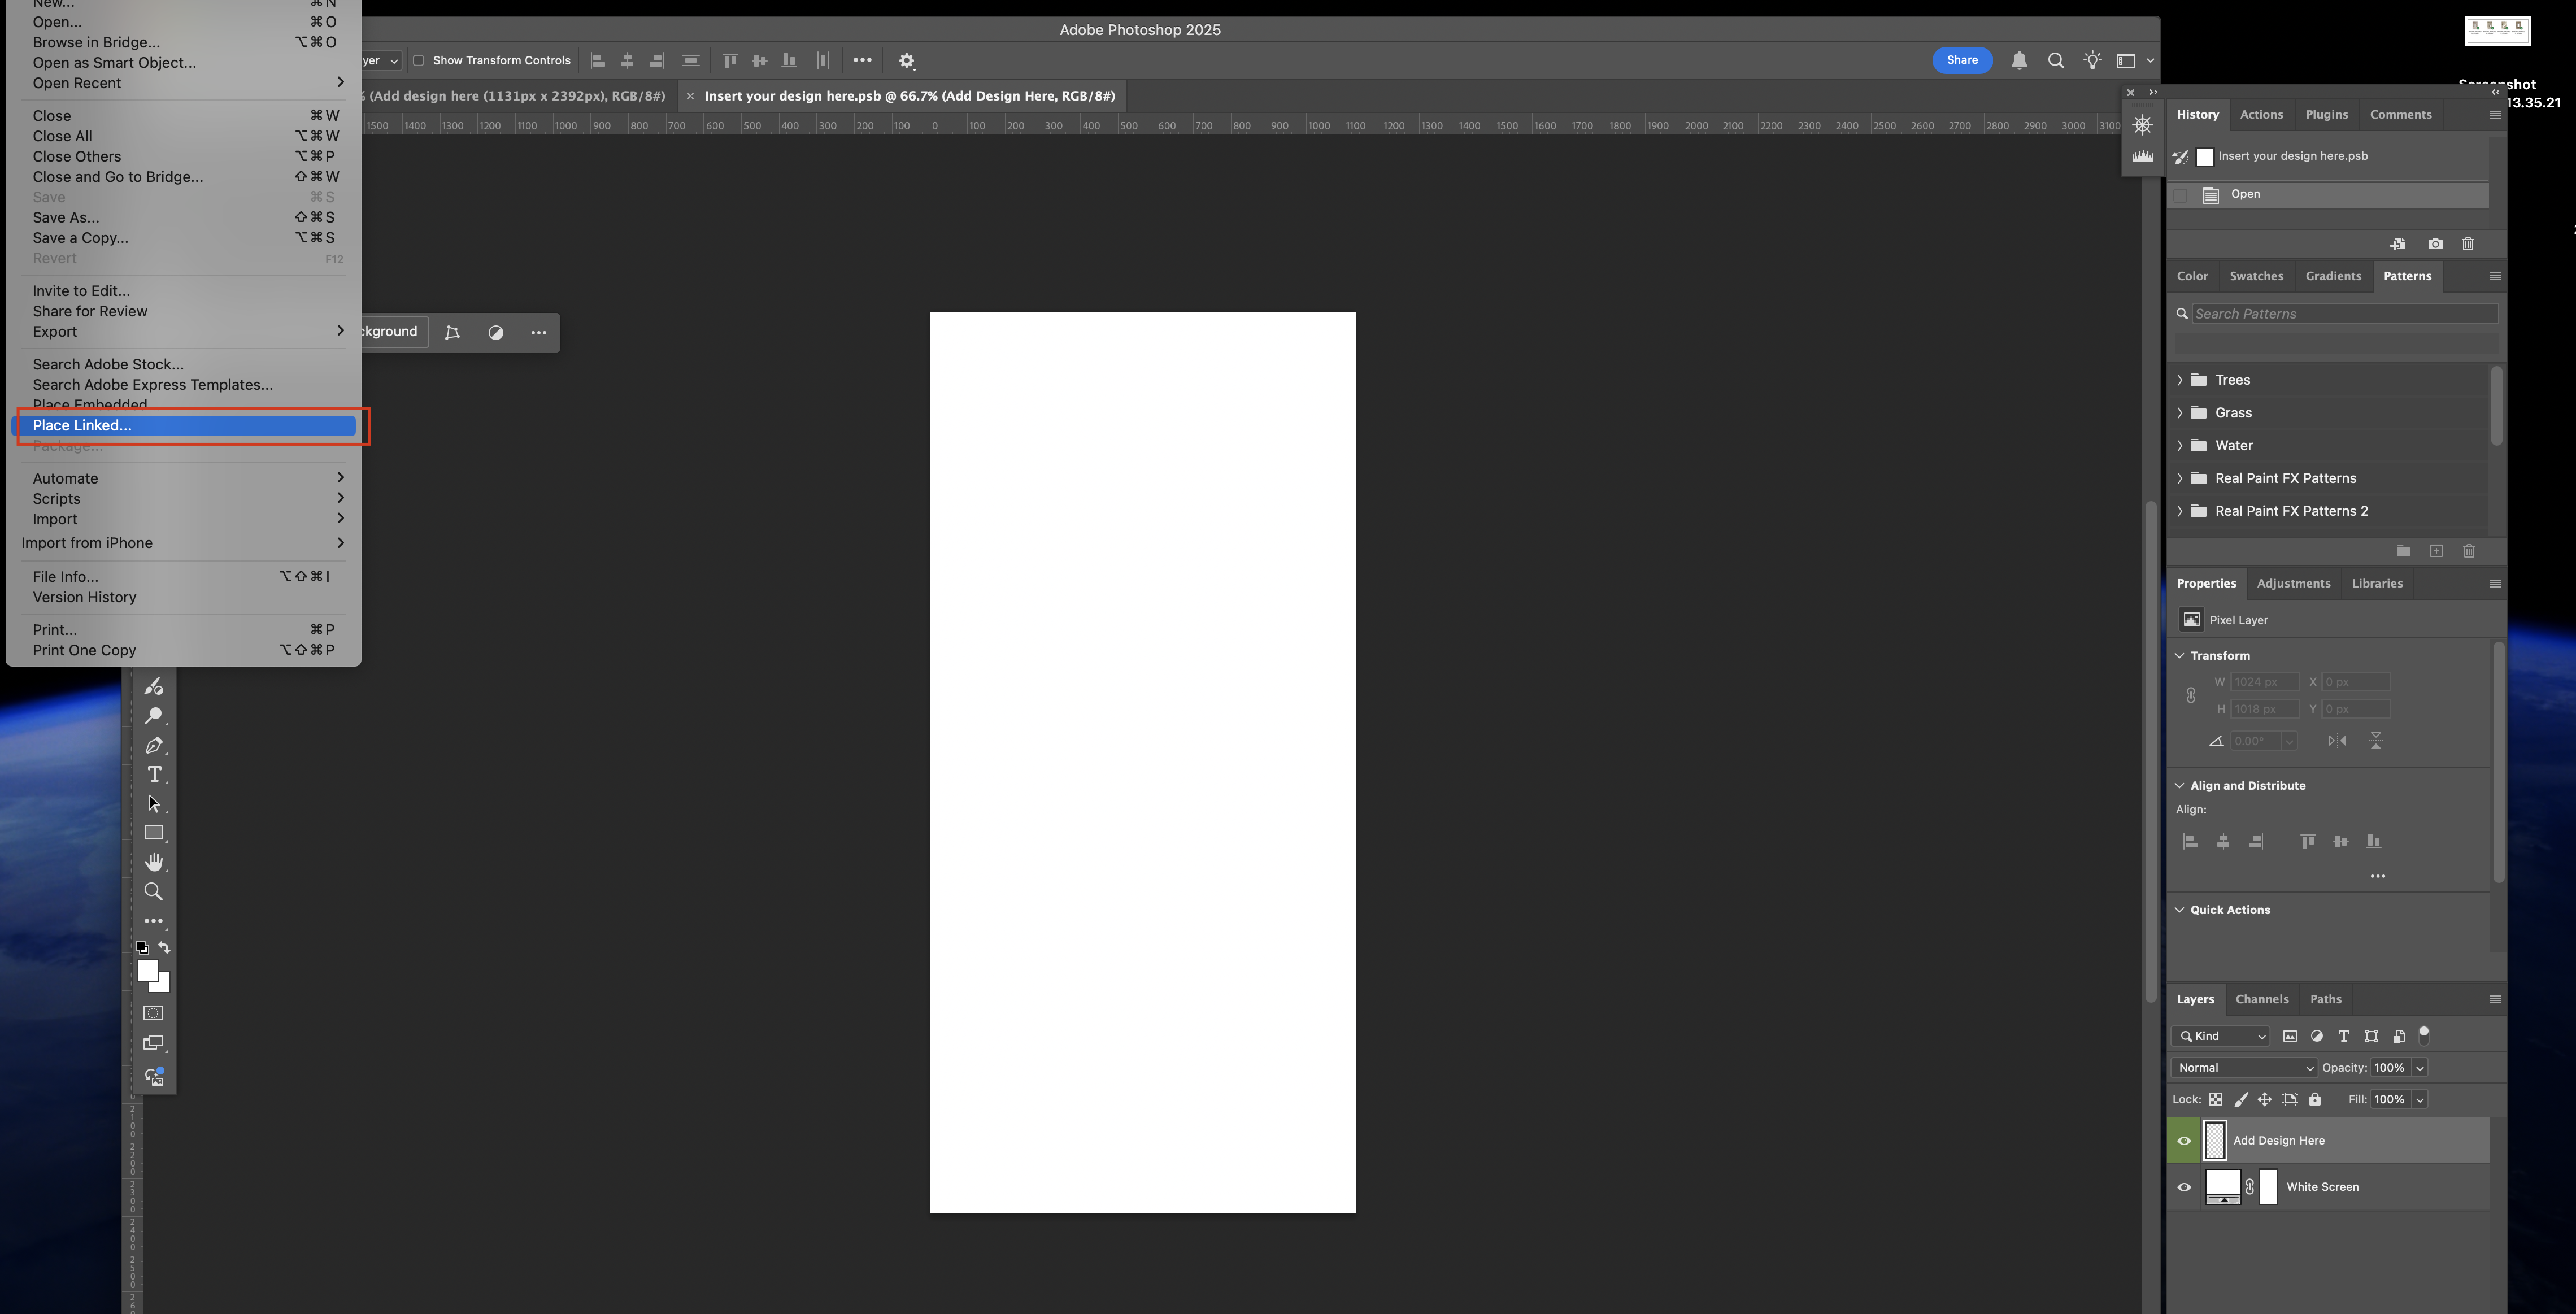
Step 2: Open the Smart Object
- In the Layers panel, double-click on the thumbnail of the “Add design here” layer (it usually has a little page icon).
- This will open up a new tab. This is where you’ll place your design.
Step 3: Add Your Design
Once you’re in the Smart Object tab:
- Delete or hide the placeholder design, if there is one.
- Go to File > Place Linked, then select your design file from your computer. This keeps your file linked and editable, which is helpful if you ever need to make changes later.
- Resize and position your design to fit the canvas—it’s usually pre-sized to match the screen shape
- Once it’s placed correctly, press Enter/Return to confirm.
- Save the Smart Object by going to File > Save or pressing Cmd+S / Ctrl+S.
Then return to the original mockup tab—your design will now appear perfectly placed within the scene, with all lighting, angle, and texture effects applied.
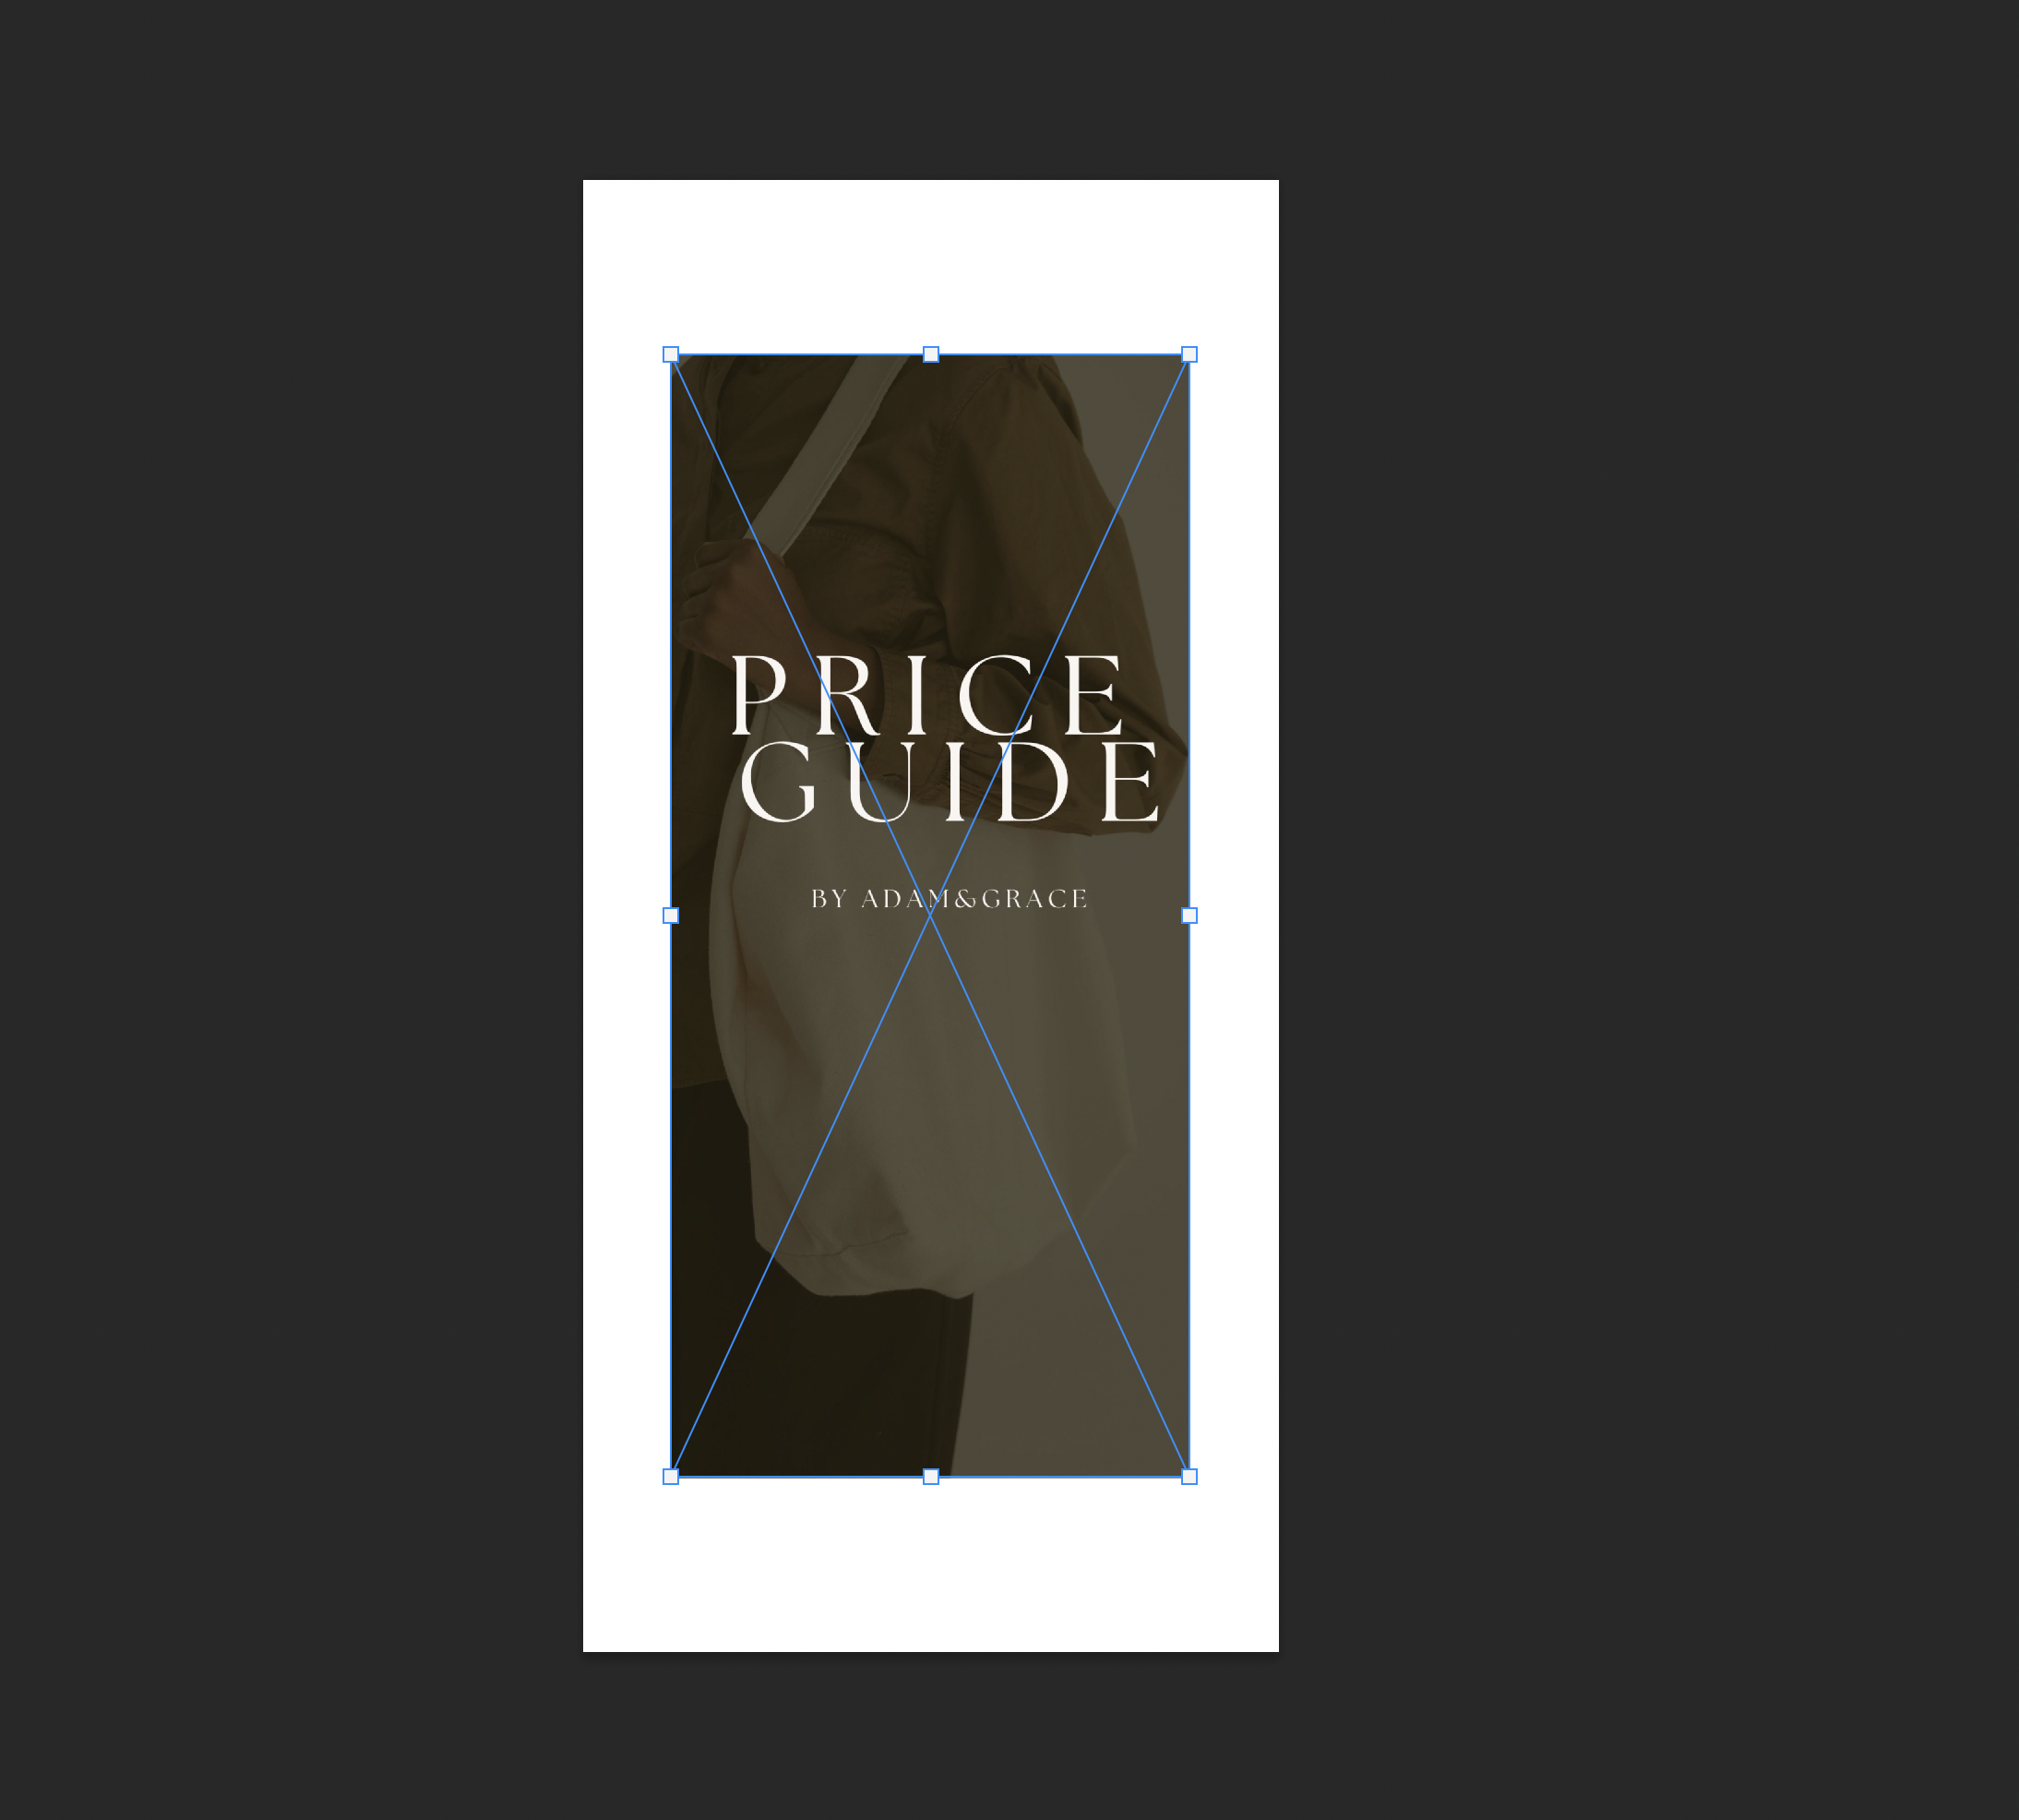
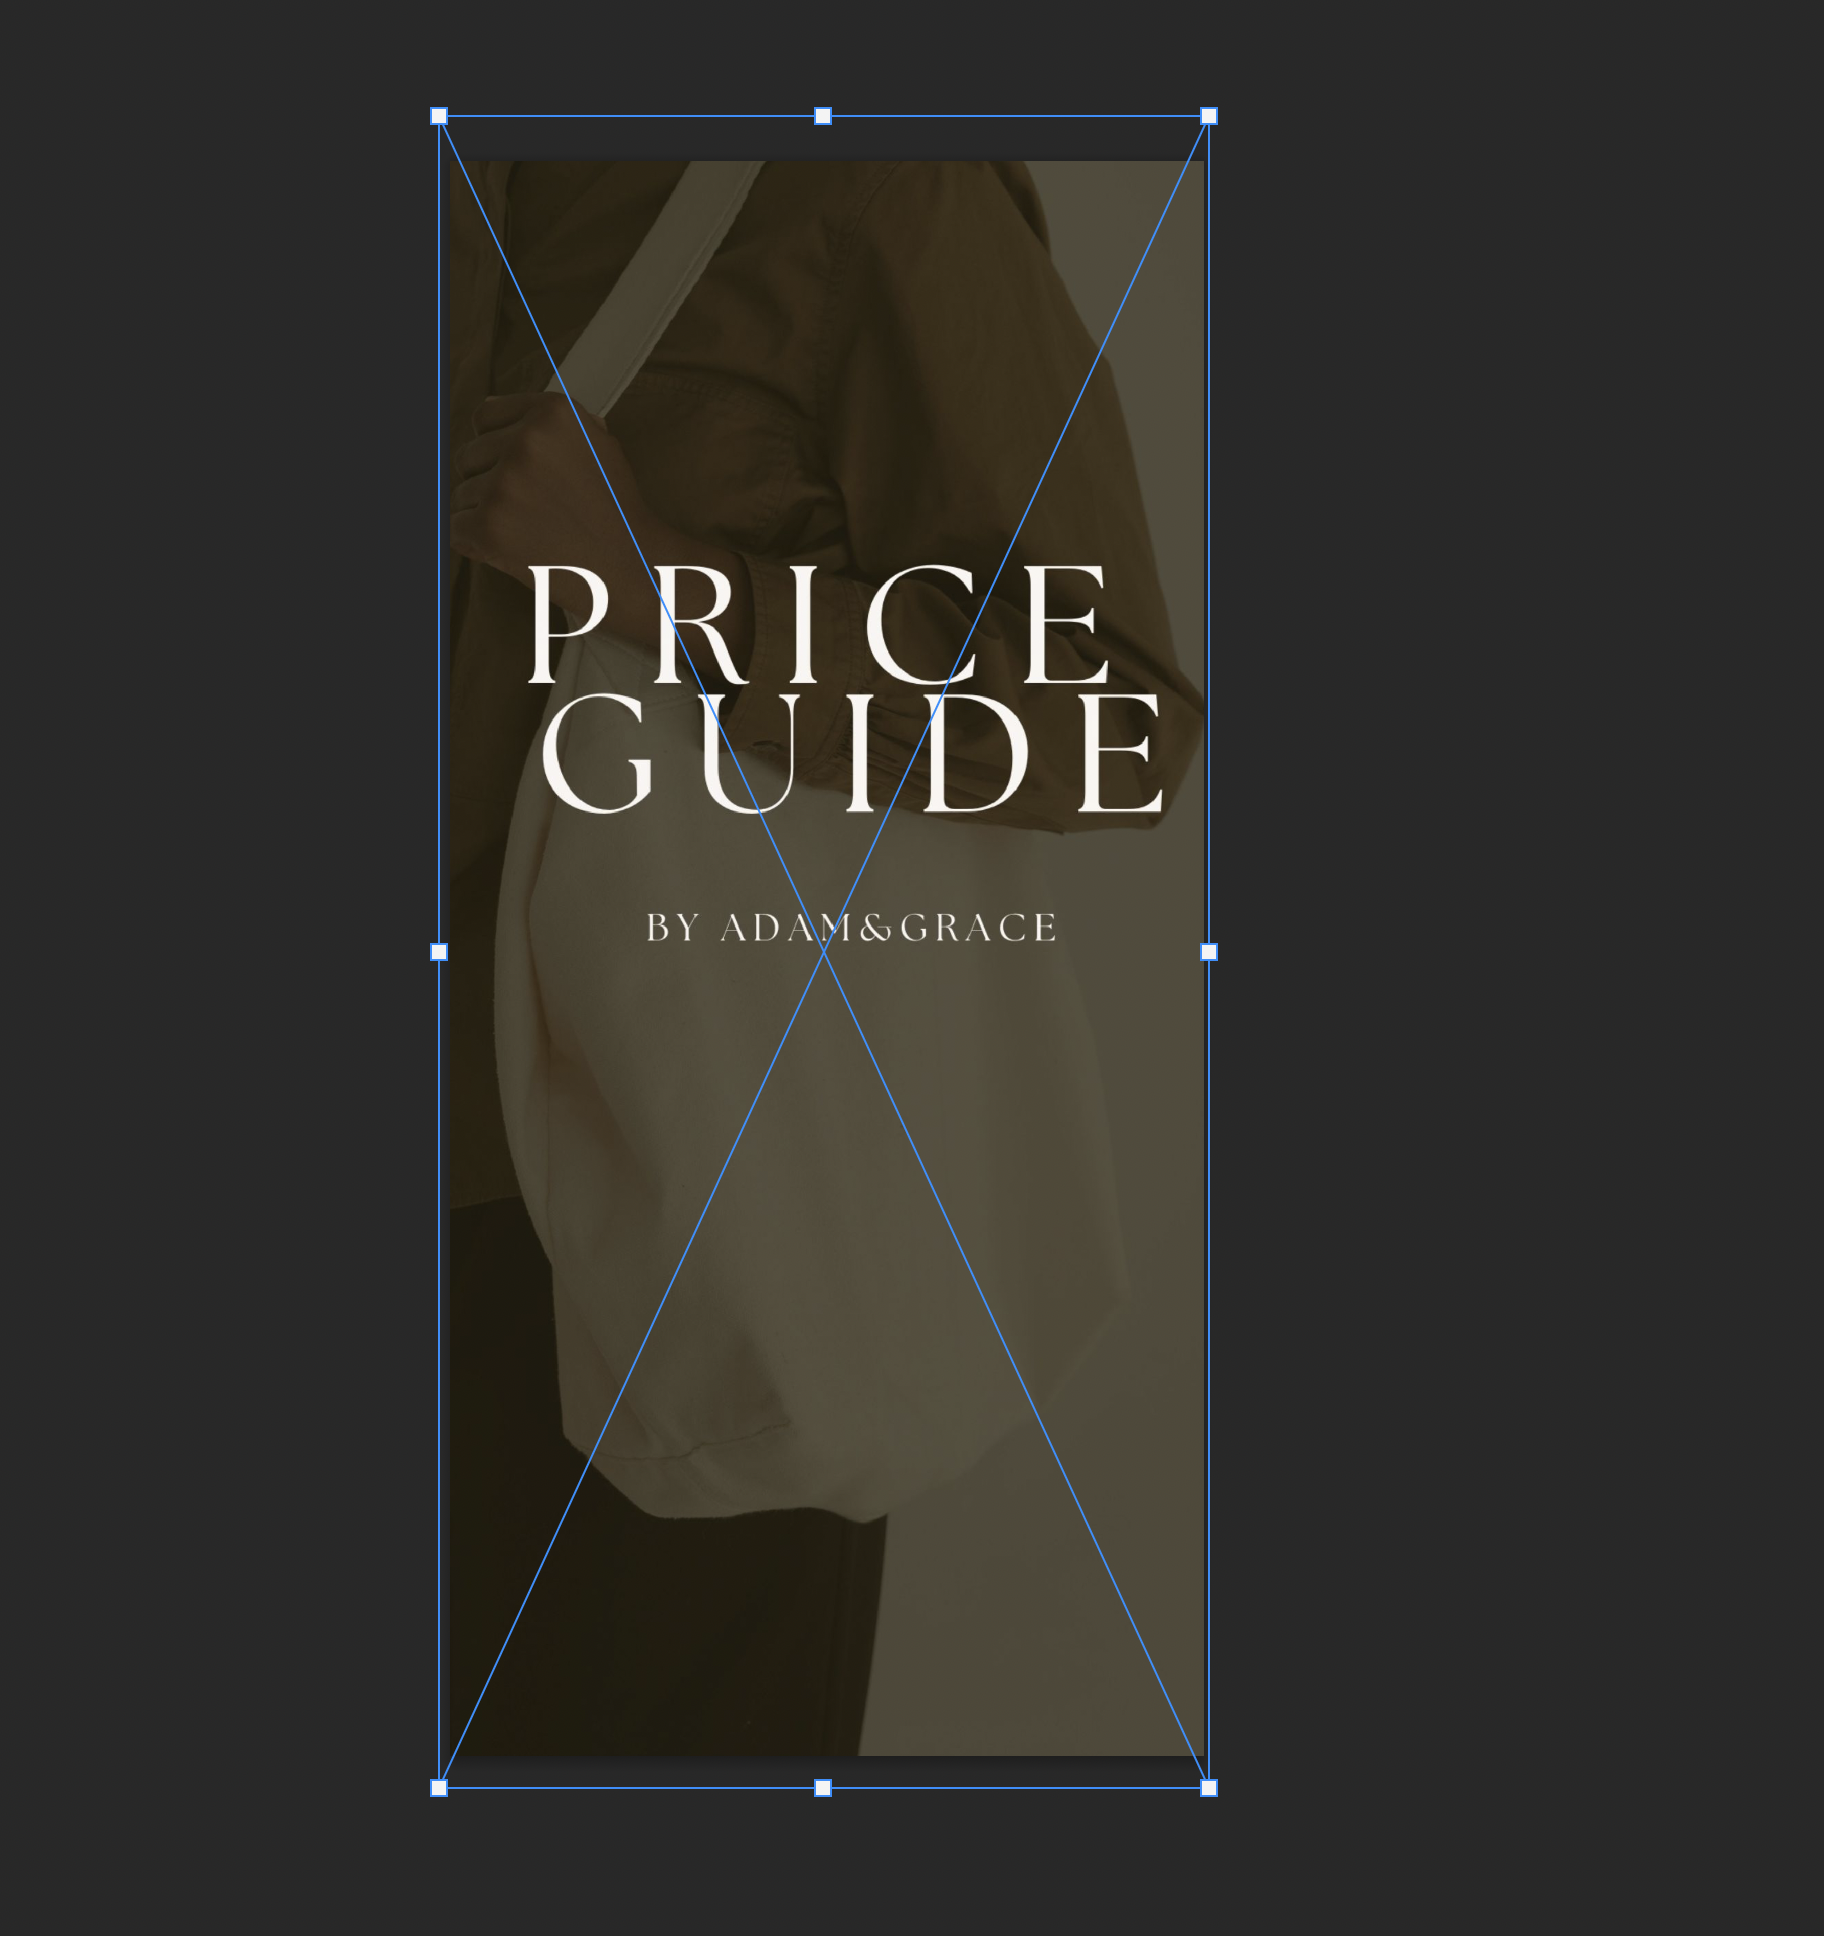
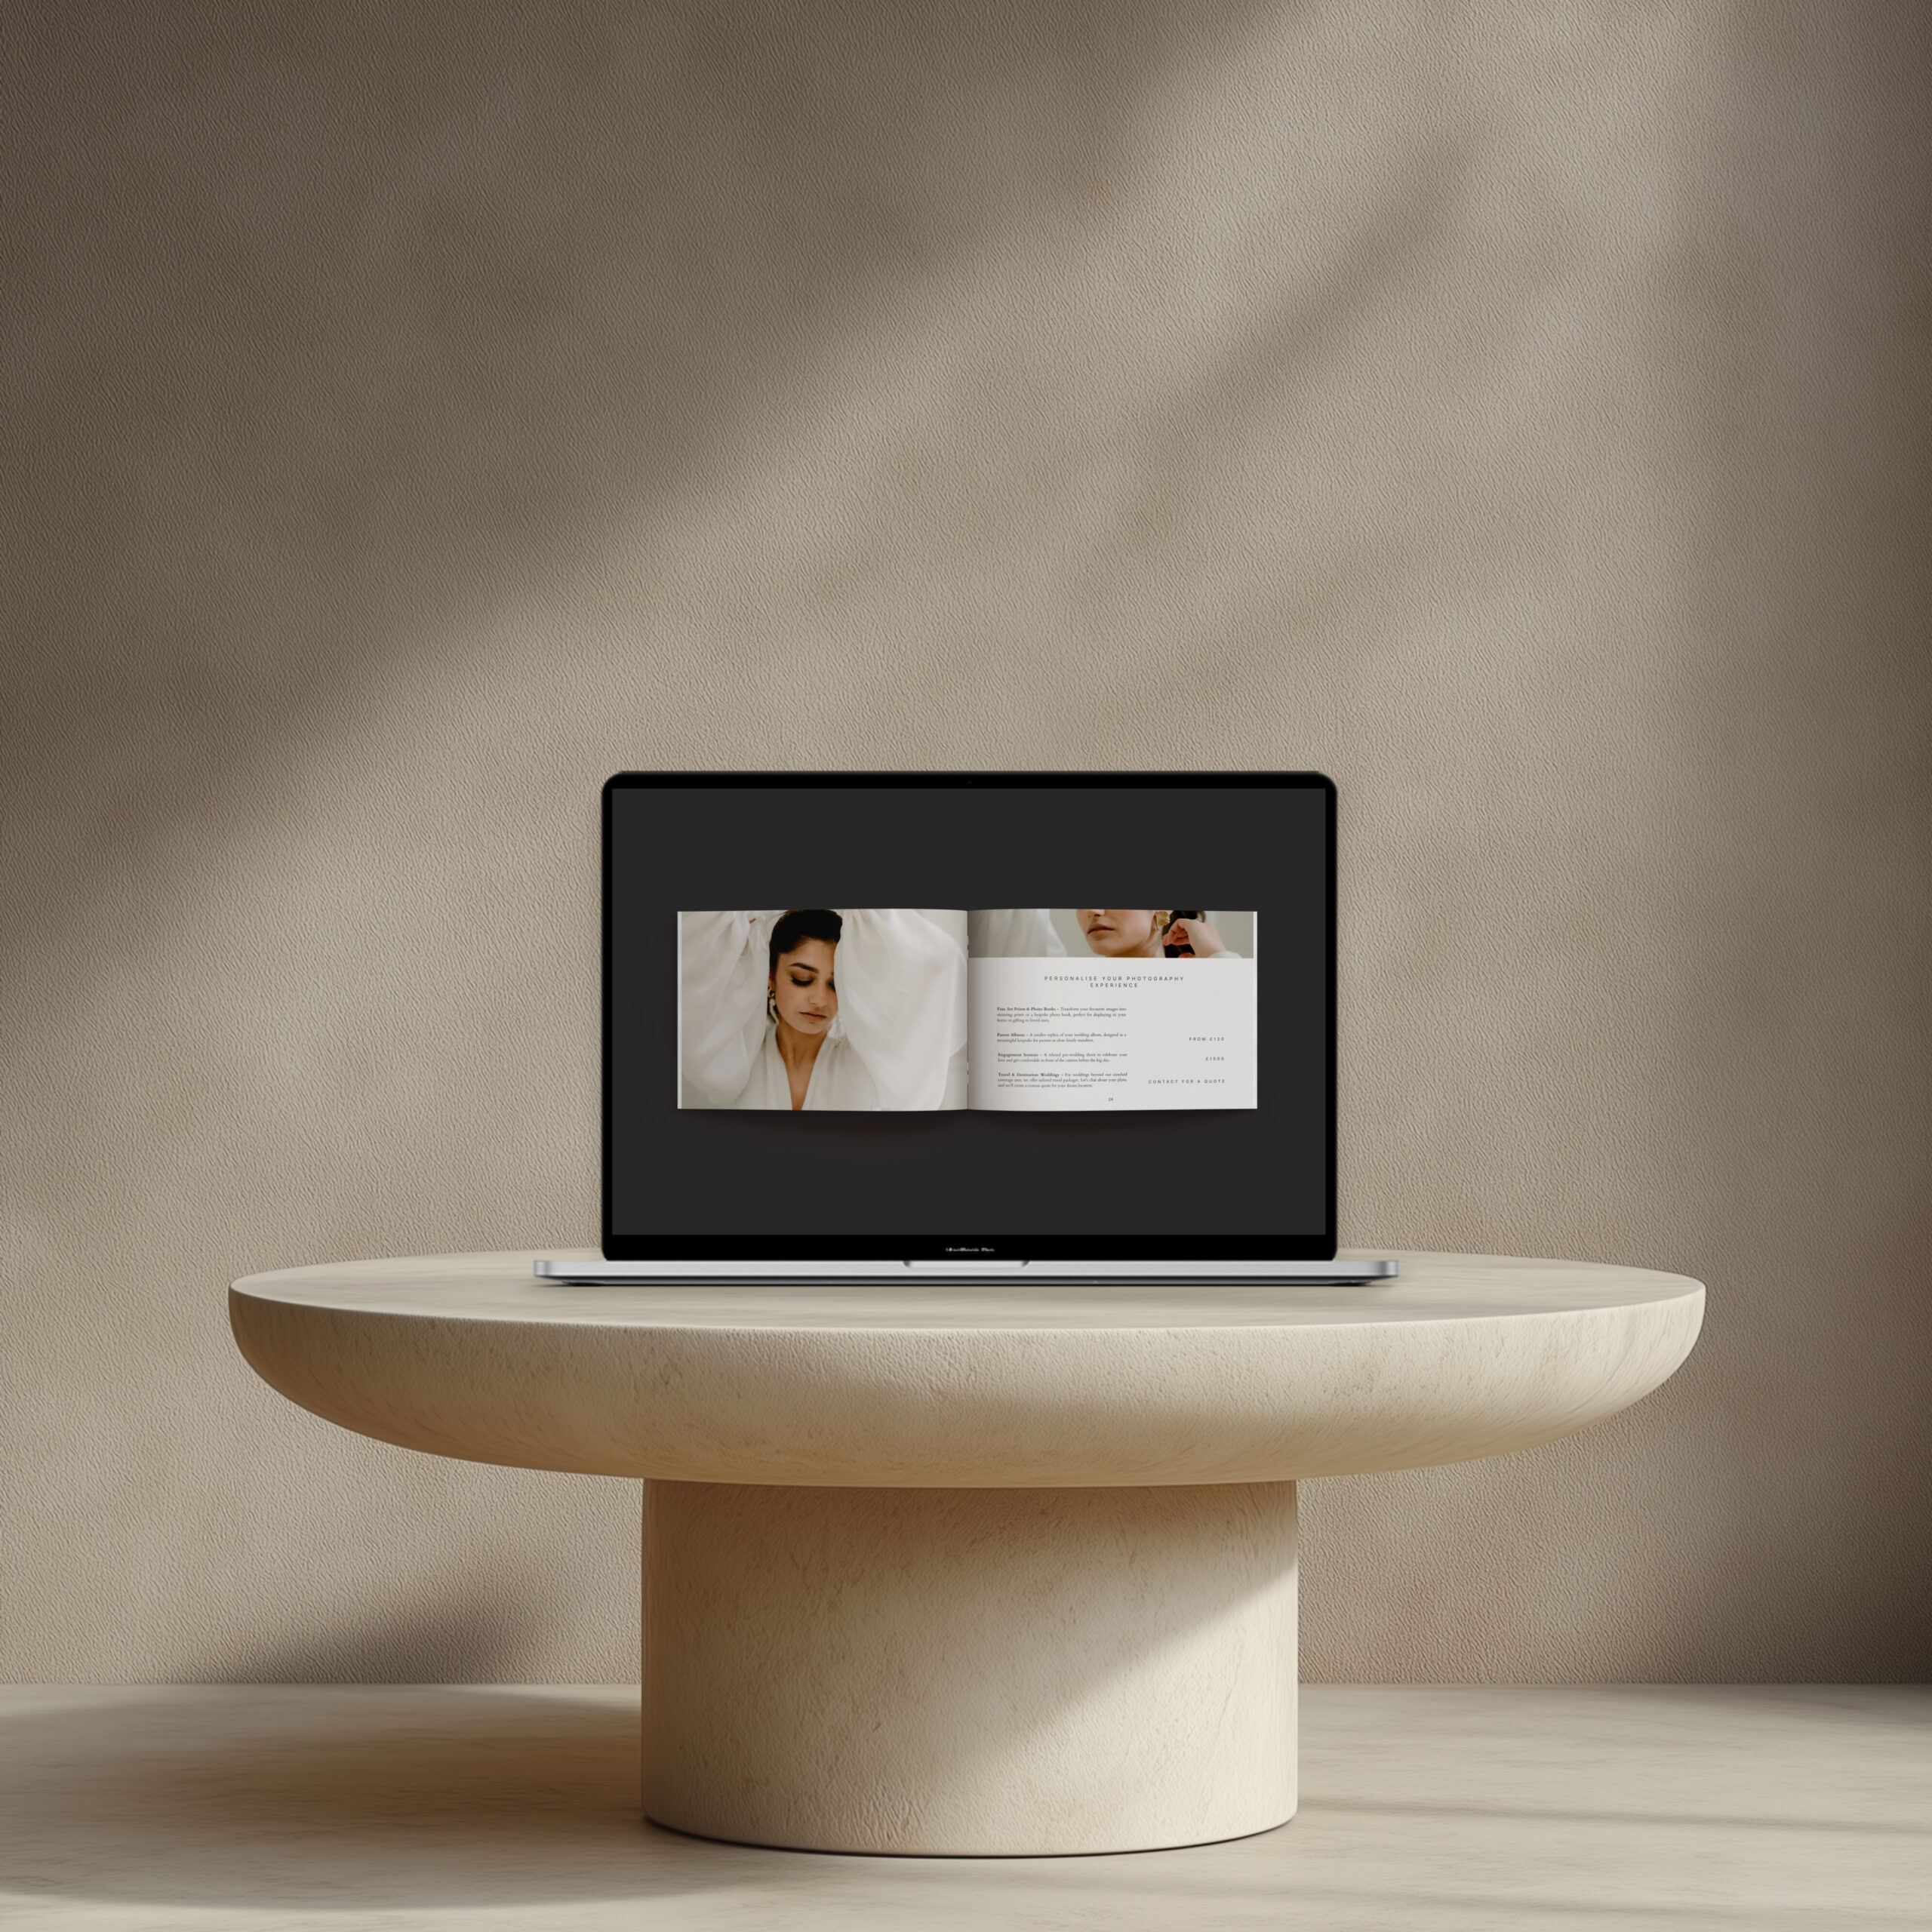
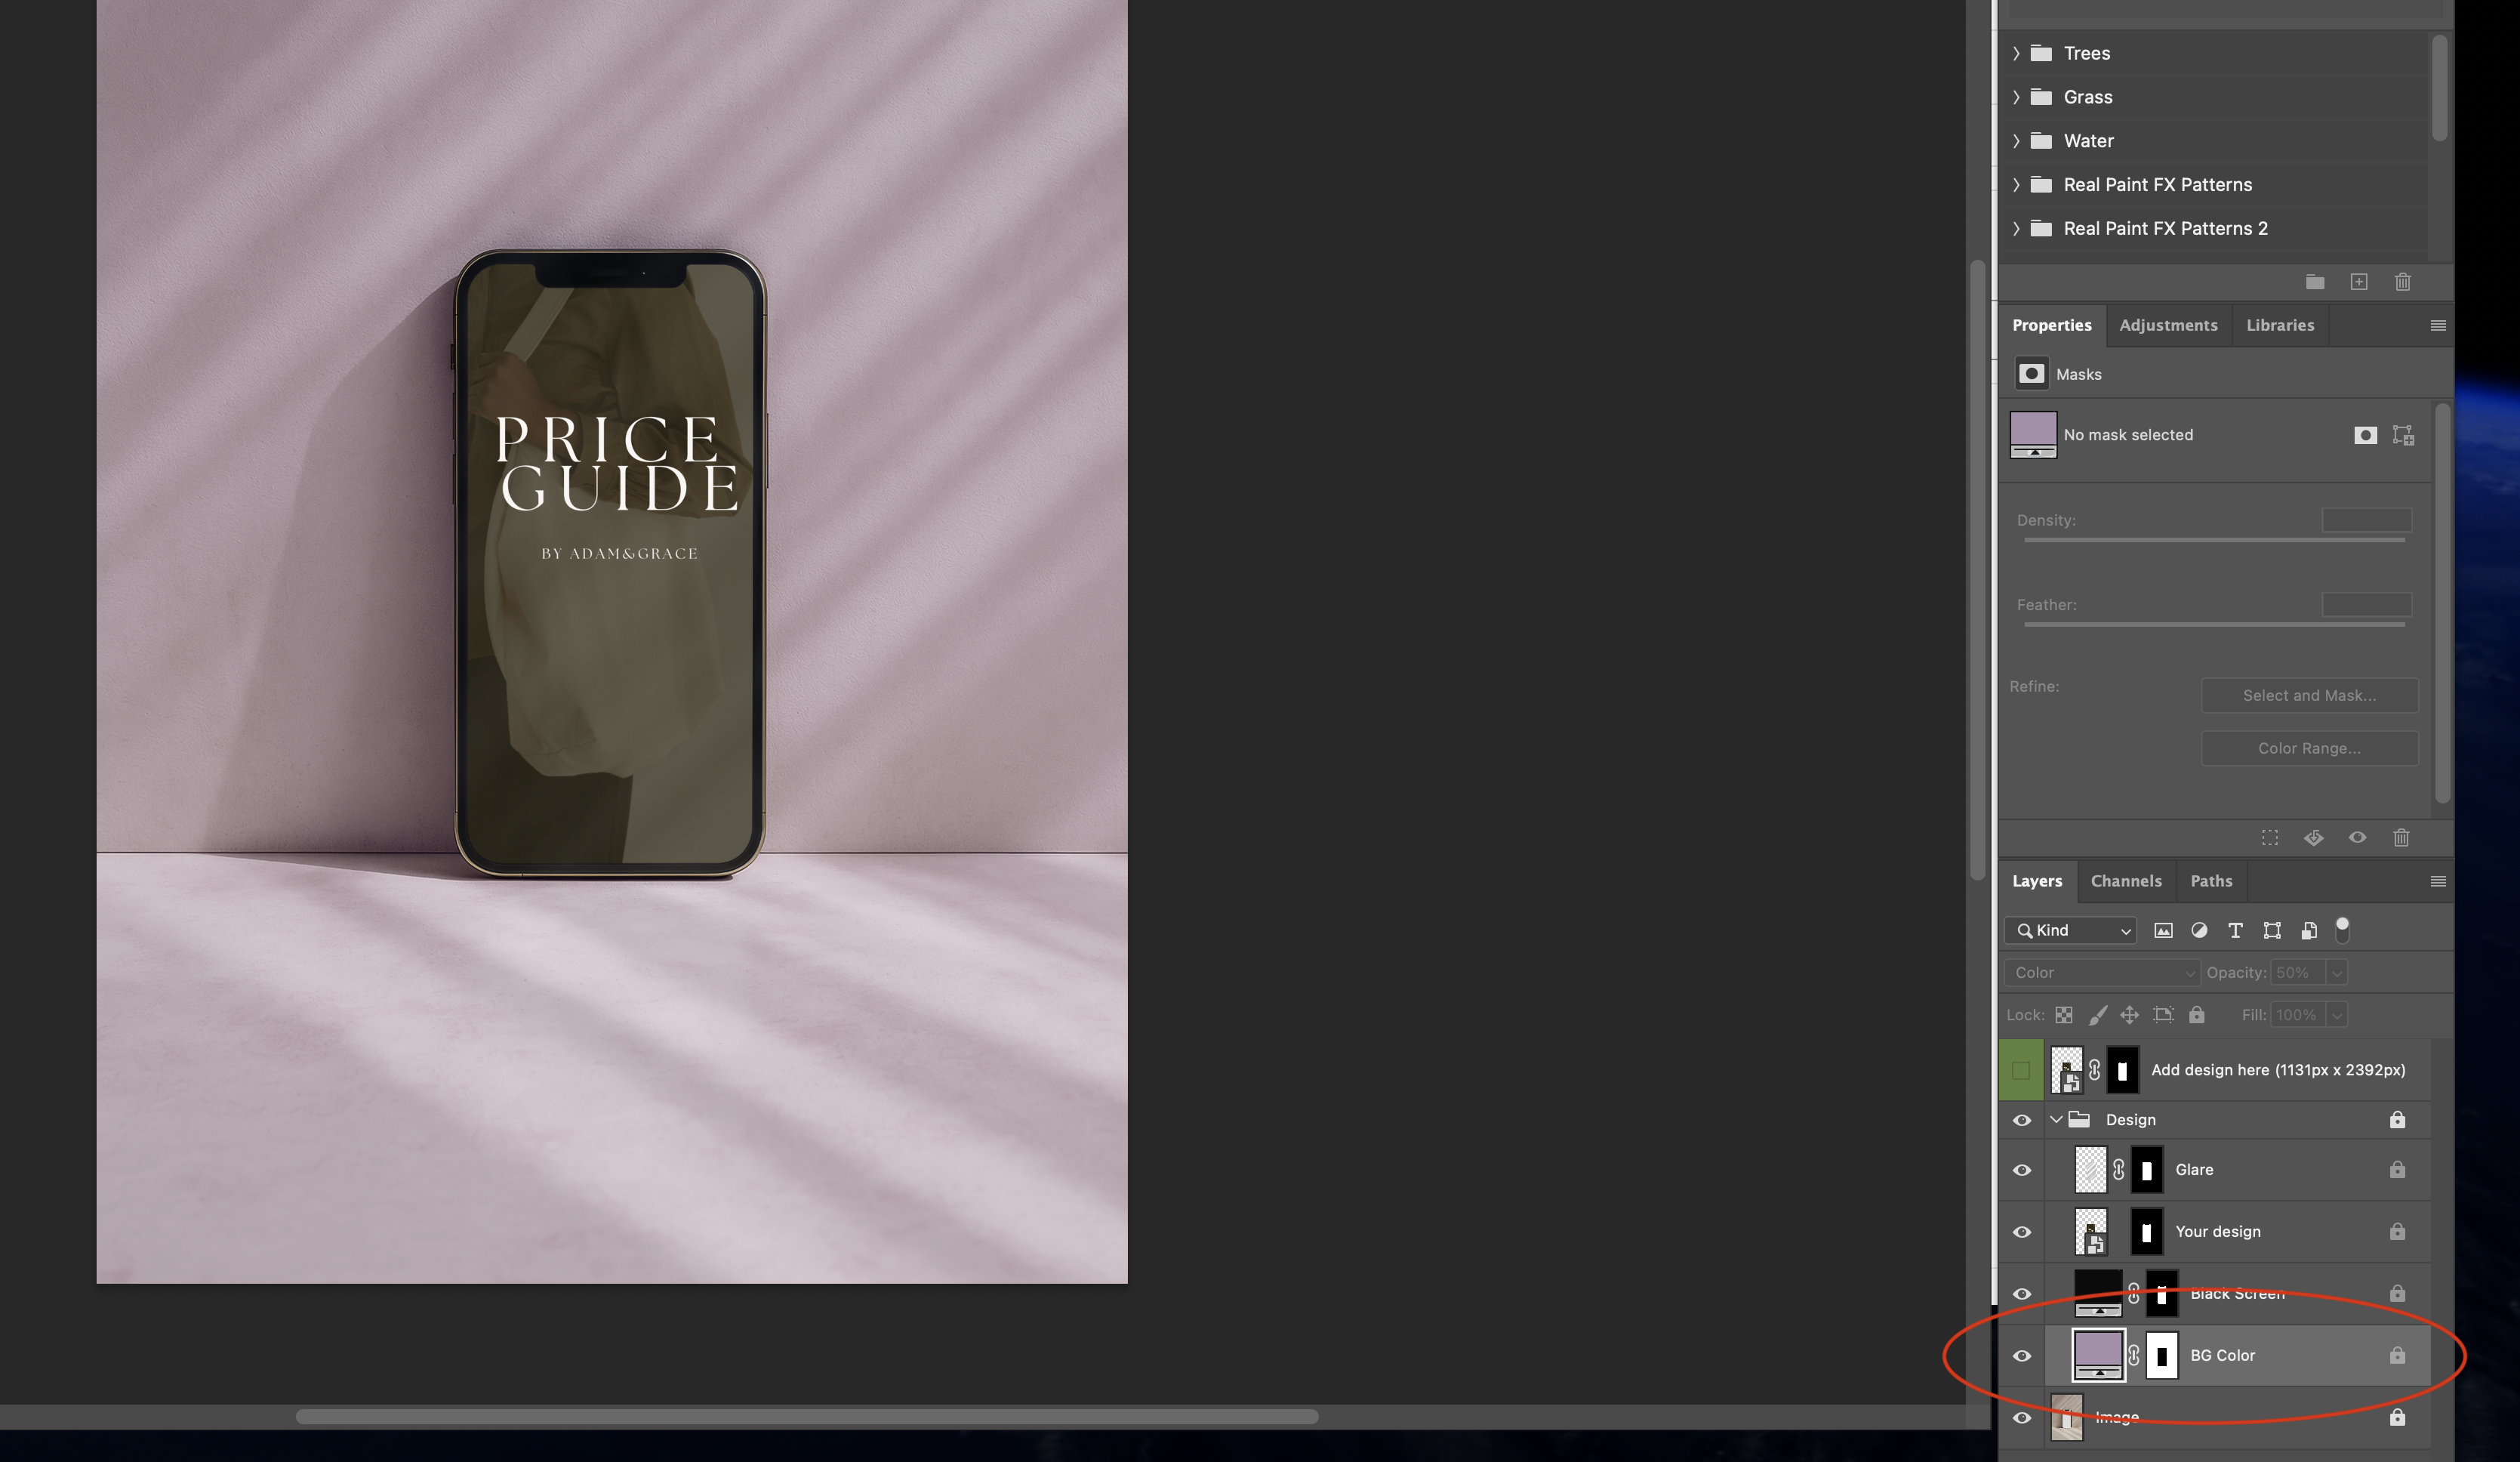
Resize your image to fit the designated screen area. For the most accurate result, refer to the measurements highlighted on the “Add Design Here” layer—these dimensions are provided to ensure a perfect fit. Alternatively, you can scale the design proportionally by eye for a balanced visual result, as we have done here (above). Once its placed where you want it, hit ‘done’ then file and save.
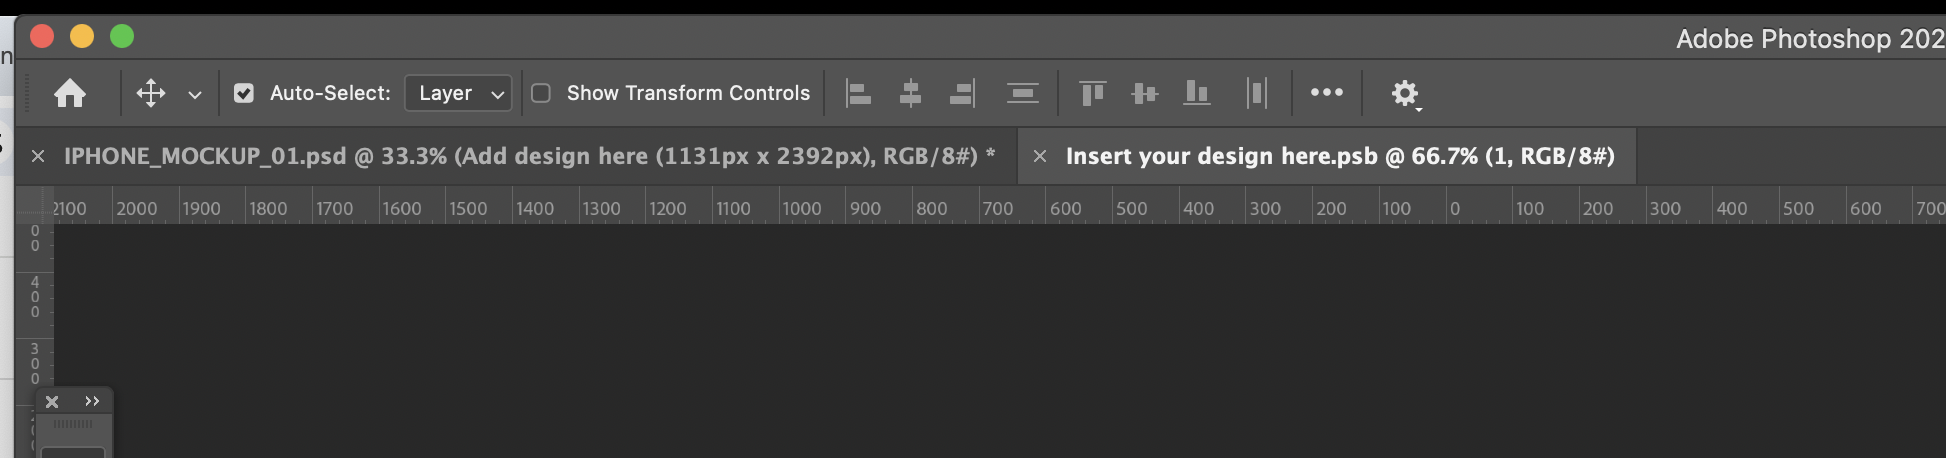
You should now have two tabs open in Photoshop. Once you’ve placed and saved your design, return to the first tab—this will take you back to your main mockup file. Our main image tab is labelled; ‘iphone_mockup_01’ (see above image). Your design will now appear seamlessly within the mockup, fully styled and ready to use.
Step 4: Customise (if needed)
You can now:
- Adjust the background colour by editing the “BG Colour” layer.
- Turn on/off or tweak layers like glare, shadow, or screen overlays depending on your chosen mockup.
- If your mockup has any shapes or items like a table or vase/item you should be able to change the colours of those too.
To save your final mockup:
Go to File > Export > Save for Web or File > Export > Export As and choose JPG or PNG depending on your needs.
Please see above for customisation options under the ‘design’ layer tab.
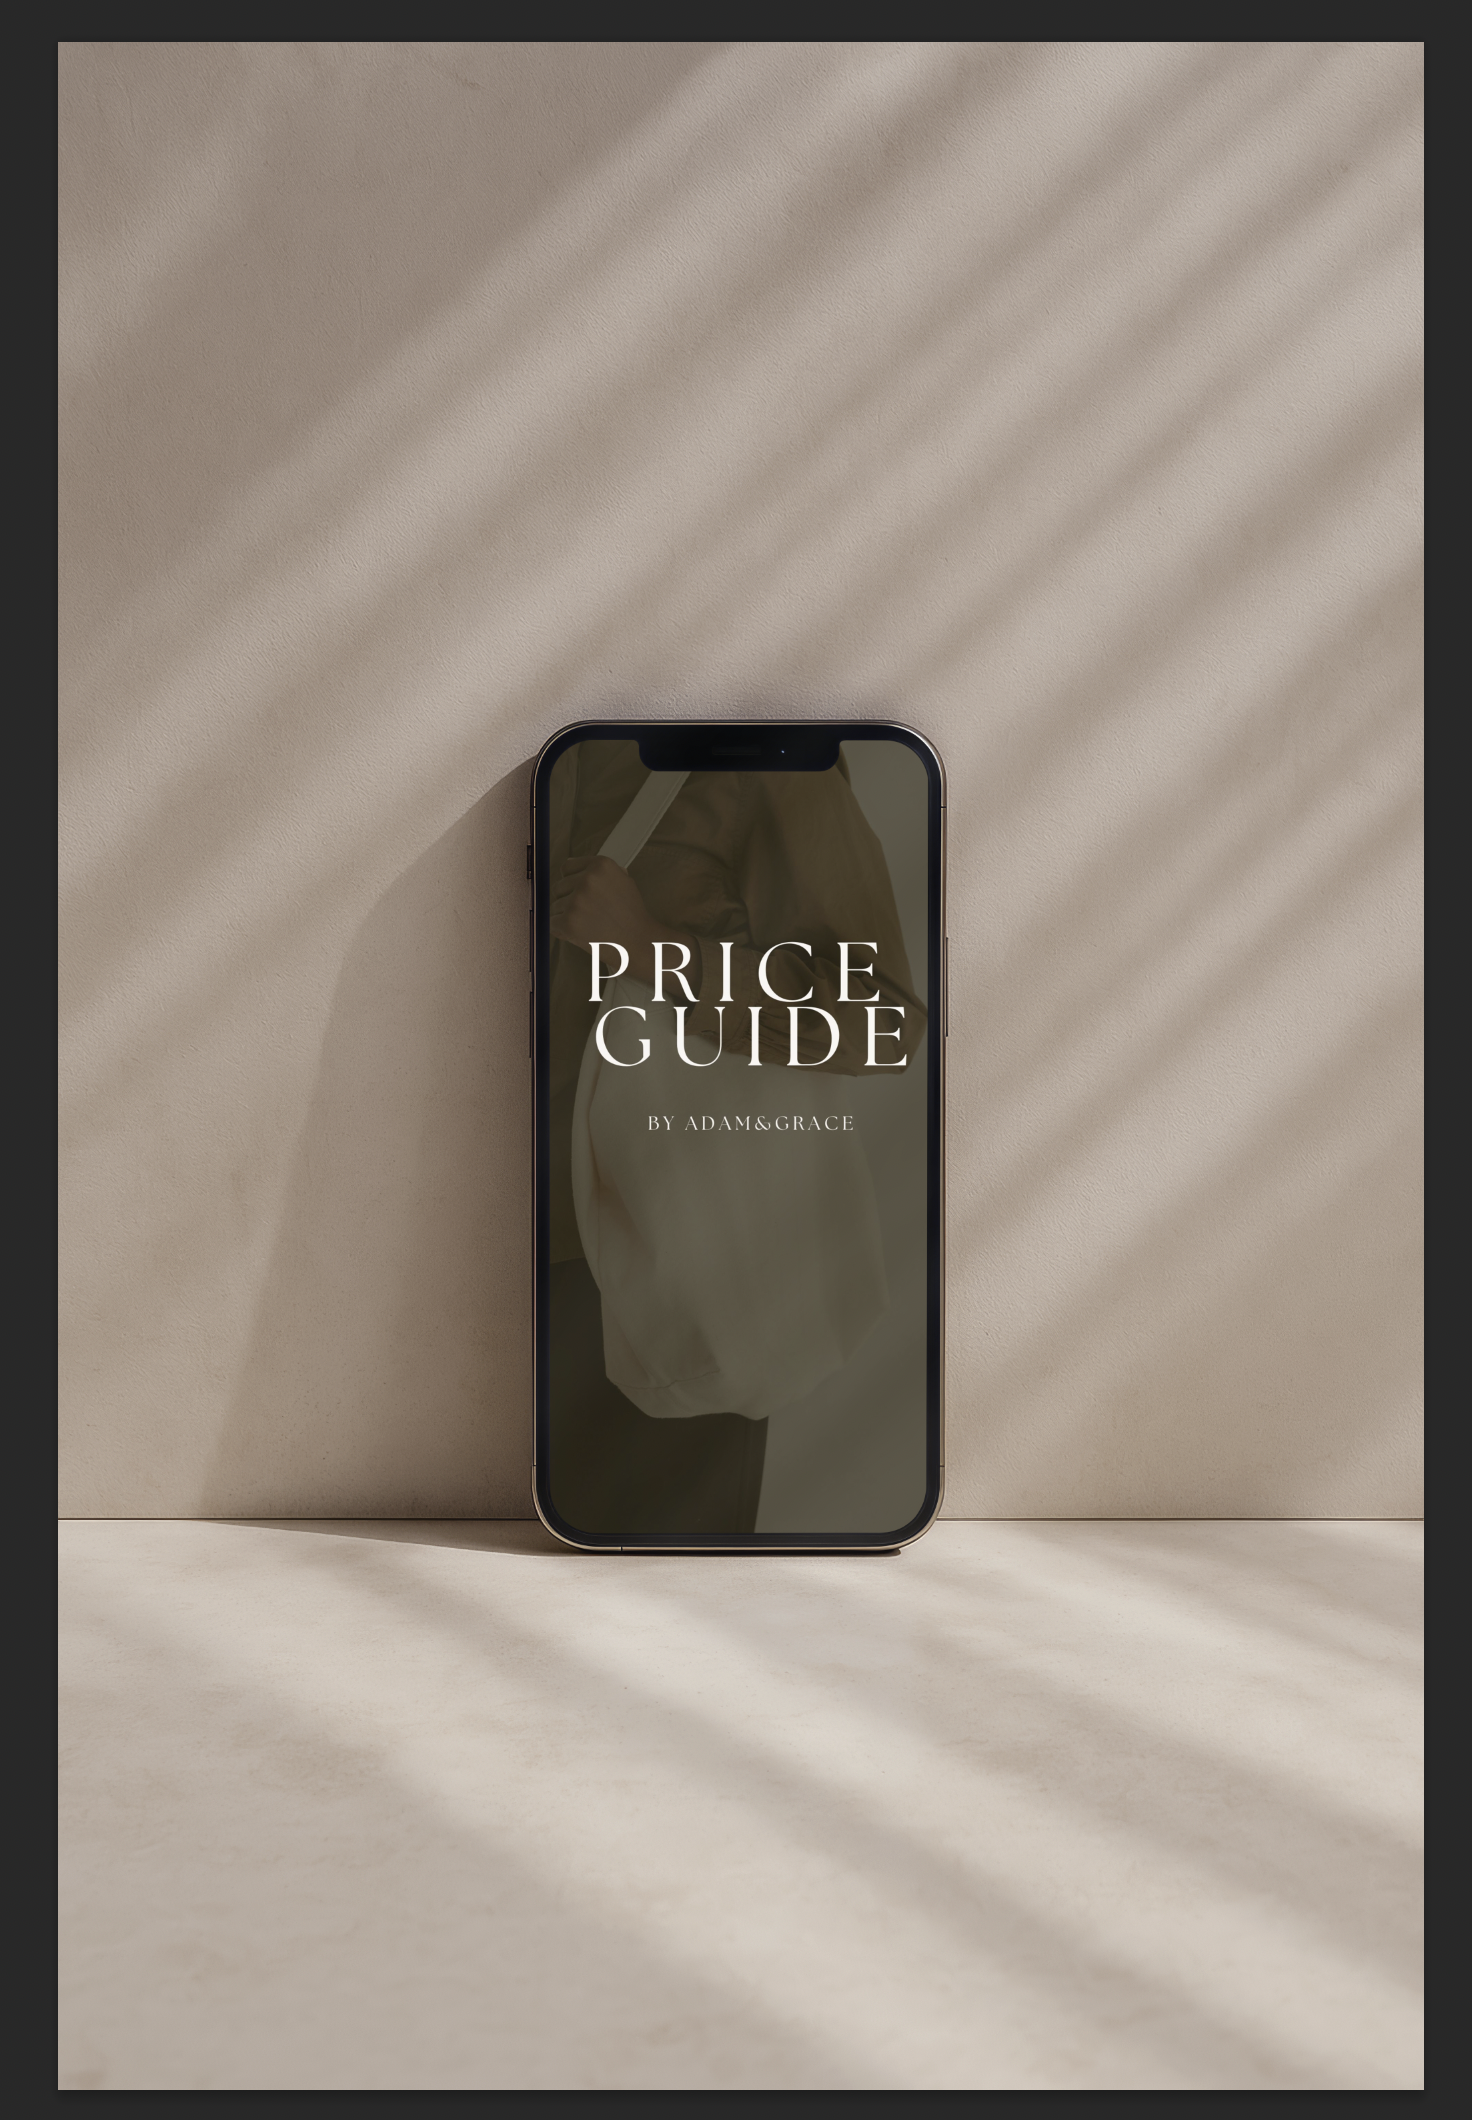
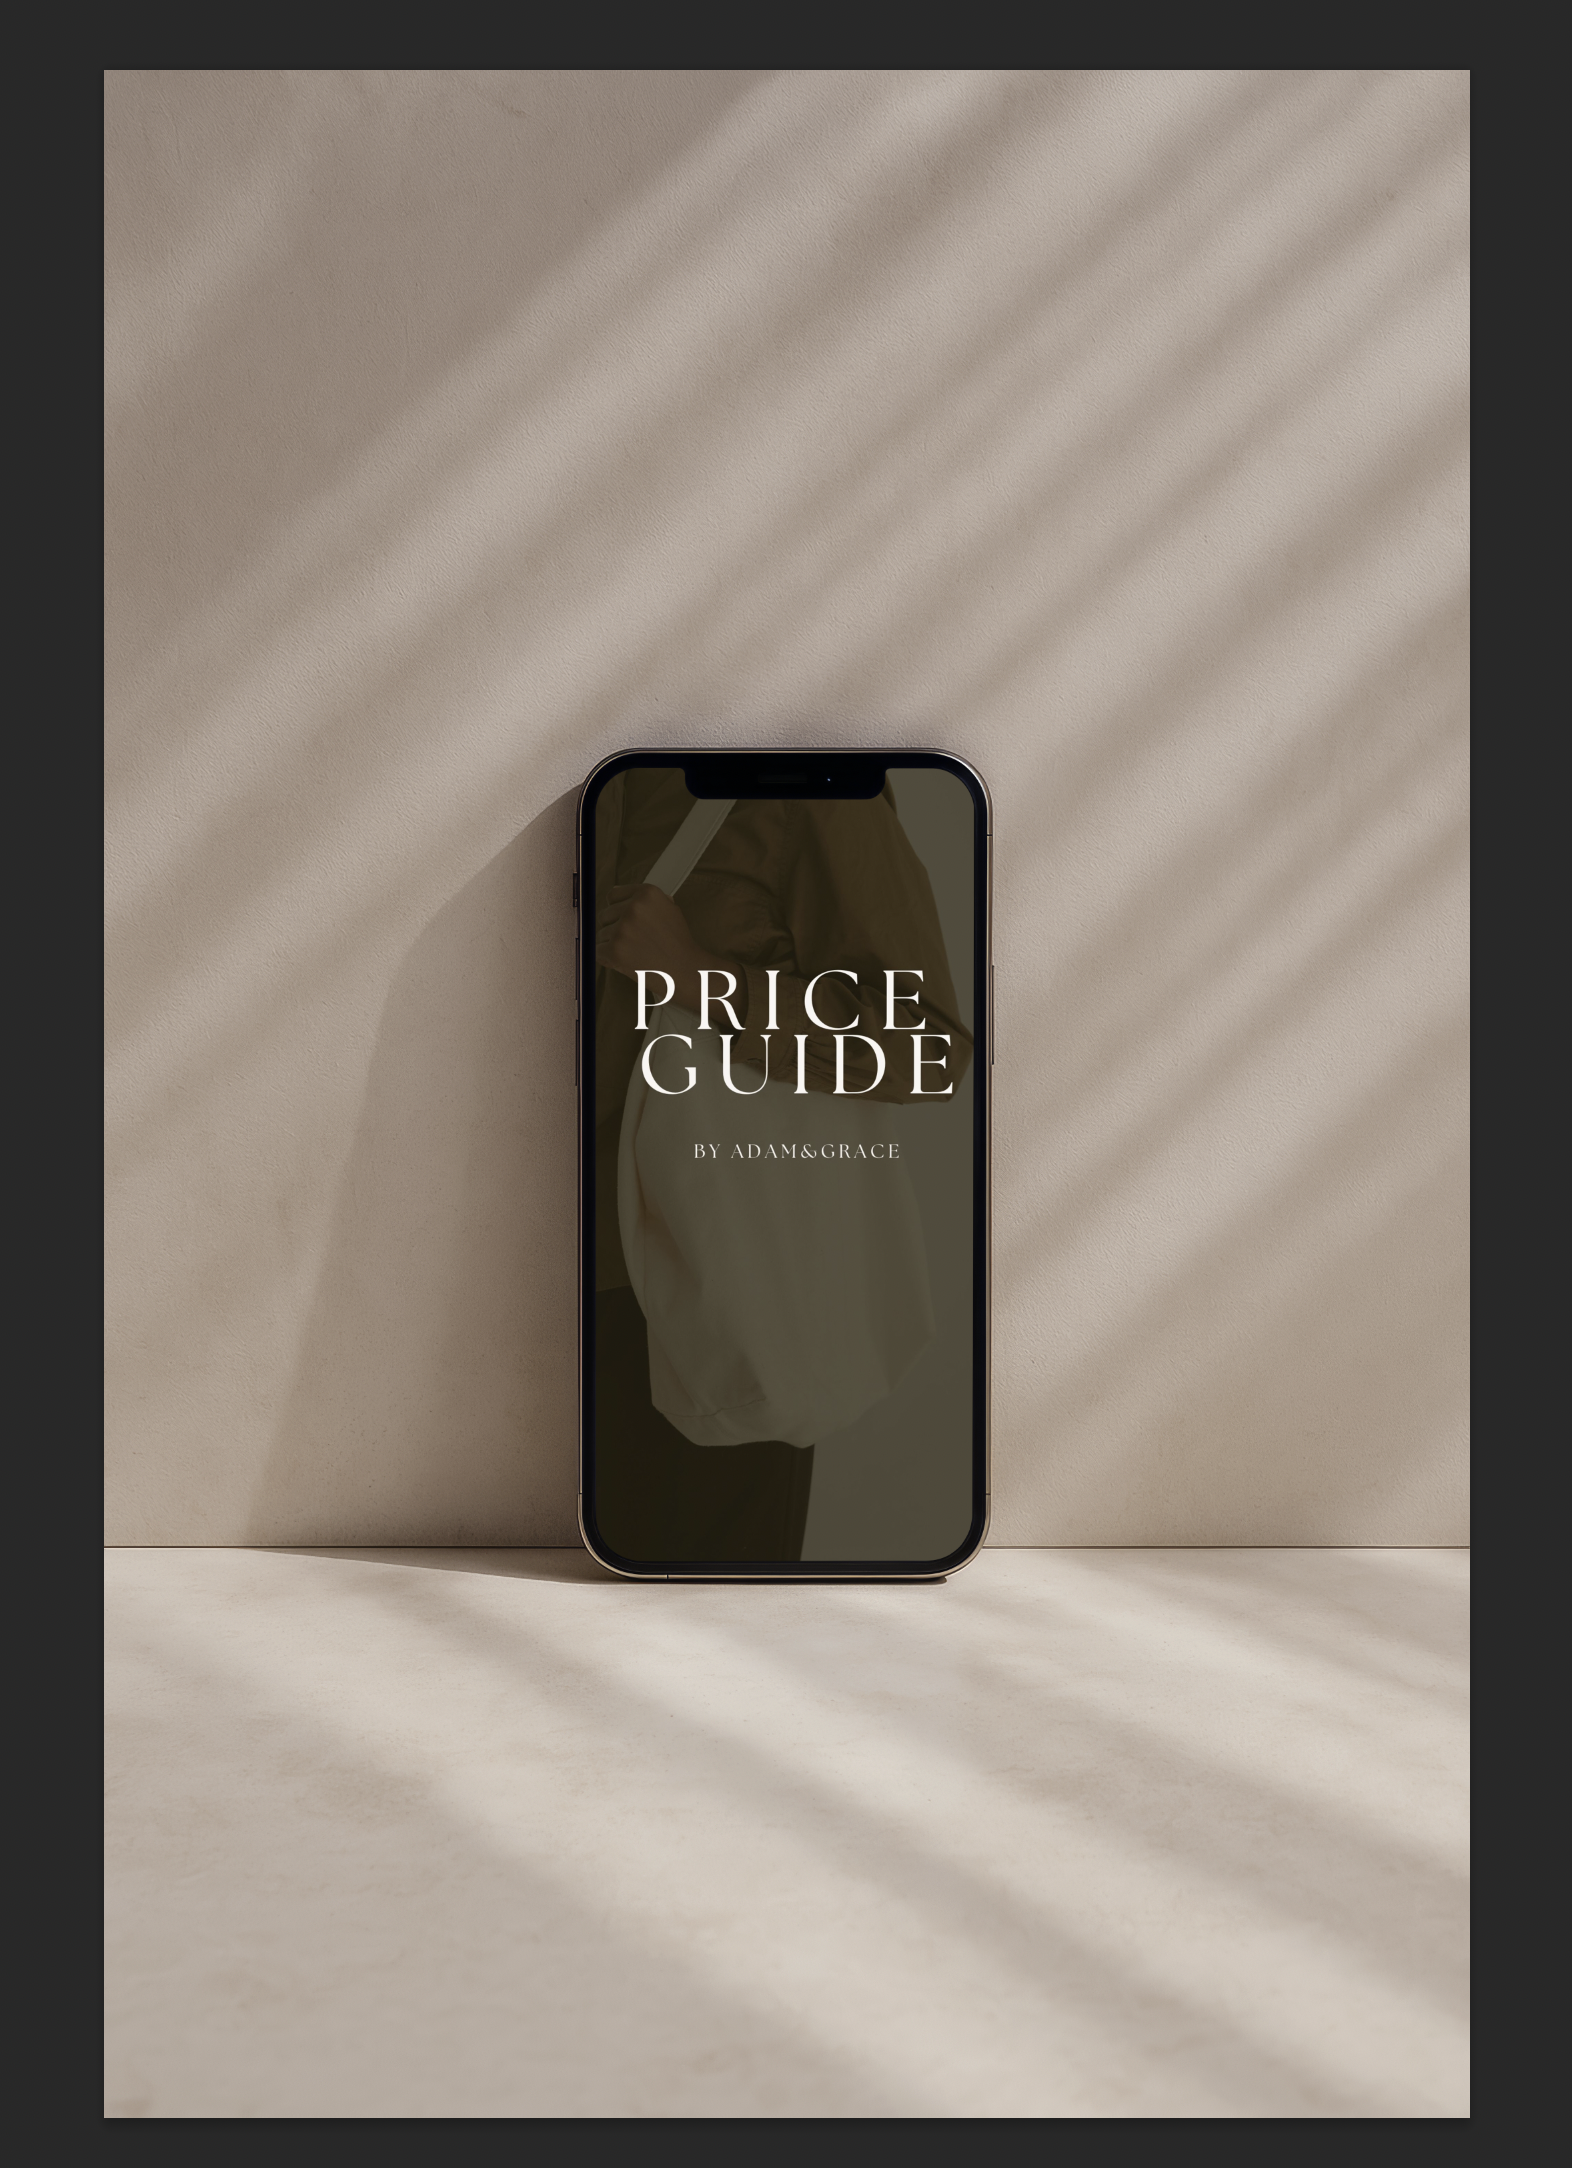
With and without the screen ‘glare’ option (above).
That’s It!
Mockups are made to make your life easier—and your work shine. If you’re stuck or want to show off what you’ve made, feel free to tag us on Instagram (@adamandgraceco).
We’d love to see what you create 🌿
—
If you want to shop more mockups and templates you can do on our website here ——-> http://adamandgrace.com/shop
Or if you are stuck on anything or need help with this, please get in touch and let us know!
For more Mockups/ product ideas/options and template resources and guides you can check out our latest blog posts here —–> https://adamandgracephoto.com/category/resources/
and here —–> https://adamandgracephoto.com/category/design/